Linux clients often need an NFS directory to appear at a stable local path without forcing the remote server to answer during early boot. A systemd automount keeps the path available and waits until a process opens it before starting the real network mount.
The fstab method keeps the configuration in /etc/fstab while letting systemd generate the matching .automount and .mount units. The generated automount unit watches the local path, while the generated mount unit keeps the server export, filesystem type, timeout, and network-ordering options.
Start from a manual mount that already works from the client. The finished setup is ready when the fstab entry has no parse errors, the automount unit is active and waiting, the first directory access starts the mount unit, and the live mount table shows the expected NFS source.
Related: How to mount an NFS export on Linux
Related: How to automount an NFS export with autofs
Related: How to create a systemd automount unit
Steps to automatically mount an NFS export on Linux with systemd:
- Open a terminal on the Linux client with sudo privileges.
- Install the NFS client utilities if mount.nfs is not already available.
$ sudo apt install --assume-yes nfs-common
Use sudo dnf install nfs-utils on RHEL, CentOS Stream, Fedora, and compatible systems.
- Confirm that the server advertises the export to this client network.
$ showmount --exports files.example.net
Export list for files.example.net:
/srv/nfs/projects 192.0.2.0/24
Some NFSv4-only servers do not answer showmount because they do not expose the legacy mount service. If the server owner provided the exact export path, test the mount directly and compare any failure with the server-side export table.
Related: How to list NFS exports from a client
Related: How to list NFS exports on a server - Create the empty local mount point.
$ sudo mkdir --parents /mnt/projects
Files already inside /mnt/projects become hidden while the NFS filesystem is mounted there.
- Mount the export manually.
$ sudo mount -t nfs4 files.example.net:/srv/nfs/projects /mnt/projects
Use the server-required type or options when the export is not NFSv4, such as nfs with vers=3 for an older server.
- Verify that the manual mount uses the expected NFS export.
$ findmnt --types nfs4 -o TARGET,SOURCE,FSTYPE /mnt/projects
TARGET        SOURCE                               FSTYPE
/mnt/projects files.example.net:/srv/nfs/projects nfs4
- List the mounted directory as a user who should have access.
$ ls /mnt/projects
README.txt  reports
If the mount succeeds but file access fails, check export rules, filesystem ownership, UID/GID mapping, and any required Kerberos security option before making the entry persistent.
- Unmount the manual test mount.
$ sudo umount /mnt/projects
- Get the generated systemd automount unit name for the mount point.
$ systemd-escape --path --suffix=automount /mnt/projects
mnt-projects.automount
The matching mount unit for this path is mnt-projects.mount.
- Open /etc/fstab for editing.
$ sudoedit /etc/fstab
- Add the NFS export entry.
files.example.net:/srv/nfs/projects /mnt/projects nfs4 rw,_netdev,x-systemd.automount,x-systemd.idle-timeout=5min,x-systemd.mount-timeout=30s 0 0
_netdev marks the entry as a network mount. x-systemd.automount creates the on-demand trigger, x-systemd.idle-timeout=5min lets systemd unmount the export after inactivity, and x-systemd.mount-timeout=30s limits how long the first access waits for the server.
Add nofail only when the export is optional for this client. A critical application path should fail visibly if the server export cannot mount.
- Check the /etc/fstab line for parse errors.
$ sudo findmnt --verify --tab-file /etc/fstab
   [W] your fstab has been modified, but systemd still uses the old version;
       use 'systemctl daemon-reload' to reload

0 parse errors, 0 errors, 1 warning
The warning is expected immediately after editing /etc/fstab. Fix parse errors before reloading the systemd manager.
- Reload the systemd manager so it regenerates units from /etc/fstab.
$ sudo systemctl daemon-reload
- Start the generated automount unit.
$ sudo systemctl start mnt-projects.automount
The automount unit is the trigger. Starting it should not mount the NFS export until a process accesses /mnt/projects.
- Confirm that the automount trigger is active and waiting.
$ systemctl show -p ActiveState -p SubState mnt-projects.automount
ActiveState=active
SubState=waiting
- Access the path to trigger the NFS mount.
$ ls /mnt/projects
README.txt  reports
The first access can pause while systemd starts mnt-projects.mount and the client contacts the NFS server.
- Confirm that the generated mount unit is mounted.
$ systemctl show -p ActiveState -p SubState mnt-projects.mount
ActiveState=active
SubState=mounted
- Verify that the mounted filesystem comes from the expected NFS export.
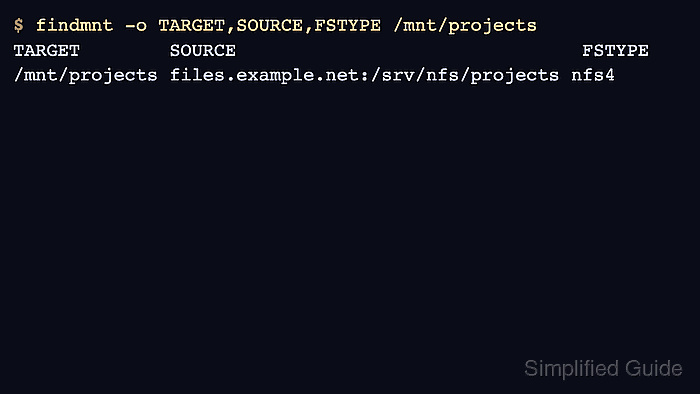
$ findmnt --types nfs4 -o TARGET,SOURCE,FSTYPE /mnt/projects
TARGET        SOURCE                               FSTYPE
/mnt/projects files.example.net:/srv/nfs/projects nfs4
If the path does not mount, inspect both generated units with sudo journalctl -u mnt-projects.automount -u mnt-projects.mount -b and confirm the manual mount still works.

Mohd Shakir Zakaria is a cloud architect with deep roots in software development and open-source advocacy. Certified in AWS, Red Hat, VMware, ITIL, and Linux, he specializes in designing and managing robust cloud and on-premises infrastructures.


