A manual Nextcloud LEMP deployment puts the application behind Nginx and PHP-FPM while MariaDB stores the application data on the same Ubuntu host. This layout fits operators who want package-managed services and the standard archive install instead of Nextcloud AIO, Snap, or a container stack.
The deployment depends on Nginx for HTTP requests, PHP-FPM for PHP execution, MariaDB for the database, the extracted Nextcloud archive, and the occ command that writes the initial configuration. Use the PHP-FPM package, service, and socket that match the active Ubuntu and Nextcloud release.
Assume a clean server with DNS already pointing at the chosen hostname. The bootstrap server block is HTTP-only so the installed site can be verified through Nginx before normal users log in; enable HTTPS and then review background jobs, cache, memory, and OPcache before putting the server into routine use.
Steps to deploy Nextcloud on Ubuntu LEMP:
- Refresh the Ubuntu package index.
$ sudo apt update
- Install Nginx, MariaDB, PHP-FPM, the required PHP modules, and archive tools.
$ sudo apt install nginx mariadb-server php8.5-fpm php8.5-cli php8.5-gd php8.5-mysql php8.5-curl php8.5-mbstring php8.5-intl php8.5-gmp php8.5-xml php-imagick php8.5-zip php8.5-apcu bzip2 curl ca-certificates
##### snipped #####
Setting up nginx
Setting up mariadb-server
Setting up php8.5-fpm
php-imagick follows the package name used by the Ubuntu archive. If a PHP module name is already bundled or renamed in the active Ubuntu release, confirm it with the distribution package list before adding a third-party PHP repository.
- Enable and start the service layer.
$ sudo systemctl enable --now nginx mariadb php8.5-fpm
- Open the MariaDB shell.
$ sudo mysql
Welcome to the MariaDB monitor.
##### snipped #####
MariaDB [(none)]>
- Create the Nextcloud database and local database user.
CREATE DATABASE nextcloud CHARACTER SET utf8mb4 COLLATE utf8mb4_general_ci;
CREATE USER 'nextcloud'@'localhost' IDENTIFIED BY 'replace-with-a-long-random-password';
GRANT ALL PRIVILEGES ON nextcloud.* TO 'nextcloud'@'localhost';
FLUSH PRIVILEGES;
EXIT;
Use a unique database password and keep it out of screenshots, tickets, and shared transcripts.
- Download the latest Nextcloud archive.
$ curl -LO https://download.nextcloud.com/server/releases/latest.tar.bz2
- Download the matching SHA256 checksum file.
$ curl -LO https://download.nextcloud.com/server/releases/latest.tar.bz2.sha256
- Verify the downloaded archive.
$ sha256sum -c latest.tar.bz2.sha256
latest.tar.bz2: OK
Signature verification with the Nextcloud release key gives stronger provenance when deployment policy requires it.
- Extract the archive into /var/www.
$ sudo tar -xjf latest.tar.bz2 -C /var/www
Move or back up an existing /var/www/nextcloud directory before extracting. Extracting over an existing tree can mix releases and leave stale application files behind.
- Set the web-server user as the owner of the extracted tree.
$ sudo chown -R www-data:www-data /var/www/nextcloud
- Install Nextcloud from the command line.
$ sudo -E -u www-data php /var/www/nextcloud/occ maintenance:install \
  --database 'mysql' \
  --database-name 'nextcloud' \
  --database-user 'nextcloud' \
  --database-pass 'replace-with-database-password' \
  --admin-user 'admin' \
  --admin-pass 'replace-with-admin-password'
Nextcloud was successfully installed
The database and admin passwords appear in the shell command while this runs. Use a controlled setup shell, clear shell history if required by local policy, and do not reuse the database password for the web admin account.
- Add the public hostname to the trusted domains list.
$ sudo -E -u www-data php /var/www/nextcloud/occ config:system:set trusted_domains 1 --value=cloud.example.com
System config value trusted_domains => 1 set to string cloud.example.com
- Set the public command-line URL for generated links.
$ sudo -E -u www-data php /var/www/nextcloud/occ config:system:set overwrite.cli.url --value=http://cloud.example.com
System config value overwrite.cli.url set to string http://cloud.example.com
Change this value to https://cloud.example.com after TLS is enabled.
Related: How to configure HTTPS for Nextcloud with Nginx and Let's Encrypt - Create the Nginx site file.
$ sudoedit /etc/nginx/sites-available/cloud.example.com
- Save a root-install Nextcloud bootstrap server block.
upstream php-handler {
    server unix:/run/php/php8.5-fpm.sock;
}

server {
    listen 80;
    listen [::]:80;
    server_name cloud.example.com;

    root /var/www/nextcloud;
    index index.php index.html /index.php$request_uri;

    client_max_body_size 512M;

    location ^~ /.well-known {
        location = /.well-known/carddav { return 301 /remote.php/dav/; }
        location = /.well-known/caldav  { return 301 /remote.php/dav/; }
        return 301 /index.php$request_uri;
    }

    location ~ ^/(?:build|tests|config|lib|3rdparty|templates|data)(?:$|/) {
        return 404;
    }

    location ~ ^/(?:\.|autotest|occ|issue|indie|db_|console) {
        return 404;
    }

    location ~ \.php(?:$|/) {
        try_files $fastcgi_script_name =404;
        include fastcgi_params;
        fastcgi_param SCRIPT_FILENAME $document_root$fastcgi_script_name;
        fastcgi_param modHeadersAvailable true;
        fastcgi_param front_controller_active true;
        fastcgi_param HTTPS off;
        fastcgi_pass php-handler;
    }

    location / {
        try_files $uri $uri/ /index.php$request_uri;
    }
}
The official Nextcloud Nginx example changes over time. Keep the deny locations, .well-known redirects, PHP FastCGI parameters, asset caching rules, and PHP-FPM socket aligned with the active Nextcloud and Ubuntu release before production use.
This HTTP block is for initial bootstrap or private validation only. Do not let real users enter credentials over plain HTTP.
- Enable the Nginx site.
$ sudo ln -s /etc/nginx/sites-available/cloud.example.com /etc/nginx/sites-enabled/cloud.example.com
- Test the Nginx configuration.
$ sudo nginx -t
nginx: the configuration file /etc/nginx/nginx.conf syntax is ok
nginx: configuration file /etc/nginx/nginx.conf test is successful
Related: How to test Nginx configuration
- Reload Nginx and PHP-FPM.
$ sudo systemctl reload nginx php8.5-fpm
Use the PHP-FPM unit that owns the socket in the site file.
Related: How to manage the Nginx service
Related: How to manage a Linux service with systemctl - Request the public status endpoint through Nginx.
$ curl http://cloud.example.com/status.php
{"installed":true,"maintenance":false,"needsDbUpgrade":false,"version":"35.0.0.0","versionstring":"35.0.0","edition":"","productname":"Nextcloud","extendedSupport":false}
A successful response proves DNS, Nginx, PHP-FPM, the web root, and the installed Nextcloud app can complete a request path.
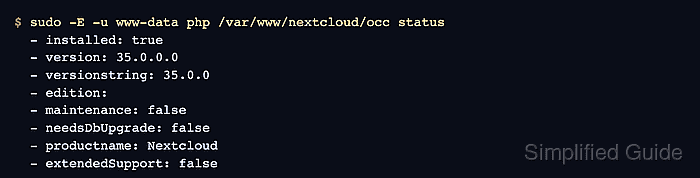
- Check the installed application state with occ.
$ sudo -E -u www-data php /var/www/nextcloud/occ status
  - installed: true
  - version: 35.0.0.0
  - versionstring: 35.0.0
  - edition:
  - maintenance: false
  - needsDbUpgrade: false
  - productname: Nextcloud
  - extendedSupport: false
Complete the follow-up service hardening before normal use, especially HTTPS, background jobs, memory limits, OPcache, and cache locking.
Related: How to configure HTTPS for Nextcloud with Nginx and Let's Encrypt
Related: How to configure Nextcloud background jobs with cron
Related: How to set the PHP memory limit for Nextcloud
Related: How to configure PHP OPcache for Nextcloud
Related: How to configure Redis caching for Nextcloud

Mohd Shakir Zakaria is a cloud architect with deep roots in software development and open-source advocacy. Certified in AWS, Red Hat, VMware, ITIL, and Linux, he specializes in designing and managing robust cloud and on-premises infrastructures.


