How to invalidate CloudFront cache after WordPress changes
CloudFront can keep serving an older WordPress page, redirect, stylesheet, script, or media object after the origin has already been corrected. A narrow invalidation removes the stale edge object so the next viewer request goes back to the origin instead of waiting for the cached response to expire.
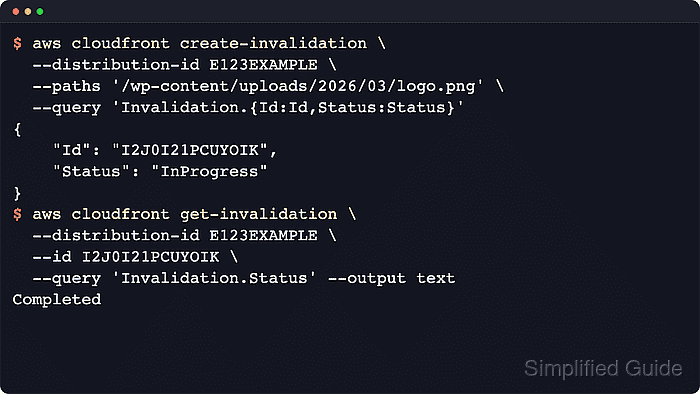
CloudFront invalidation paths are distribution-relative public paths, not filesystem paths on the web server. For WordPress, the path might be a changed upload under /wp-content/uploads/, a regenerated theme stylesheet, an optimization plugin bundle, or a post URL whose redirect was cached before the origin rule was fixed.
Use invalidation after the origin response is already correct. Invalidation cannot repair a bad WordPress rule, a missing upload, or a generated asset that still has the wrong content. Paths are case sensitive, AWS CLI requests need a leading slash, and wildcard paths must be quoted with the wildcard at the end of the path.
Steps to invalidate CloudFront cache after WordPress changes:
- Check the public URL through CloudFront and capture the stale edge signal.
$ curl -I https://www.example.com/wp-content/uploads/2026/03/logo.png
HTTP/2 200
cache-control: public, max-age=31536000
age: 1842
x-cache: Hit from cloudfront
content-type: image/png
Age and X-Cache: Hit from cloudfront show that CloudFront is returning a cached copy for the requested object.
- Confirm that the WordPress origin already returns the corrected response.
$ curl -I https://origin.example.com/wp-content/uploads/2026/03/logo.png
HTTP/2 200
cache-control: public, max-age=31536000
last-modified: Sun, 21 Jun 2026 02:15:42 GMT
content-type: image/png
Use the origin hostname, a provider preview URL, or another safe origin-only route that bypasses CloudFront. If the origin still returns the stale redirect, missing file, or wrong asset body, fix WordPress before creating the invalidation.
- Confirm that the AWS CLI profile points at the account that owns the CloudFront distribution.
$ aws sts get-caller-identity \
  --profile production-cdn \
  --query Account \
  --output text
123456789012
The account number should match the environment that owns the distribution before any invalidation request is submitted.
Related: How to check the current caller identity in AWS CLI
Related: How to configure multiple AWS CLI profiles - Choose the smallest invalidation path list that matches the stale WordPress objects.
Use an exact path such as /wp-content/uploads/2026/03/logo.png when one object is stale, a quoted wildcard such as "/wp-content/uploads/2026/03/*" when a regenerated folder must be refreshed, or "/*" only when stale responses are widespread. When CloudFront caches query-string variants for a file, invalidate each variant such as /wp-content/uploads/2026/03/logo.png?ver=1 or use a wildcard path such as /wp-content/uploads/2026/03/logo.png*. CloudFront invalidation requests cannot be canceled after submission.
- Submit the invalidation request and note the returned invalidation ID.
$ aws cloudfront create-invalidation \ --distribution-id E2ABCDEF123456 \ --profile production-cdn \ --paths '/wp-content/uploads/2026/03/logo.png' '/wp-content/themes/example/style.css' \ --query 'Invalidation.{Id:Id,Status:Status,Paths:InvalidationBatch.Paths.Items}' { "Id": "I2J0I21PCUYOIK", "Status": "InProgress", "Paths": [ "/wp-content/uploads/2026/03/logo.png", "/wp-content/themes/example/style.css" ] } - Wait for CloudFront to finish processing the invalidation.
$ aws cloudfront wait invalidation-completed \
  --distribution-id E2ABCDEF123456 \
  --profile production-cdn \
  --id I2J0I21PCUYOIK
The AWS CLI waiter polls the invalidation status and exits after CloudFront reports completion.
- Check the completed invalidation record.
$ aws cloudfront get-invalidation \ --distribution-id E2ABCDEF123456 \ --profile production-cdn \ --id I2J0I21PCUYOIK \ --query 'Invalidation.{Id:Id,Status:Status,Paths:InvalidationBatch.Paths.Items}' { "Id": "I2J0I21PCUYOIK", "Status": "Completed", "Paths": [ "/wp-content/uploads/2026/03/logo.png", "/wp-content/themes/example/style.css" ] } - Request the public WordPress URL again and confirm that CloudFront fetches the corrected origin response.
$ curl -I https://www.example.com/wp-content/uploads/2026/03/logo.png
HTTP/2 200
cache-control: public, max-age=31536000
x-cache: Miss from cloudfront
content-type: image/png
A first Miss from cloudfront after completion means the edge fetched a fresh copy. If the same stale redirect, 404, or wrong asset body returns again, the WordPress origin or generated asset still needs correction.
Related: How to fix WordPress asset loading behind CloudFront or CDN
Related: How to version WordPress static assets for CDN cache busting
Tool: HTTP Header Checker