How to run Espresso tests in GitHub Actions
Pull requests that change Android UI code need an instrumented test run outside the developer workstation. A GitHub Actions job can start an Android emulator, run Espresso through Gradle, and keep the generated reports attached to the workflow run when a test fails.
The CI job uses a Linux GitHub-hosted runner, sets up Java, enables KVM access for the emulator, and runs the app module's connectedDebugAndroidTest task through android-emulator-runner. It assumes the project already has Espresso dependencies and at least one Android test that passes locally.
GitHub-hosted emulators are slower than local devices, so keep the CI target narrow before expanding to matrices or sharding. Upload both the HTML report directory and XML result directory with if: always() so failed runs still leave enough output for triage.
Steps to run Espresso tests in GitHub Actions:
- Choose the Gradle task and emulator image that match the local passing test run.
Gradle task: :app:connectedDebugAndroidTest
Emulator API: 35
System image target: google_apis
Architecture: x86_64
Use the module and variant that already pass on a developer machine. For a flavored debug variant, the task may be like :app:connectedFreeDebugAndroidTest.
Related: How to run Espresso tests locally - Create the GitHub Actions workflow file.
- .github/workflows/espresso.yml
name: Espresso instrumented tests

on:
  push:
    branches: [main]
  pull_request:
  workflow_dispatch:

permissions:
  contents: read

jobs:
  espresso:
    runs-on: ubuntu-latest
    timeout-minutes: 45

    steps:
      - name: Check out repository
        uses: actions/checkout@v7

      - name: Set up Java
        uses: actions/setup-java@v5
        with:
          distribution: temurin
          java-version: '17'
          cache: gradle

      - name: Enable KVM for Android emulator
        run: |
          echo 'KERNEL=="kvm", GROUP="kvm", MODE="0666", OPTIONS+="static_node=kvm"' | sudo tee /etc/udev/rules.d/99-kvm4all.rules
          sudo udevadm control --reload-rules
          sudo udevadm trigger --name-match=kvm

      - name: Run Espresso tests
        uses: reactivecircus/android-emulator-runner@v2
        with:
          api-level: 35
          target: google_apis
          arch: x86_64
          profile: pixel_7
          script: ./gradlew :app:connectedDebugAndroidTest --stacktrace

      - name: Upload Espresso reports
        if: always()
        uses: actions/upload-artifact@v7
        with:
          name: espresso-android-test-results
          if-no-files-found: error
          retention-days: 14
          path: |
            app/build/reports/androidTests/connected/
            app/build/outputs/androidTest-results/connected/
Keep java-version aligned with the Android Gradle Plugin used by the project. Change api-level or target only when the app depends on a newer Android API or Google APIs.
- Push the branch that contains the workflow file.
$ git push origin espresso-ci
push, pull_request, and workflow_dispatch can all start the job. Use the trigger that matches the branch policy for the repository.
- Open the workflow run and verify that the emulator starts before Gradle runs.
Run reactivecircus/android-emulator-runner@v2
##### snipped #####
Emulator booted.
Running script:
./gradlew :app:connectedDebugAndroidTest --stacktrace
If the run fails before Gradle starts, check the Enable KVM for Android emulator step first. Without KVM access, emulator startup may time out on Linux runners.
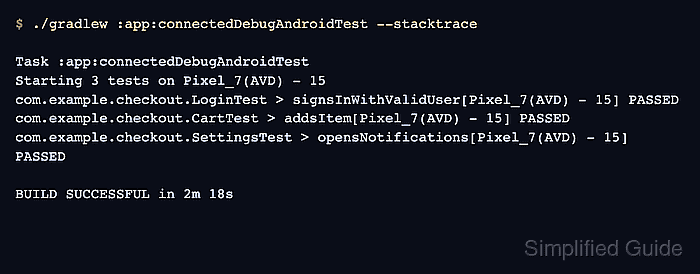
- Check the Espresso task output in the run log.
$ ./gradlew :app:connectedDebugAndroidTest --stacktrace

> Task :app:connectedDebugAndroidTest
Starting 3 tests on Pixel_7(AVD) - 15
com.example.checkout.LoginTest > signsInWithValidUser[Pixel_7(AVD) - 15] PASSED
com.example.checkout.CartTest > addsItem[Pixel_7(AVD) - 15] PASSED
com.example.checkout.SettingsTest > opensNotifications[Pixel_7(AVD) - 15] PASSED

Test execution completed. See the report at:
file:///home/runner/work/mobile/mobile/app/build/reports/androidTests/connected/debug/index.html

BUILD SUCCESSFUL in 2m 18s
The file URL points to the runner workspace. Use the uploaded artifact from the run summary to inspect that report after the job finishes.
- Confirm that the report artifact was uploaded.
Run actions/upload-artifact@v7
With the provided path, there will be 8 files uploaded
Artifact name is valid!
Artifact upload has finished successfully
The artifact should include the HTML report under reports/androidTests/connected and XML result files under outputs/androidTest-results/connected.
Related: How to generate a JUnit report from Espresso tests