An Android app needs instrumented test dependencies before Espresso can compile UI tests and install the test APK on a device. The app module must expose the AndroidJUnitRunner and keep test-only libraries in the androidTest classpath so release code stays separate from UI test code.
The configuration belongs in the app module's Gradle build file rather than the project-level settings file. The defaultConfig block selects the instrumentation runner, and androidTestImplementation adds Espresso, AndroidX Test runner/rules, and the JUnit extension to the instrumented test APK.
Use the project's existing version catalog if it already centralizes dependency versions. Kotlin DSL projects keep these coordinates in build.gradle.kts, and Groovy projects use the same artifacts inside build.gradle. The app module remains the configuration boundary either way.
Steps to configure an Android project for Espresso:
- Open the app module Gradle build file.
For a typical single-app project, edit app/build.gradle.kts. Do not put androidTestImplementation dependencies in the root project build file.
- Set the AndroidJUnitRunner in the app module.
- build.gradle.kts
android {
    defaultConfig {
        testInstrumentationRunner =
            "androidx.test.runner.AndroidJUnitRunner"
    }
}
- Add the Espresso and AndroidX Test dependencies to the same module.
- build.gradle.kts
val espressoVersion = "3.7.0"
val junitExtVersion = "1.3.0"
val testRunnerVersion = "1.7.0"
val testRulesVersion = "1.7.0"

dependencies {
    androidTestImplementation(
        "androidx.test.espresso:" +
            "espresso-core:$espressoVersion"
    )
    androidTestImplementation(
        "androidx.test.ext:" +
            "junit:$junitExtVersion"
    )
    androidTestImplementation(
        "androidx.test:" +
            "runner:$testRunnerVersion"
    )
    androidTestImplementation(
        "androidx.test:" +
            "rules:$testRulesVersion"
    )
}
Keep related Espresso artifacts on the same release when adding modules such as espresso-intents, espresso-contrib, or espresso-web later.
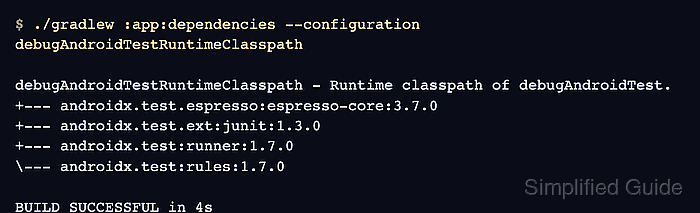
- Resolve the debug Android test runtime classpath.
$ ./gradlew :app:dependencies --configuration debugAndroidTestRuntimeClasspath

debugAndroidTestRuntimeClasspath - Runtime classpath of debugAndroidTest.
+--- androidx.test.espresso:espresso-core:3.7.0
+--- androidx.test.ext:junit:1.3.0
+--- androidx.test:runner:1.7.0
\--- androidx.test:rules:1.7.0

BUILD SUCCESSFUL in 4s
The variant name changes with the project. For a release or flavored test build, use the matching configuration such as freeDebugAndroidTestRuntimeClasspath.
- Build the debug Android test APK.
$ ./gradlew :app:assembleDebugAndroidTest

> Task :app:compileDebugAndroidTestKotlin
> Task :app:packageDebugAndroidTest
> Task :app:assembleDebugAndroidTest

BUILD SUCCESSFUL in 18s
- Run the connected Espresso test task on an emulator or device.
$ ./gradlew :app:connectedDebugAndroidTest

> Task :app:connectedDebugAndroidTest
Starting 1 tests on Pixel_8_API_35
Finished 1 tests on Pixel_8_API_35

BUILD SUCCESSFUL in 29s
If the project has no androidTest class yet, add one small Espresso test before using the connected task as the final proof.
Related: How to write a first Espresso test
Related: How to run Espresso tests locally

Mohd Shakir Zakaria is a cloud architect with deep roots in software development and open-source advocacy. Certified in AWS, Red Hat, VMware, ITIL, and Linux, he specializes in designing and managing robust cloud and on-premises infrastructures.


