Open WebUI image generation lets the web interface call a separate image backend when users need generated images beside normal chat work. Enabling it is useful when an organization already has an OpenAI-compatible image provider, hosted image API, or local image service and wants the same Open WebUI workspace to handle text and image prompts.
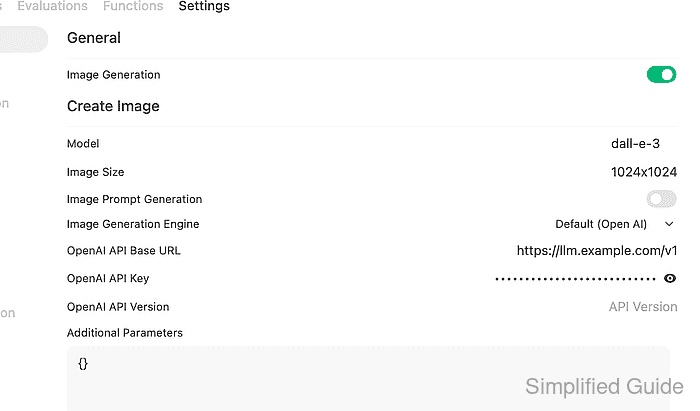
The Admin Panel → Settings → Images page controls the global image switch, provider engine, default image model, output size, and provider credentials. The Default (Open AI) engine sends requests to an OpenAI-compatible /v1/images/generations endpoint, while ComfyUI, Automatic1111, and Gemini use their own provider fields.
Use a provider URL that the Open WebUI server or container can reach, not only a URL that works from the administrator's browser. After saving, a signed request to the Open WebUI image endpoint should return an uploaded file URL, and native chat-based generation also needs the selected model profile to allow the Image Generation capability.
Steps to enable Open WebUI image generation:
- Sign in to Open WebUI as an administrator.
- Open Admin Panel → Settings → Images.
- Turn on Image Generation.
- Keep Image Generation Engine set to Default (Open AI) for an OpenAI-compatible image backend.
- Enter the default Model and Image Size for generated images.
The model name must match the provider-side image model. Common OpenAI-compatible examples include dall-e-3, gpt-image-1, or a model name exposed by an image API proxy.
- Enter the provider OpenAI API Base URL and OpenAI API Key.
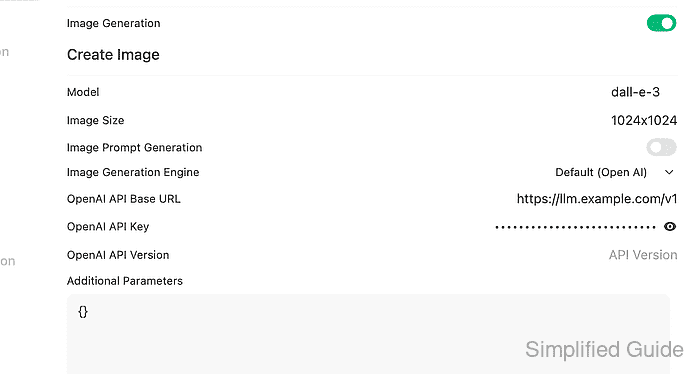
Use a base URL shaped like https://llm.example.com/v1. For Azure OpenAI image deployments, use the deployment endpoint and set OpenAI API Version to the API version required by that deployment.
- Leave Additional Parameters as {} unless the provider requires extra JSON options such as quality, style, or deployment-specific fields.
- Click Save.
- Confirm the target chat model allows image generation when users will generate images from chat.
Open Admin Panel → Settings → Models, select the target model, and check its Capabilities if the model has a custom profile. Native tool-based generation needs both the global Image Generation setting and a model that allows the image-generation capability.
- Store an Open WebUI API key for a smoke test.
$ read -r -s OPEN_WEBUI_API_KEY
Related: How to enable API keys in Open WebUI
- Set the Open WebUI base URL for the image request.
$ export OPEN_WEBUI_URL="https://openwebui.example.com"
- Send a test image prompt through Open WebUI.
$ curl --fail-with-body --silent --show-error "$OPEN_WEBUI_URL/api/v1/images/generations" \
  -H "Authorization: Bearer $OPEN_WEBUI_API_KEY" \
  -H "Content-Type: application/json" \
  --data '{"model":"dall-e-3","prompt":"A compact server rack drawn as a clean icon","n":1,"size":"1024x1024"}'
[
  {
    "url": "/api/v1/files/090e2360-e181-40b6-a89e-7dd1d6a6ce54/content"
  }
]
A returned /api/v1/files/.../content URL proves Open WebUI accepted the request, called the configured image backend, and stored the generated image. A 400 response usually points to the provider URL, API key, model name, image size, API version, or provider-side image-model availability.

Mohd Shakir Zakaria is a cloud architect with deep roots in software development and open-source advocacy. Certified in AWS, Red Hat, VMware, ITIL, and Linux, he specializes in designing and managing robust cloud and on-premises infrastructures.


