Real-time features need a connection that stays open after the first request, so WebSocket is a fit for chat, presence, dashboards, and browser-to-server updates. In Node.js, a small local server can accept a client, send a greeting, and echo a message before the application grows into routes, rooms, or authentication.
The ws package provides the server implementation because current Node.js releases include a WebSocket client API but not a built-in WebSocket server. The server and client files use .mjs modules, bind to 127.0.0.1, and listen on port 8080 so the first test stays on the local machine.
The local smoke test keeps the terminal proof simple by using a Node-based client from the same package. A browser client can connect to the same ws://127.0.0.1:8080 endpoint later, while production deployment should add TLS, authentication, origin checks, shutdown handling, and process management before exposing the listener.
Steps to create a WebSocket server in Node.js:
- Open the Node.js project root that contains package.json.
If the project does not have package metadata yet, initialize it before adding runtime dependencies.
Related: How to create a Node.js project with npm - Install ws as a runtime dependency.
$ npm install ws

added 1 package, and audited 2 packages in 443ms

found 0 vulnerabilities
ws supplies both WebSocketServer and a Node-based client for the local smoke test.
Related: How to install a Node.js dependency - Confirm ws is saved in the project dependency tree.
$ npm list ws --depth=0
websocket-demo@1.0.0 /home/developer/websocket-demo
`-- ws@8.21.0
- Create the WebSocket server file.
- server.mjs
import { WebSocketServer } from "ws";

const host = "127.0.0.1";
const port = Number(process.env.PORT) || 8080;

const server = new WebSocketServer({ host, port });

server.on("connection", (socket) => {
  socket.send("server: ready");

  socket.on("message", (message) => {
    socket.send(`server: ${message.toString()}`);
  });
});

server.on("listening", () => {
  console.log(`WebSocket server listening at ws://${host}:${port}`);
});
Binding to 127.0.0.1 keeps the listener local. Use a deliberate public bind address only after TLS, authentication, and firewall rules are planned.
- Create the client smoke-test file.
- client.mjs
import WebSocket from "ws";

const url = process.argv[2] ?? "ws://127.0.0.1:8080";
const socket = new WebSocket(url);

socket.on("open", () => {
  socket.send("hello from client");
});

socket.on("message", (message) => {
  const text = message.toString();
  console.log(text);

  if (text === "server: hello from client") {
    socket.close();
  }
});

socket.on("close", () => {
  console.log("client: closed");
});
- Check the server file syntax.
$ node --check server.mjs
No output means Node.js parsed the server file without a syntax error.
- Check the client file syntax.
$ node --check client.mjs
No output means Node.js parsed the client file without a syntax error.
- Start the WebSocket server.
$ node server.mjs
WebSocket server listening at ws://127.0.0.1:8080
Keep this terminal open while the client connects.
- Connect with the smoke-test client from another terminal.
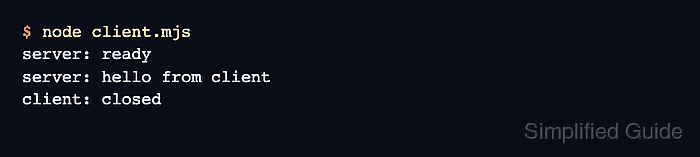
$ node client.mjs
server: ready
server: hello from client
client: closed
Pass another URL such as wss://app.example.com/socket as the first argument when testing a deployed endpoint.
- Return to the server terminal and press Ctrl-C.

Mohd Shakir Zakaria is a cloud architect with deep roots in software development and open-source advocacy. Certified in AWS, Red Hat, VMware, ITIL, and Linux, he specializes in designing and managing robust cloud and on-premises infrastructures.


