NFS exports turn local server directories into mountable network filesystems for selected clients. Creating one is more than making a directory; the server must load a path, client selector, and option set into the active export table before clients can mount it.
Linux NFS servers read export definitions from /etc/exports and from files ending in .exports under /etc/exports.d. A drop-in file keeps one shared path separate from unrelated exports, while the exportfs command rebuilds the active table from the saved files.
A writable project export needs both an export rule and filesystem permissions that match the client accounts. Keep root_squash enabled unless an application has a specific remote-root requirement, and finish from an allowed client so filesystem permissions, firewall access, and UID/GID mapping are exercised.
Related: Install an NFS server on Ubuntu
Related: Create a read-only NFS export
Related: Validate NFS export configuration
Steps to create an NFS export:
- Open a shell on the NFS server with an account that can use sudo.
- Create a group for users or services that should write to the export.
$ sudo groupadd --system nfs-projects
Skip this command when an existing application group already owns the shared tree. Keep numeric UID/GID policy consistent across clients that create files through AUTH_SYS.
- Create the export directory with shared group ownership and setgid permissions.
$ sudo install -d -o root -g nfs-projects -m 2775 /srv/nfs/projects
The setgid bit keeps new files under /srv/nfs/projects in the directory group. Filesystem ownership and mode still control writes even when the export uses rw. With root_squash enabled, client UID/GID 0 maps to anonymous IDs, so use matching user or group ownership for accounts that should create files.
Tool: chmod Calculator - Create the export drop-in directory if it does not already exist.
$ sudo install -d -o root -g root -m 0755 /etc/exports.d
- Open the export drop-in file.
$ sudoedit /etc/exports.d/projects.exports
Use /etc/exports instead on a small server where one shared export file is easier to review. Drop-in files under /etc/exports.d must end in .exports or exportfs ignores them.
- Add the export definition.
/srv/nfs/projects 192.0.2.0/24(rw,sync,no_subtree_check,root_squash)
Keep the client selector directly attached to its option list. 192.0.2.0/24(rw,sync) applies those options to that subnet, while 192.0.2.0/24 (rw,sync) changes how exports(5) parses the rule.
- Confirm that the client selector is narrow enough for a writable export.
Avoid broad writable exports such as *(rw,sync,no_subtree_check) unless the NFS server is intentionally isolated and every reachable client is trusted.
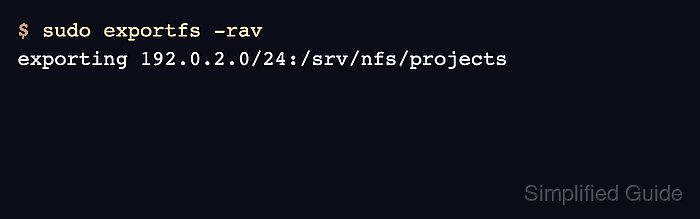
- Reload the active export table from the saved files.
$ sudo exportfs -rv
exporting 192.0.2.0/24:/srv/nfs/projects
Fix any reported path, selector, or option error before testing clients. A reload warning means the active table may not match the saved file.
Related: Reload NFS exports
- Verify that the export is loaded with the intended selector and options.
$ sudo exportfs -v
/srv/nfs/projects
		192.0.2.0/24(sync,wdelay,hide,no_subtree_check,sec=sys,rw,root_squash,no_all_squash)
exportfs may show defaults such as wdelay, hide, sec=sys, and no_all_squash in addition to the options saved in the file.
Related: List NFS exports from the server
- Check the NFS server unit before client testing.
$ sudo systemctl is-active nfs-server
active
Clients also need network access to the server's NFS ports. Check the firewall when exportfs -v is correct but remote mounts time out.
Related: Check NFS server status
Related: Allow NFS through firewalld - Create an empty mount point on an allowed Linux client.
$ sudo mkdir --parents /mnt/projects
Files already inside /mnt/projects become hidden while the NFS filesystem is mounted there.
- Mount the export from the allowed client.
$ sudo mount -t nfs4 files.example.net:/srv/nfs/projects /mnt/projects
Replace files.example.net with the NFS server name. The client host must match 192.0.2.0/24 or the selector used in the saved export line.
Related: Mount an NFS export on Linux
- Confirm that the client mounted the expected server export.
$ findmnt -o TARGET,SOURCE,FSTYPE,OPTIONS /mnt/projects
TARGET        SOURCE                               FSTYPE OPTIONS
/mnt/projects files.example.net:/srv/nfs/projects nfs4   rw,relatime,vers=4.2,proto=tcp
- Write a temporary probe file as a normal allowed user.
$ printf 'nfs export test\n' > /mnt/projects/.nfs-export-test
Do not use sudo for this write test unless the export policy intentionally permits remote root. With root_squash, a root write from the client can fail even when normal mapped users can write.
- Read the probe file back through the mount.
$ cat /mnt/projects/.nfs-export-test
nfs export test
- Remove the temporary probe file.
$ rm /mnt/projects/.nfs-export-test
- Unmount the temporary client test mount.
$ sudo umount /mnt/projects

Mohd Shakir Zakaria is a cloud architect with deep roots in software development and open-source advocacy. Certified in AWS, Red Hat, VMware, ITIL, and Linux, he specializes in designing and managing robust cloud and on-premises infrastructures.


