Large Espresso suites can spend most of their runtime waiting for one emulator to execute every UI path. Gradle managed-device sharding splits the same instrumentation suite across identical virtual device instances, which lets a CI runner or developer workstation finish a longer test set sooner.
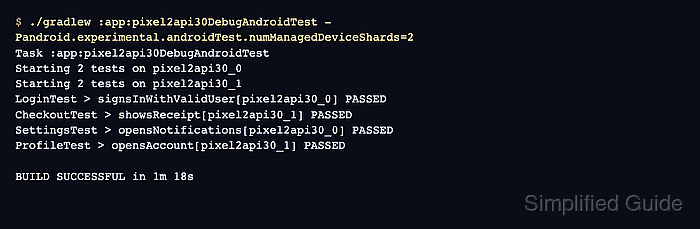
Gradle uses the managed-device task that the app module already exposes and accepts the Android Gradle Plugin sharding property for that run. It starts one virtual device instance per shard for the selected device profile, combines the HTML report, and leaves per-shard result files for deeper inspection.
Start with a managed device that already passes without sharding. Increase the shard count only to the number of emulator instances the machine can run at the same time, because too little CPU, memory, or emulator acceleration produces provisioning and timeout failures before Espresso reaches the app.
Steps to run Espresso tests in parallel with Gradle managed devices:
- Confirm that the managed-device task passes without sharding.
$ ./gradlew :app:pixel2api30DebugAndroidTest
Task :app:pixel2api30DebugAndroidTest
Starting 4 tests on pixel2api30
LoginTest > signsInWithValidUser[pixel2api30] PASSED
CheckoutTest > showsReceipt[pixel2api30] PASSED
SettingsTest > opensNotifications[pixel2api30] PASSED
ProfileTest > opensAccount[pixel2api30] PASSED

BUILD SUCCESSFUL in 2m 14s
Use the managed-device task that matches the module, device profile, and build variant already proven for the project.
Related: How to run Espresso tests on Gradle managed devices - Run the same managed-device task with a shard count.
$ ./gradlew :app:pixel2api30DebugAndroidTest -Pandroid.experimental.androidTest.numManagedDeviceShards=2
Task :app:pixel2api30DebugAndroidTest
Starting 2 tests on pixel2api30_0
Starting 2 tests on pixel2api30_1
LoginTest > signsInWithValidUser[pixel2api30_0] PASSED
CheckoutTest > showsReceipt[pixel2api30_1] PASSED
SettingsTest > opensNotifications[pixel2api30_0] PASSED
ProfileTest > opensAccount[pixel2api30_1] PASSED

BUILD SUCCESSFUL in 1m 18s
Use -Pandroid.experimental.androidTest.numManagedDeviceShards=2 for a one-run check. Put android.experimental.androidTest.numManagedDeviceShards=2 in gradle.properties when every managed-device run should shard.
- Confirm that Gradle created a result file for each shard.
$ ls app/build/outputs/androidTest-results/managedDevice/pixel2api30/shard_*/test-result.pb
app/build/outputs/androidTest-results/managedDevice/pixel2api30/shard_1/test-result.pb
app/build/outputs/androidTest-results/managedDevice/pixel2api30/shard_2/test-result.pb
Each shard writes its own test-result.pb file. Missing shard output usually means the emulator instance failed before the test runner returned a result.
- Check the combined managed-device HTML report.
$ ls app/build/reports/androidTests/managedDevice/pixel2api30/index.html
app/build/reports/androidTests/managedDevice/pixel2api30/index.html
The combined report is the reader-friendly view of the sharded run. CI should also archive the per-shard result directory when failed shards need deeper inspection.
Related: How to generate a JUnit report from Espresso tests

Mohd Shakir Zakaria is a cloud architect with deep roots in software development and open-source advocacy. Certified in AWS, Red Hat, VMware, ITIL, and Linux, he specializes in designing and managing robust cloud and on-premises infrastructures.


