How to create subplots in Matplotlib
Dashboards and technical reports often place related measurements in one figure so differences in scale and trend remain visible at a glance. Matplotlib represents each panel as a separate Axes inside a shared Figure, allowing every panel to use its own plot type, title, and y-axis scale.
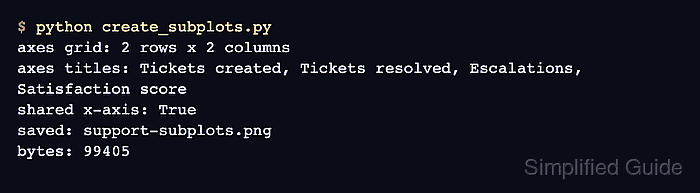
The plt.subplots(2, 2, squeeze=False) call returns the Figure with a two-dimensional array of Axes. Each panel can then be addressed by its row and column position, such as axs[1, 0] for the lower-left panel.
The sample uses one month sequence across four support metrics. sharex=True aligns the horizontal scale and keeps tick labels on the bottom row, while constrained layout reserves space for the subplot titles and labels.
Steps to create Matplotlib subplots:
- Create create_subplots.py with the shared x-axis labels and four data series.
- create_subplots.py
from pathlib import Path

import matplotlib.pyplot as plt


months = ["Jan", "Feb", "Mar", "Apr", "May", "Jun"]
created = [34, 38, 41, 46, 44, 49]
resolved = [30, 35, 39, 42, 45, 47]
escalated = [6, 5, 8, 7, 6, 4]
satisfaction = [82, 84, 83, 86, 88, 90]
- Append the 2 x 2 Figure and Axes grid below the data.
fig, axs = plt.subplots(
    2,
    2,
    figsize=(8.8, 5.6),
    sharex=True,
    squeeze=False,
    layout="constrained",
)
squeeze=False keeps axs two-dimensional even if the grid dimensions change to one row or one column.
- Append the two top-row plot definitions below the grid.
axs[0, 0].plot(months, created, marker="o", color="tab:blue")
axs[0, 0].set(title="Tickets created", ylabel="Tickets")

axs[0, 1].bar(months, resolved, color="tab:green")
axs[0, 1].set(title="Tickets resolved", ylabel="Tickets")
- Append the two bottom-row plot definitions below the top row.
axs[1, 0].plot(months, escalated, marker="s", color="tab:red")
axs[1, 0].set(title="Escalations", xlabel="Month", ylabel="Tickets")

axs[1, 1].plot(months, satisfaction, marker="^", color="tab:purple")
axs[1, 1].set(
    title="Satisfaction score",
    xlabel="Month",
    ylabel="Score",
    ylim=(75, 95),
)
- Finish the script with figure-level formatting and saved-file checks.
fig.suptitle("Support queue dashboard")

for ax in axs.flat:
    ax.grid(True, axis="y", alpha=0.25)

output = Path("support-subplots.png")
fig.savefig(output, dpi=160)
plt.close(fig)

print(f"axes grid: {axs.shape[0]} rows x {axs.shape[1]} columns")
print(f"axes count: {len(fig.axes)}")
print(f"saved: {output}")
print(f"bytes: {output.stat().st_size}")
- Run create_subplots.py from the directory where the image should be saved.
$ python3 create_subplots.py
axes grid: 2 rows x 2 columns
axes count: 4
saved: support-subplots.png
bytes: 91428
The byte count can vary with the Matplotlib version, fonts, backend, and DPI settings. Four Axes and a nonzero file size confirm that the grid and PNG were created.
- Inspect support-subplots.png for four titled panels arranged in two rows and two columns.
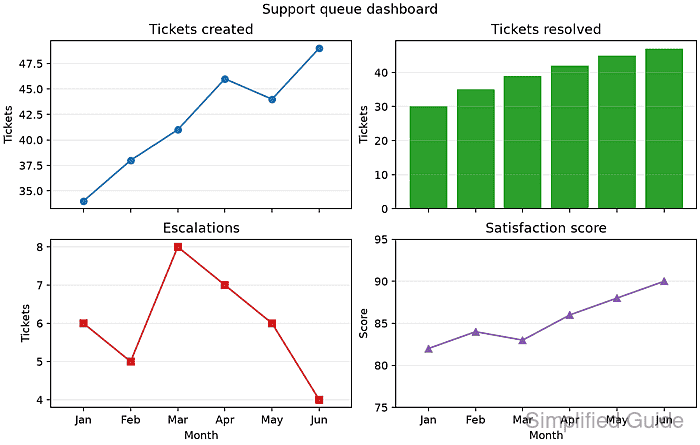
The bottom row should show the shared month labels, while each panel retains its own title and y-axis label.