Deploying WordPress on an Ubuntu LEMP stack joins Nginx, MySQL, PHP-FPM, and the application files into one working virtual host. This setup fits a server that needs a normal WordPress site without a hosting panel, bundled desktop stack, or Apache-specific .htaccess rules.
The deployment uses distribution packages for Nginx, MySQL, PHP-FPM, and common WordPress PHP extensions, then installs the upstream WordPress release in a dedicated web root. The Nginx server block sends ordinary page requests through index.php and passes PHP scripts to the packaged PHP-FPM socket.
Start with a fresh server, sudo access, a hostname that can point at the server, and an empty database name. HTTPS, caching, backups, and hardening can be added after the installer endpoint returns a 200 OK response and the browser can finish the first-run WordPress setup.
Related: How to redirect HTTP to HTTPS in WordPress
Related: How to back up a WordPress site
Related: How to install WP-CLI on Ubuntu or Debian
Steps to deploy WordPress on Ubuntu LEMP:
- Refresh the Ubuntu package index.
$ sudo apt-get update
- Install Nginx, MySQL, PHP-FPM, and the common WordPress PHP extensions.
$ sudo apt-get install --yes \
  nginx mysql-server php-fpm php-mysql php-xml php-curl \
  php-zip php-gd php-intl php-mbstring ca-certificates curl tar
On Ubuntu 26.04, the php-fpm package installs php8.5-fpm and creates /run/php/php8.5-fpm.sock. Use the matching socket path when deploying on a different Ubuntu release.
- Enable the services and start them now.
$ sudo systemctl enable --now nginx mysql php8.5-fpm
Ubuntu 26.04 packages create the nginx, mysql, and php8.5-fpm systemd units.
Related: How to manage the Nginx service - Confirm the services are active.
$ systemctl is-active nginx mysql php8.5-fpm
active
active
active
- Open the local MySQL shell with sudo privileges.
$ sudo mysql
Ubuntu authenticates the local MySQL root account through the Unix socket by default, so a password prompt is not normally required for sudo mysql.
- Create an empty database and user for WordPress.
mysql> CREATE DATABASE wordpress CHARACTER SET utf8mb4 COLLATE utf8mb4_unicode_ci;
mysql> CREATE USER 'wordpress'@'localhost' IDENTIFIED BY 'strong_password_here';
mysql> GRANT ALL PRIVILEGES ON wordpress.* TO 'wordpress'@'localhost';
mysql> FLUSH PRIVILEGES;
mysql> EXIT;
Replace strong_password_here with a unique password and keep the same value for DB_PASSWORD in wp-config.php.
- Set the document root for the shell session.
$ SITE_ROOT=/var/www/example.com/public_html
Replace example.com with the real site name before copying the commands to a production server.
- Create the site document root.
$ sudo mkdir -p "$SITE_ROOT"
- Download the current WordPress release tarball.
$ curl -fsSLo /tmp/latest.tar.gz https://wordpress.org/latest.tar.gz
- Extract the WordPress files into the document root.
$ sudo tar -xzf /tmp/latest.tar.gz \
  -C "$SITE_ROOT" \
  --strip-components=1
The --strip-components=1 option copies the contents of the extracted wordpress directory into the document root instead of nesting another directory below it.
- Remove the downloaded tarball.
$ rm /tmp/latest.tar.gz
- Create the WordPress configuration file from the sample.
$ sudo cp "$SITE_ROOT/wp-config-sample.php" "$SITE_ROOT/wp-config.php"
- Edit the database settings in wp-config.php.
$ sudoedit "$SITE_ROOT/wp-config.php"
define( 'DB_NAME', 'wordpress' );
define( 'DB_USER', 'wordpress' );
define( 'DB_PASSWORD', 'strong_password_here' );
define( 'DB_HOST', 'localhost' );
- Fetch fresh authentication keys and salts from the official WordPress API.
$ curl -fsS https://api.wordpress.org/secret-key/1.1/salt/
Paste the returned define(… ) lines over the placeholder authentication-key section in wp-config.php before saving the file.
- Set the WordPress files to the web server user.
$ sudo chown -R www-data:www-data "$SITE_ROOT"
- Restrict the main configuration file.
$ sudo chmod 640 "$SITE_ROOT/wp-config.php"
- Create the Nginx server block.
$ sudoedit /etc/nginx/sites-available/example.com
server {
    listen 80;
    server_name www.example.com example.com;
    root /var/www/example.com/public_html;
    index index.php index.html;
    client_max_body_size 64M;

    location / {
        try_files $uri $uri/ /index.php?$args;
    }

    location ~ \.php$ {
        include snippets/fastcgi-php.conf;
        fastcgi_pass unix:/run/php/php8.5-fpm.sock;
    }

    location ~ /\.ht {
        deny all;
    }
}
The try_files fallback keeps WordPress permalink requests inside index.php. The fastcgi_pass socket must match the installed PHP-FPM service.
- Enable the site.
$ sudo ln -s /etc/nginx/sites-available/example.com \
  /etc/nginx/sites-enabled/example.com
- Disable the packaged default site on a fresh server.
$ sudo rm -f /etc/nginx/sites-enabled/default
Skip this command when the default site is intentionally serving another application or maintenance page.
- Test the Nginx configuration.
$ sudo nginx -t
nginx: the configuration file /etc/nginx/nginx.conf syntax is ok
nginx: configuration file /etc/nginx/nginx.conf test is successful
Related: How to test Nginx configuration
- Reload Nginx to activate the server block.
$ sudo systemctl reload nginx
Related: How to manage the Nginx service
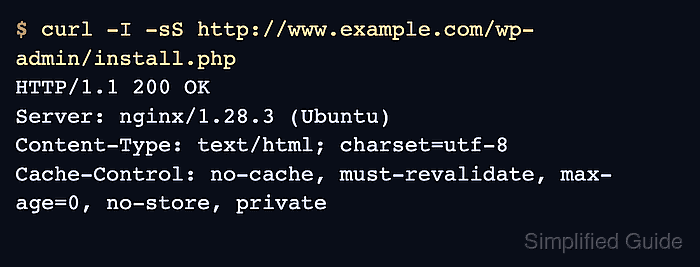
- Verify that the WordPress installer endpoint responds through Nginx and PHP-FPM.
$ curl -I -sS http://www.example.com/wp-admin/install.php
HTTP/1.1 200 OK
Server: nginx/1.28.3 (Ubuntu)
Content-Type: text/html; charset=utf-8
Cache-Control: no-cache, must-revalidate, max-age=0, no-store, private
If DNS is not pointed at the new server yet, test from a workstation or jump host with a temporary hosts-file entry for www.example.com.
Tool: Web Server Detector
- Open http://www.example.com/ in a browser and finish the site title, administrator account, password, and email setup.
A new install should redirect to the WordPress installer. If the page reports Already Installed, the database already contains WordPress tables.

Mohd Shakir Zakaria is a cloud architect with deep roots in software development and open-source advocacy. Certified in AWS, Red Hat, VMware, ITIL, and Linux, he specializes in designing and managing robust cloud and on-premises infrastructures.


