CUDA support in PyTorch depends on the NVIDIA driver, a CUDA-enabled PyTorch wheel, and code that moves tensors or modules onto a CUDA device. When those layers agree, GPU operations appear through the torch.cuda API instead of remaining on CPU.
The PyTorch wheel supplies the CUDA runtime libraries for the selected compute platform, but it does not replace the host driver. nvidia-smi should show the GPU before reinstalling PyTorch, and torch.version.cuda should show a CUDA runtime tag after the CUDA wheel is installed.
Linux with pip and the CUDA 12.8 wheel index is a narrow default for the package install. If the PyTorch install selector gives a different CUDA platform for the driver or project, use that generated command and keep the Python availability and tensor smoke tests unchanged.
Related: How to install PyTorch with pip
Related: How to select a device in PyTorch
Related: How to fix PyTorch not detecting a GPU
Steps to enable CUDA in PyTorch:
- Open a terminal on the NVIDIA GPU machine.
- Confirm that the NVIDIA driver can see the GPU.
$ nvidia-smi
+-----------------------------------------------------------------------------------------+
| NVIDIA-SMI 570.86.15              Driver Version: 570.86.15      CUDA Version: 12.8     |
| GPU  Name                  Persistence-M | Bus-Id          Disp.A | Volatile Uncorr. ECC |
|   0  NVIDIA RTX 6000 Ada Generation  Off |   00000000:01:00.0 Off |                  Off |
##### snipped #####
If nvidia-smi is missing, reports no devices, or shows a driver error, fix the driver layer before changing PyTorch packages.
Related: How to fix PyTorch not detecting a GPU - Create an isolated Python environment for the CUDA build.
$ python3 -m venv ~/venvs/torch-cuda
- Activate the Python environment.
$ source ~/venvs/torch-cuda/bin/activate
(torch-cuda) $
Use the project environment instead when the application already has one. The active environment is where pip replaces or installs torch.
- Upgrade pip in the active environment.
(torch-cuda) $ python3 -m pip install --upgrade pip
- Install the CUDA-enabled PyTorch wheel from the CUDA 12.8 index.
(torch-cuda) $ python3 -m pip install torch torchvision torchaudio --index-url https://download.pytorch.org/whl/cu128
The CUDA suffix in the index URL must match the install selector choice. For example, CUDA 11.8 uses cu118 and CUDA 12.6 uses cu126.
- Check that the installed PyTorch build reports a CUDA runtime.
(torch-cuda) $ python3 -c "import torch; print(torch.__version__); print(torch.version.cuda)"
2.11.0+cu128
12.8
The exact PyTorch version changes as new wheels are released. The second line should print a CUDA runtime version instead of None.
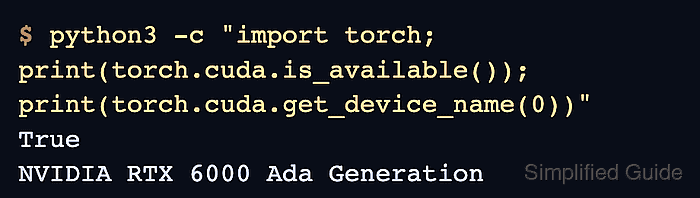
- Confirm that PyTorch can initialize CUDA and name the first GPU.
(torch-cuda) $ python3 -c "import torch; print(torch.cuda.is_available()); print(torch.cuda.device_count()); print(torch.cuda.get_device_name(0))"
True
1
NVIDIA RTX 6000 Ada Generation
A False result means PyTorch still cannot initialize CUDA in the active environment. Check the selected wheel index, the NVIDIA driver, and any container GPU passthrough before changing application code.
Related: How to fix PyTorch not detecting a GPU - Run a tensor operation on the CUDA device.
(torch-cuda) $ python3 - <<'PY'
import torch

device = torch.device("cuda")
x = torch.tensor([1.0, 2.0, 3.0], device=device)
y = x * 2
print(y)
print(y.device)
PY
tensor([2., 4., 6.], device='cuda:0')
cuda:0
Move model parameters and input tensors to the same device before running real workloads.
Related: How to select a device in PyTorch

Mohd Shakir Zakaria is a cloud architect with deep roots in software development and open-source advocacy. Certified in AWS, Red Hat, VMware, ITIL, and Linux, he specializes in designing and managing robust cloud and on-premises infrastructures.


