Generating an SSH key pair on Windows enables passwordless logins, safer automation for scripts and deployments, and less time spent feeding password prompts to terminals.
SSH uses asymmetric cryptography: the public key is installed on the server (commonly as a line inside ~/.ssh/authorized_keys), while the private key stays on the client and proves identity during the SSH handshake without being transmitted.
On Windows, PuTTY Key Generator (PuTTYgen) creates keys for PuTTY in .ppk format and supports modern algorithms such as EdDSA and ECDSA alongside RSA; protect the private key with a strong passphrase, avoid DSA, and keep generated key files in a location readable only by the intended account.
Related: How to create an SSH key pair
Related: How to use public key authentication in PuTTY
Steps to generate an SSH key pair using PuTTYgen:
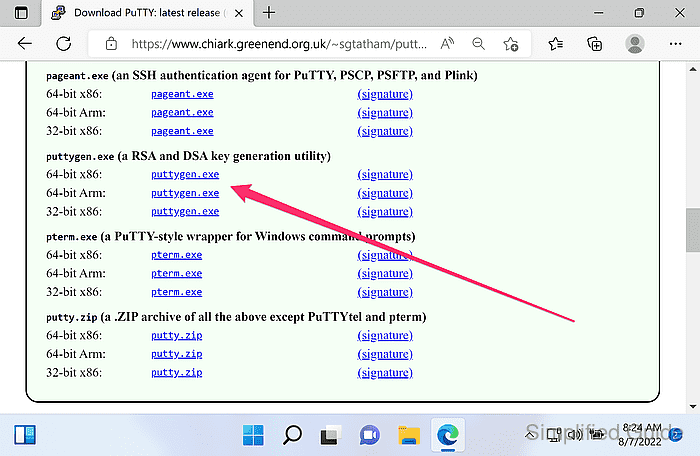
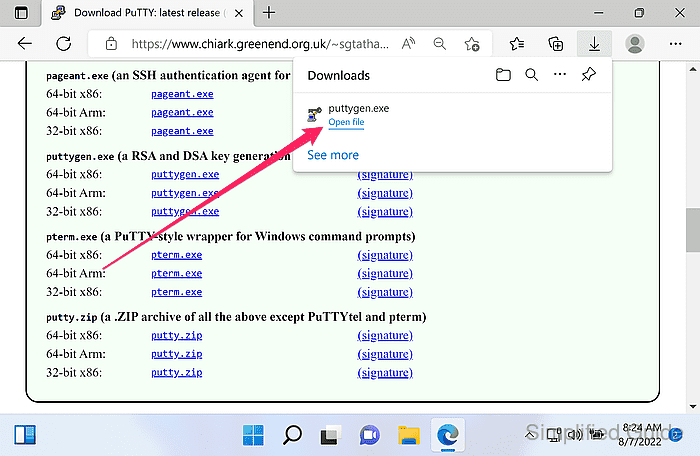
- Download PuTTY Key Generator (PuTTYgen) for the correct CPU architecture from the official download page.
https://www.chiark.greenend.org.uk/~sgtatham/putty/latest.html
The installer includes PuTTY; the portable build runs as a standalone puttygen.exe.
- Launch PuTTYgen.
- Select the key type under Parameters.
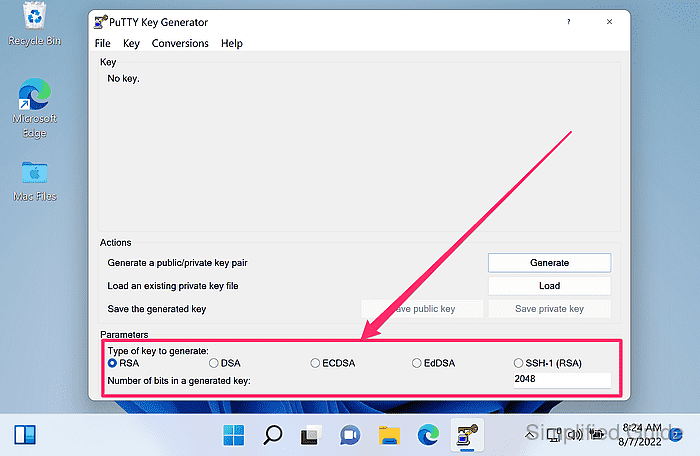
Prefer Ed25519 (EdDSA) when available; use RSA for broad compatibility; avoid DSA keys.
- Set Number of bits in a generated key to at least 3072 when generating an RSA key.
4096 is common for long-lived RSA keys.
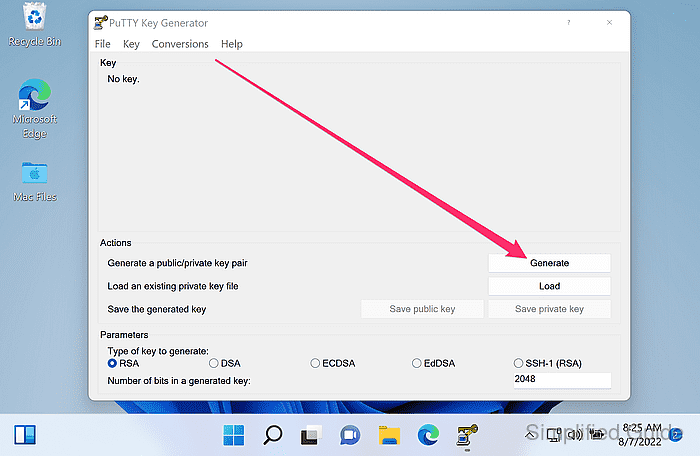
- Click Generate.
- Move the mouse pointer around the blank area until the progress bar completes.
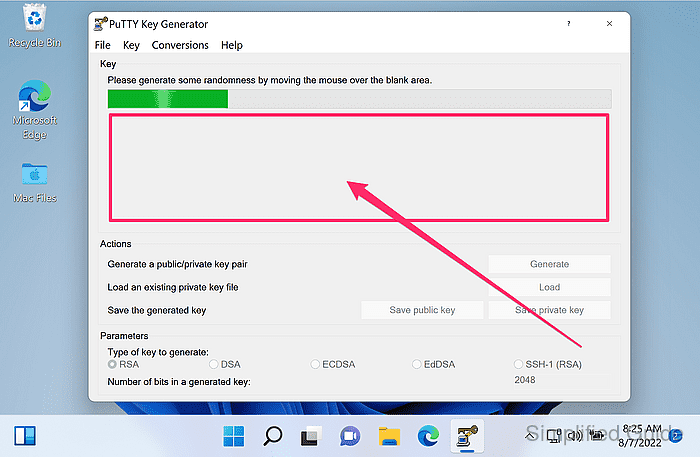
Mouse movement provides randomness used during key generation.
- Edit the Key comment field to identify the key.
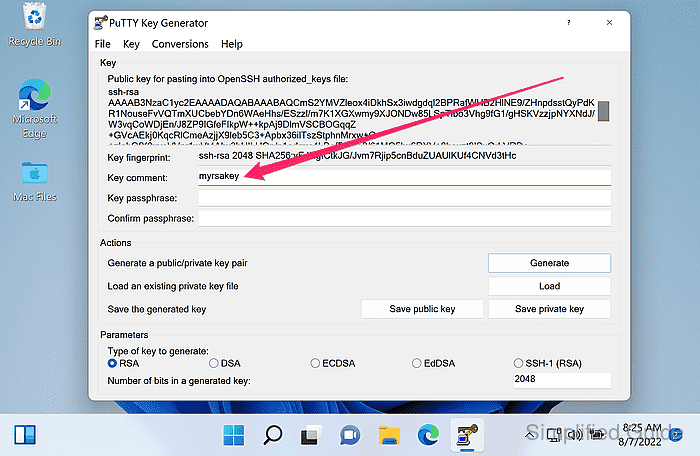
Use a label such as work-laptop-2025 or user@host.
- Enter a passphrase in Key passphrase and Confirm passphrase fields.
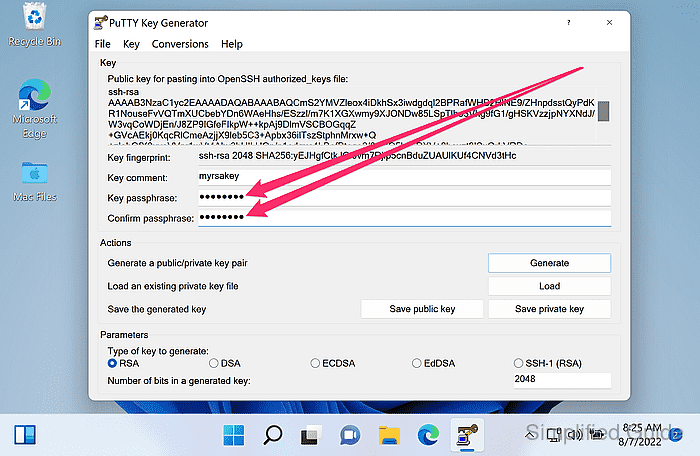
A private key saved without a passphrase can be used immediately by anyone who obtains the file.
- Copy the line from Public key for pasting into OpenSSH authorized_keys file for use in ~/.ssh/authorized_keys on the server.
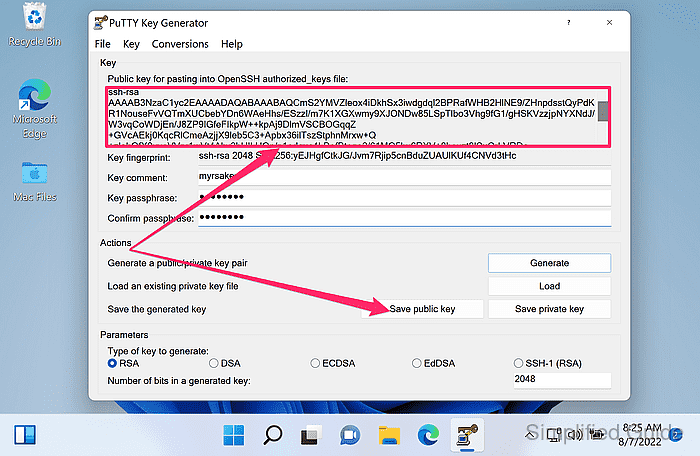
The line begins with ssh-ed25519, ssh-rsa, or ecdsa-sha2-nistp256 and must remain a single line.
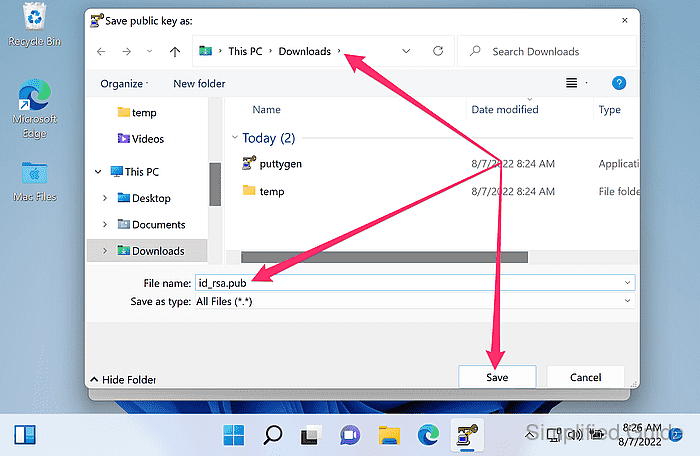
- Click Save public key to export the public key as a file.
Exporting a public-key file is optional when copying directly into authorized_keys.
- Choose a save location, enter a filename, and click Save.
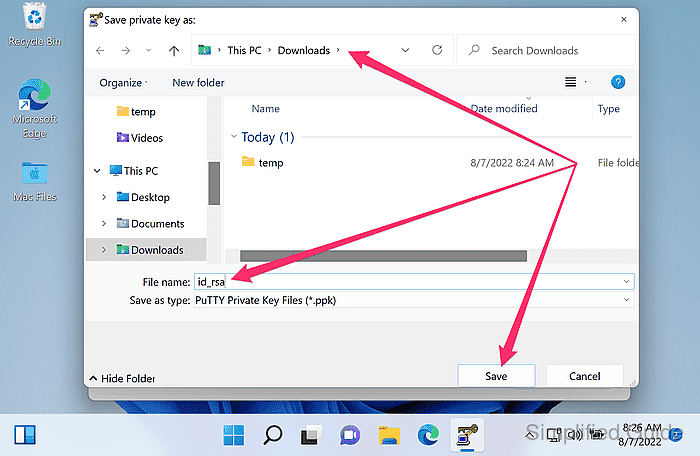
- Click Save private key to save the .ppk private key.
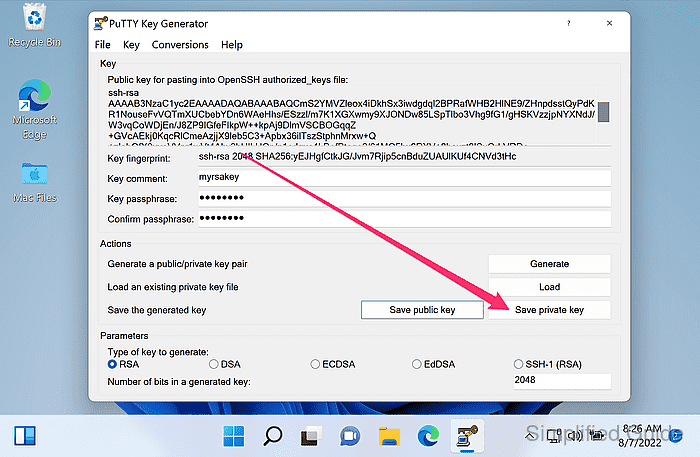
A private key shared is a private key no more, so store it securely and never share it with unauthorized individuals.
- Choose a save location, enter a filename, and click Save.
- Convert the generated .ppk private key to OpenSSH format when the key is needed by the OpenSSH client.

Mohd Shakir Zakaria is a cloud architect with deep roots in software development and open-source advocacy. Certified in AWS, Red Hat, VMware, ITIL, and Linux, he specializes in designing and managing robust cloud and on-premises infrastructures.


