Secure access to a Linux AWS EC2 instance from Windows enables administration, troubleshooting, and deployment over an encrypted channel while avoiding password-based remote logins.
Access is typically provided by SSH on port 22 using public-key authentication, where the downloaded .pem private key corresponds to a public key installed on the instance for the target account, and PuTTY uses its own .ppk key container that requires conversion before connecting.
Connectivity also depends on a reachable address (public IP/DNS or an internal path via VPN/bastion/proxy), an inbound security group rule that permits port 22 from the correct source IP range, and the correct default username for the chosen AMI. Restricting inbound rules reduces exposure to scanning and brute-force attempts, and host key warnings should only be accepted after verifying the fingerprint from a trusted source.
Steps to SSH to a Linux AWS EC2 instance from Windows using PuTTY:
- Open the Amazon EC2 instance details page and copy the Public IPv4 DNS or Public IPv4 address value.
Instances without a public address require a VPN, bastion host, or proxy path to reach port 22.
- Restrict the instance security group inbound rule for SSH to port 22 from the Windows network public IP range.
Setting the SSH source to 0.0.0.0/0 exposes the instance to internet-wide scanning and brute-force attempts.
- Convert the AWS .pem private key to a PuTTY .ppk key using PuTTYgen.
Anyone with the private key can authenticate as the permitted account; store the key in a protected location and avoid sharing it.
- Download PuTTY from the official website.
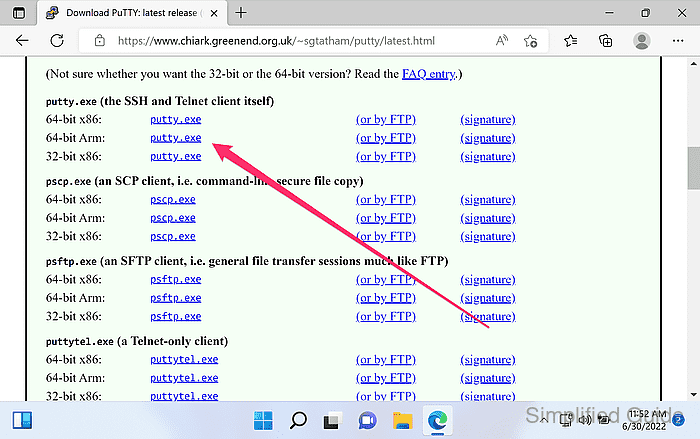
https://www.chiark.greenend.org.uk/~sgtatham/putty/latest.html
- Launch PuTTY.
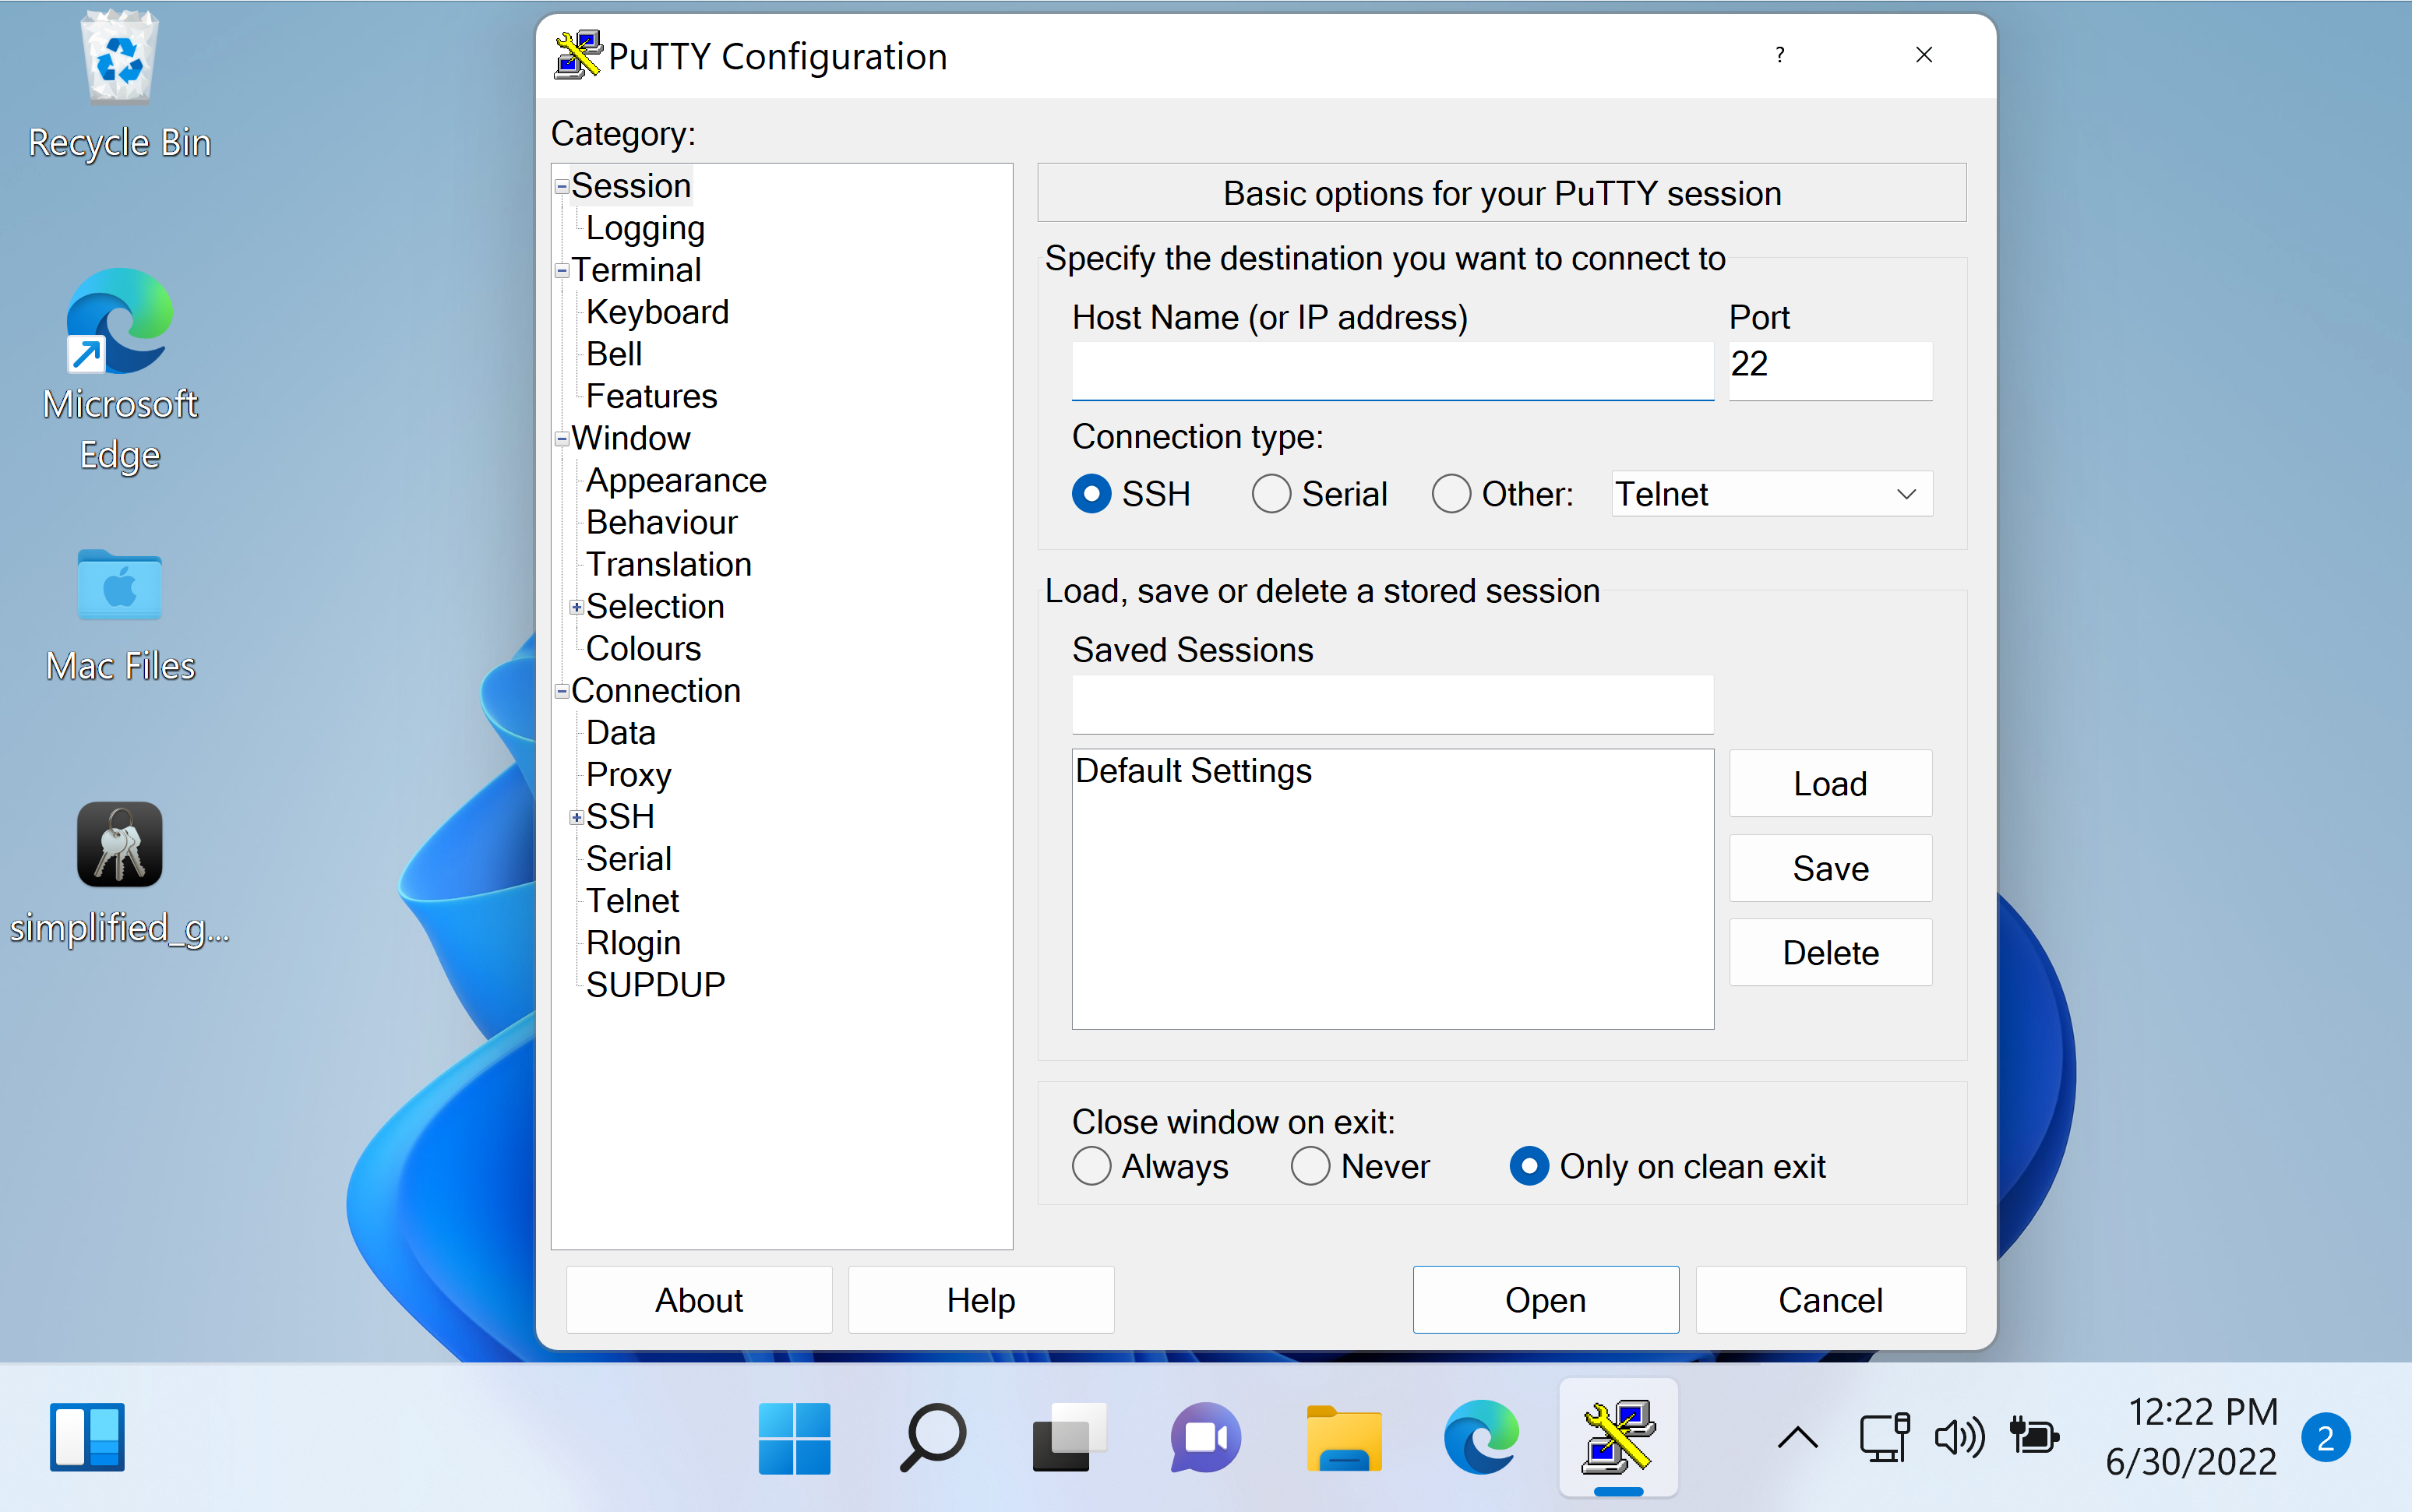
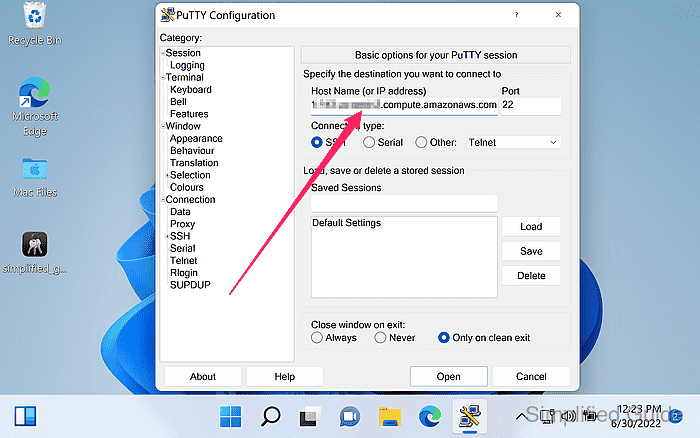
- Enter the instance address in Host Name (or IP address) and confirm Port is 22.
- Enter a label under Saved Sessions and click Save.
Saving a session preserves the host, port, and authentication settings for future logins.
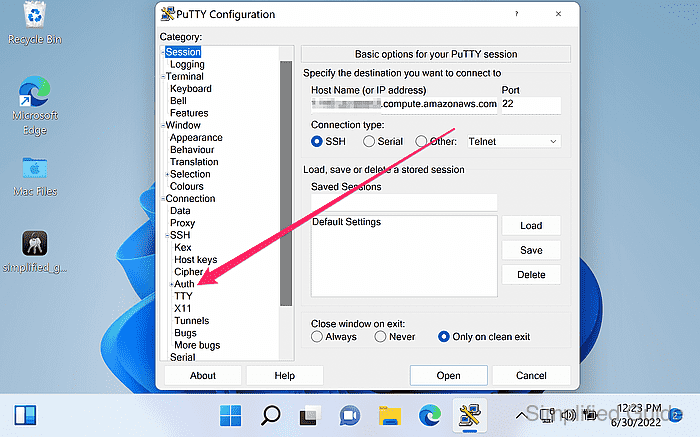
- Go to Connection → SSH → Auth from the sidebar menu.
- Click on the Browse button to look for the PuTTY Private Key.
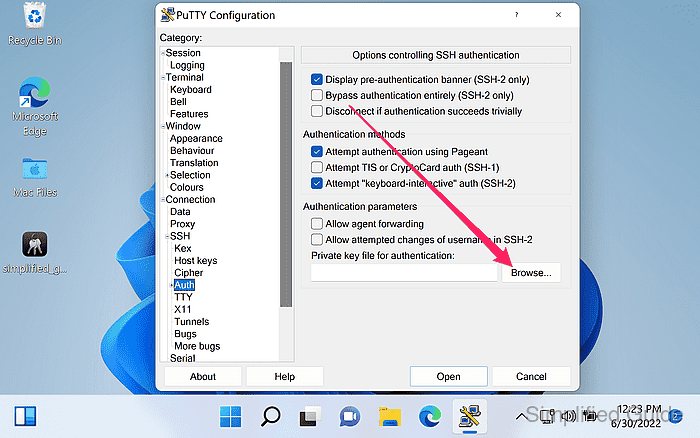
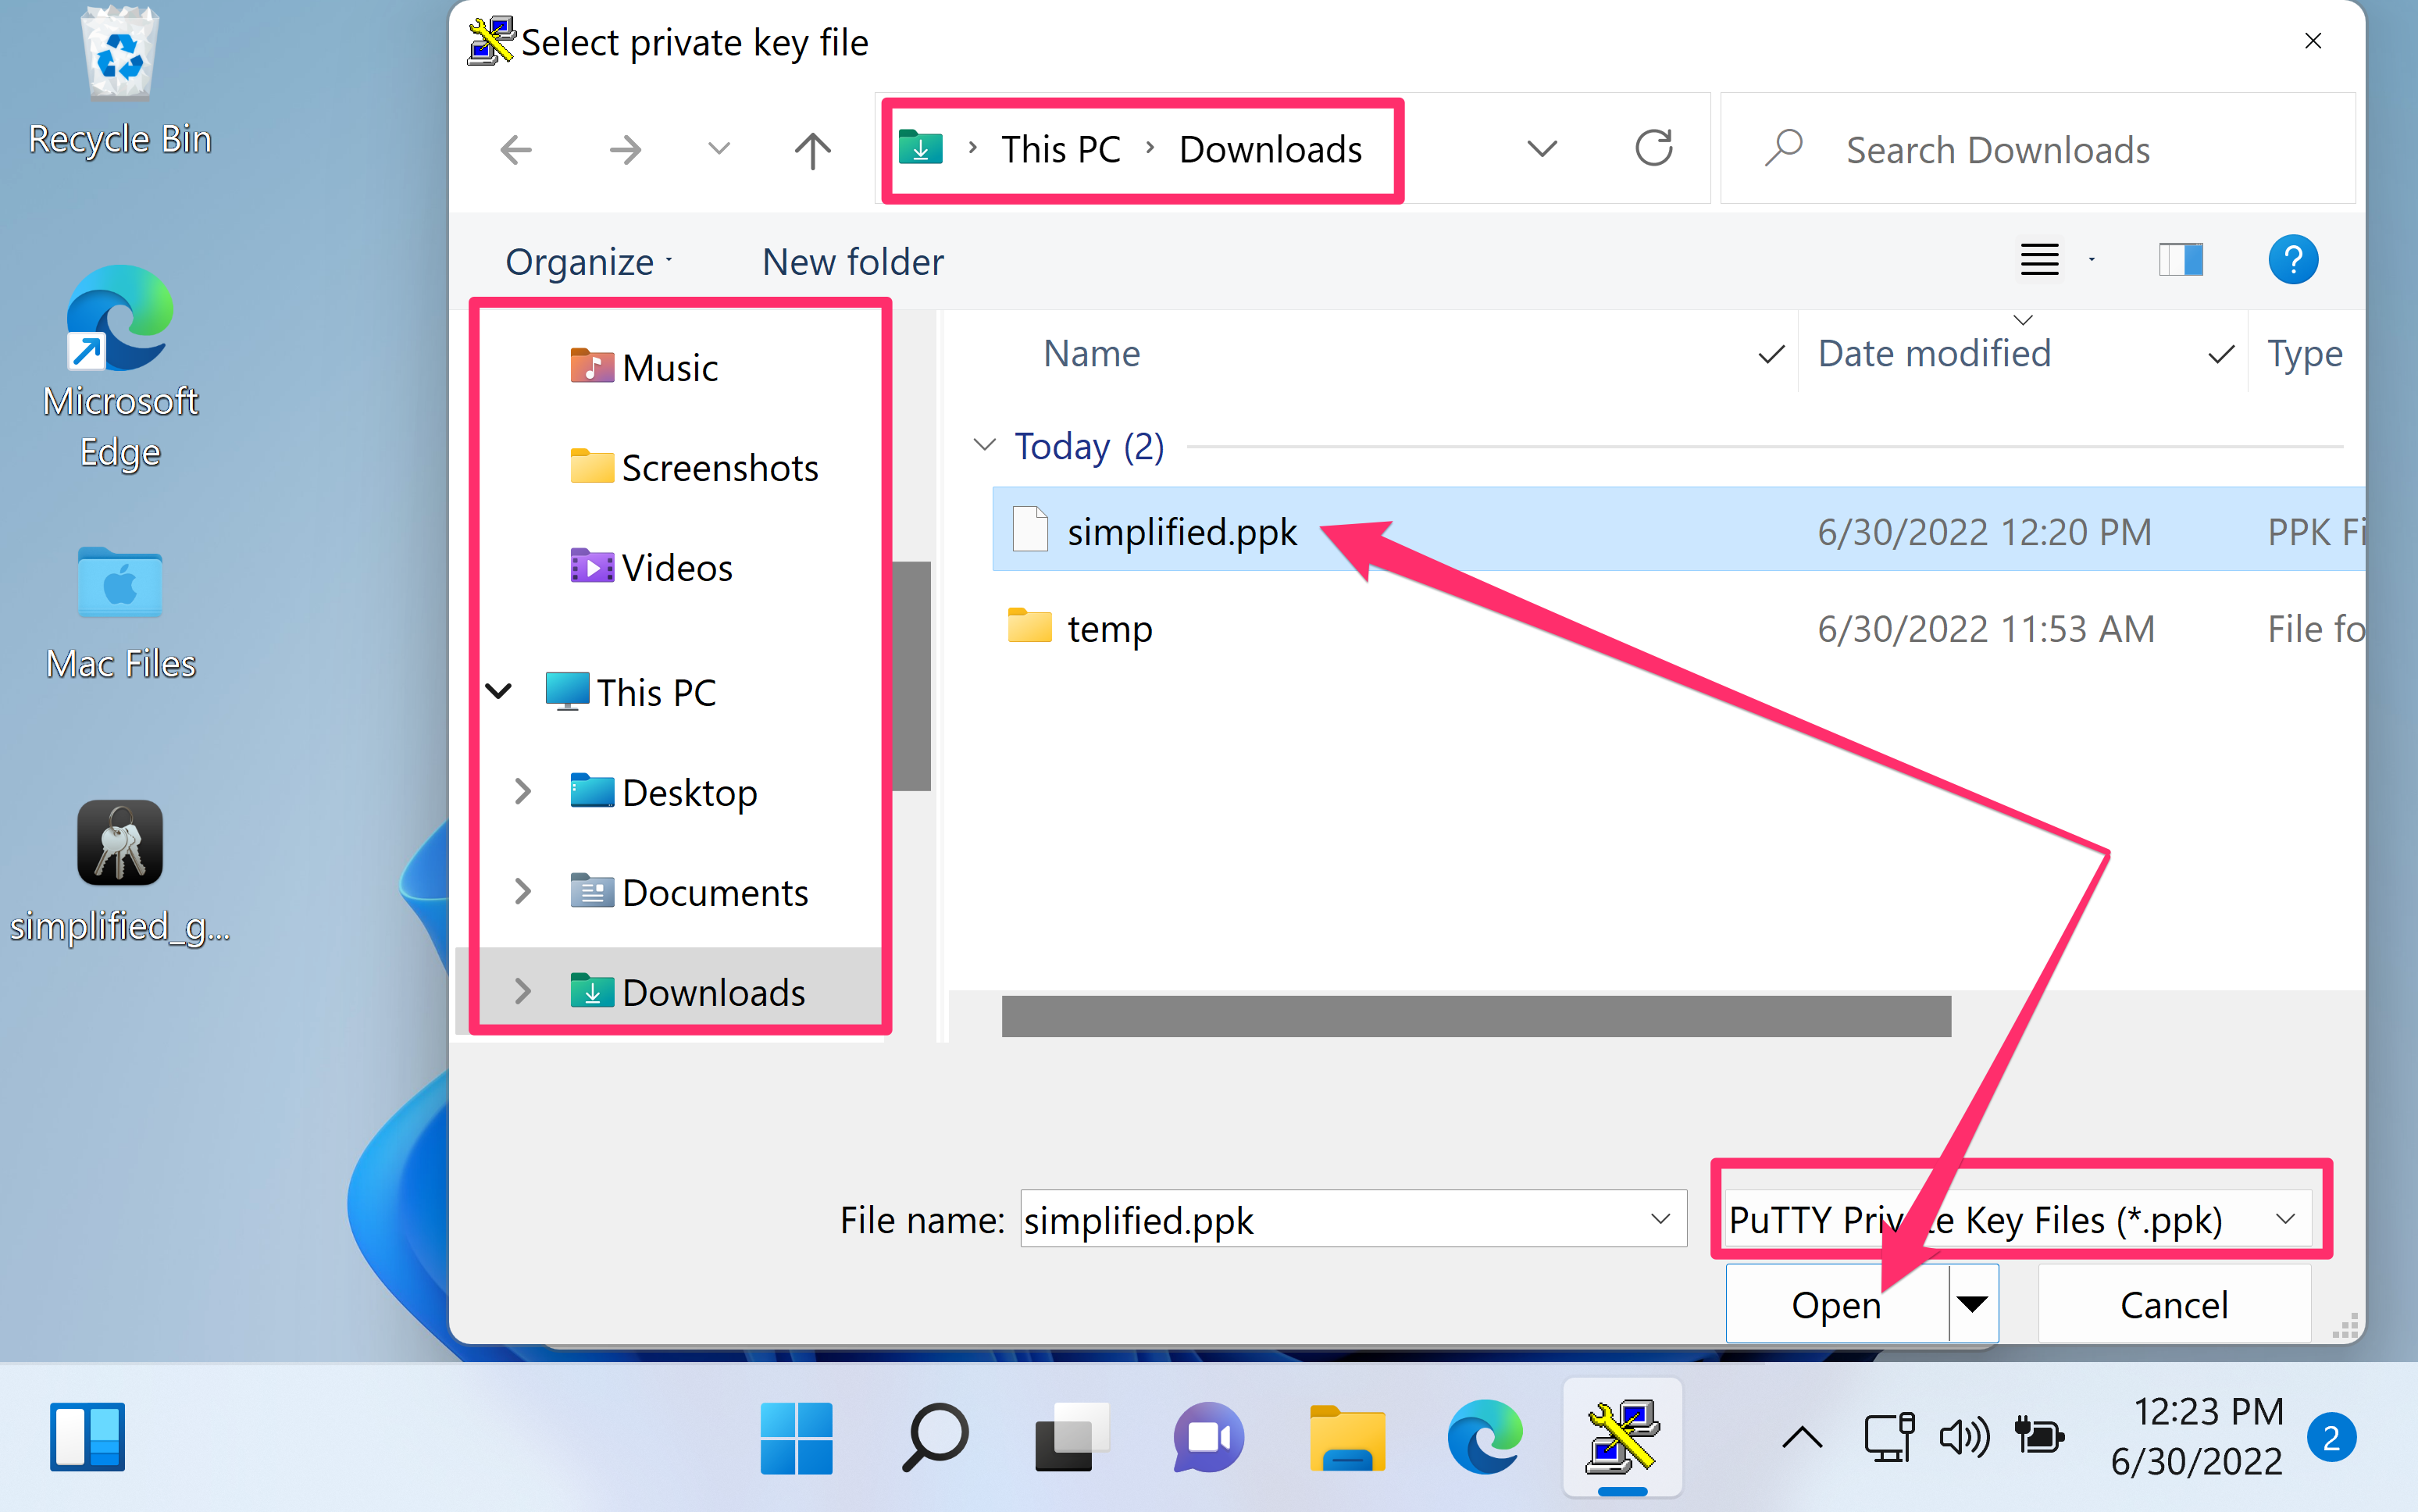
- Select the .ppk private key file and click Open.
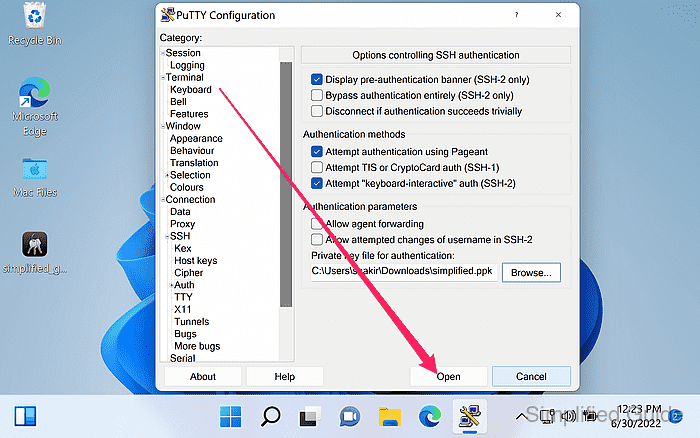
- Click on the Open button to start the connection.
- Review the host key fingerprint prompt and click Yes to cache the key when the fingerprint is trusted.
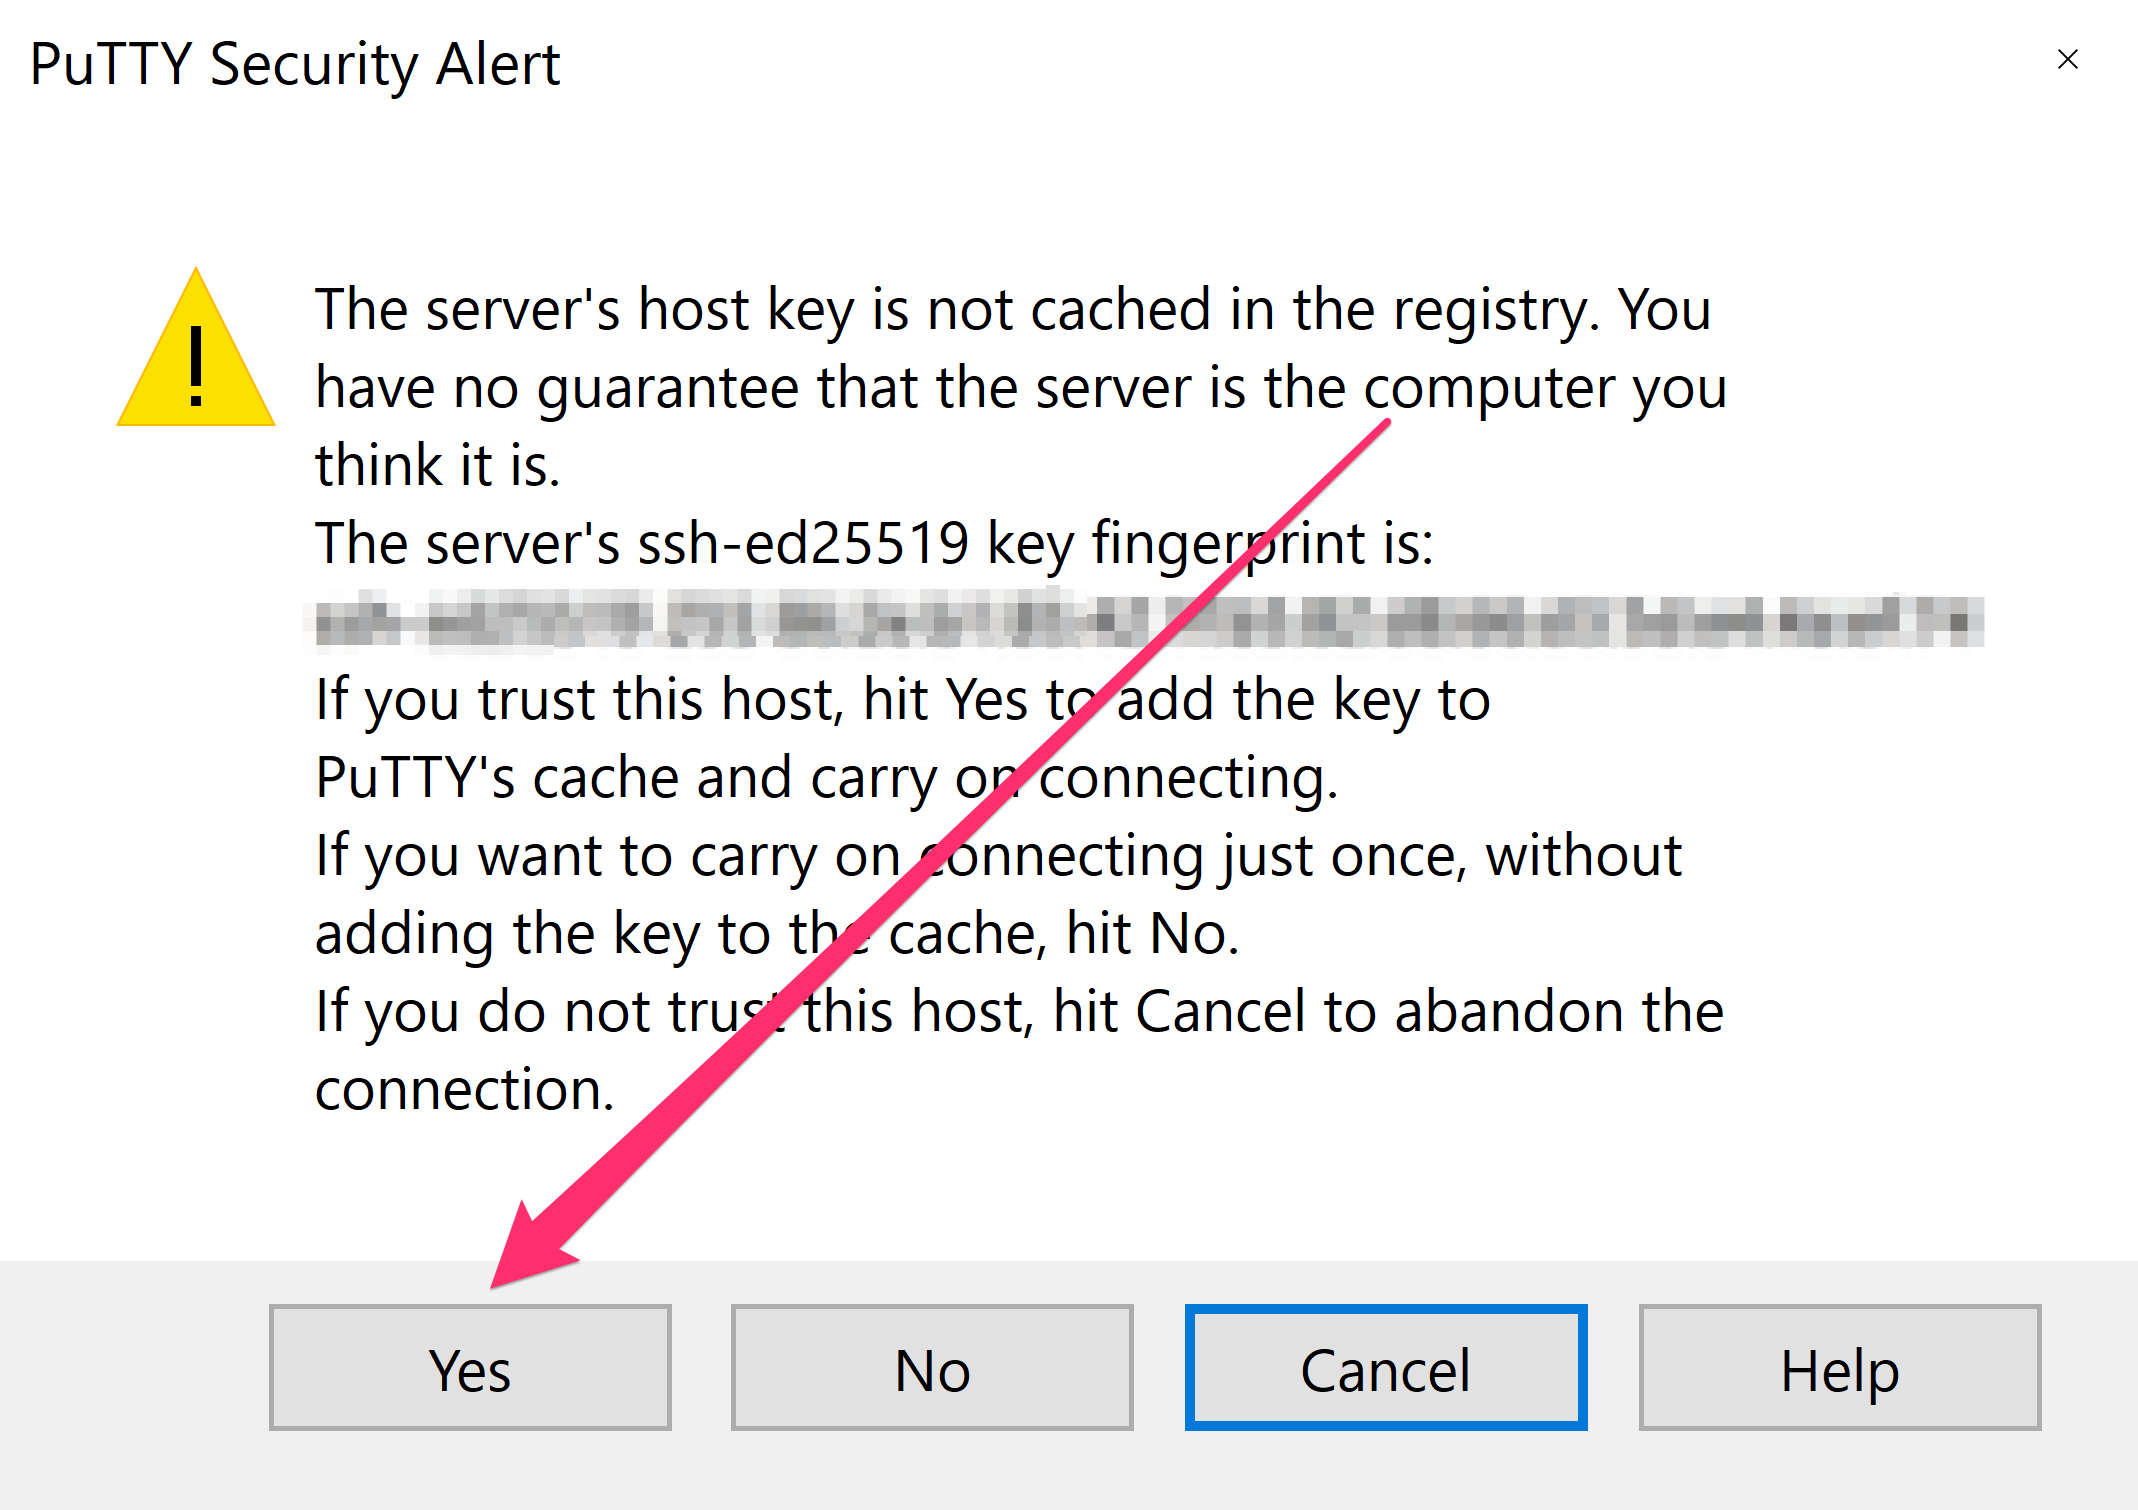
Caching an untrusted host key can enable man-in-the-middle interception; verify the fingerprint before accepting.
- Enter the instance username and press Enter at the login prompt.
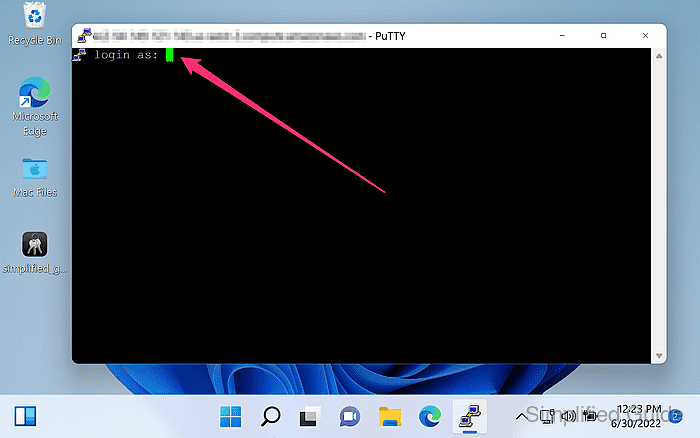
Default usernames vary by AMI, with common values including ec2-user and ubuntu.
- Enter the passphrase for the key if prompted.
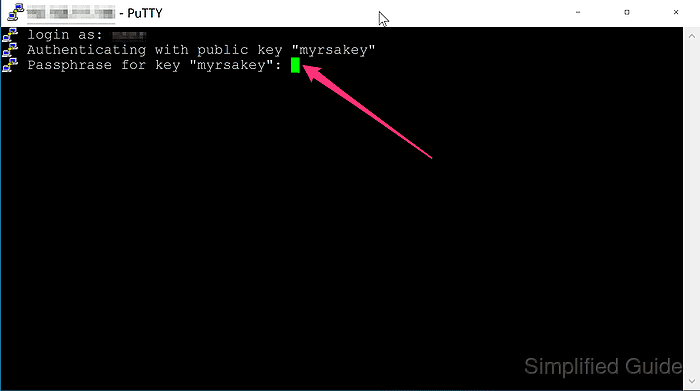
No passphrase prompt typically indicates the .ppk key was saved without encryption during conversion.
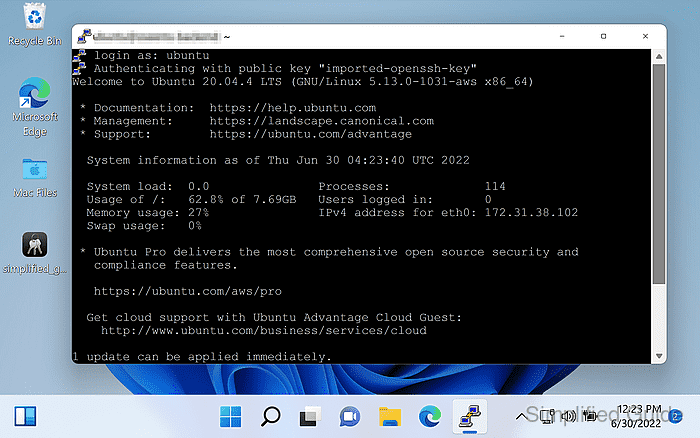
- Confirm the remote shell prompt is displayed after authentication.

Mohd Shakir Zakaria is a cloud architect with deep roots in software development and open-source advocacy. Certified in AWS, Red Hat, VMware, ITIL, and Linux, he specializes in designing and managing robust cloud and on-premises infrastructures.


