Network Discovery controls whether a Windows PC shows up in the Network browser and whether nearby devices are discoverable for file and printer sharing. Enabling it helps shared computers, printers, and media devices appear automatically on a trusted local network, while disabling it reduces visibility on untrusted networks.
In Windows 11, the setting is managed in Control Panel advanced sharing settings and applies per network profile (Private, Guest or Public, and Domain). Switching it on typically enables discovery components (including Function Discovery and common discovery traffic such as SSDP and UPnP) and allows the matching Windows Defender Firewall rules for that profile.
Network profile choice matters for security, since the Public profile is designed for untrusted environments and usually should not advertise local resources. On organization-managed devices, the Domain profile and sharing settings may be enforced by policy, and saving changes can require administrative approval.
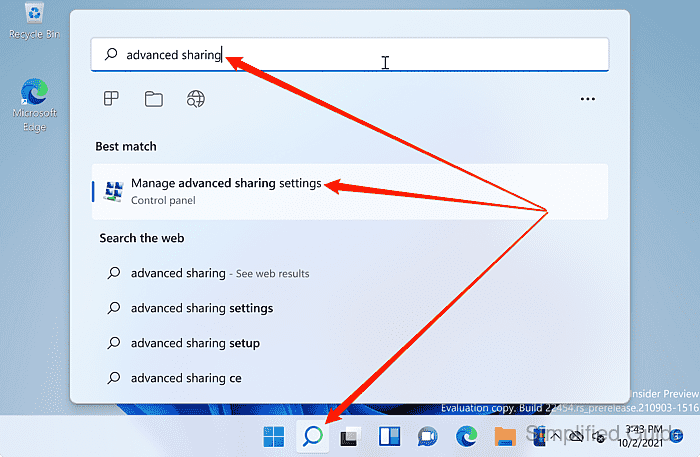
Steps to enable or disable Network Discovery in Windows 11:
- Open Control Panel advanced sharing settings from the Windows search bar.
- Expand the network profile to configure (Private, Guest or Public, or All Networks).
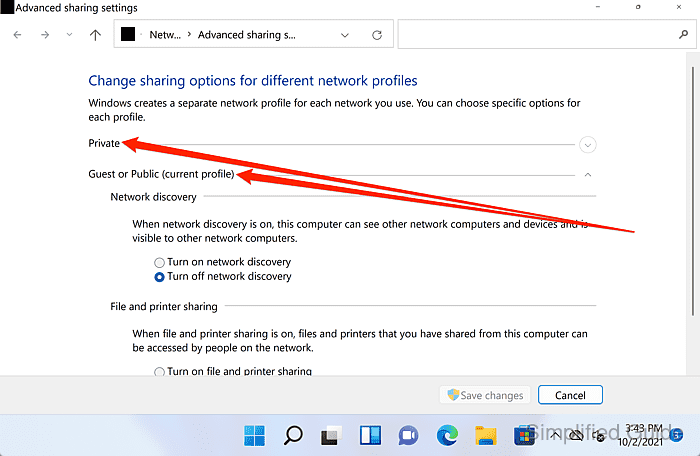
Network Discovery can be enabled for Private while remaining disabled for Public.
- Select Turn on network discovery or Turn off network discovery under Network discovery.
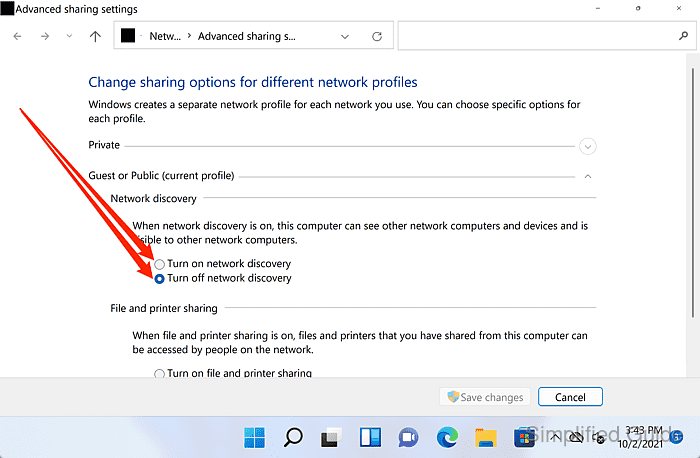
Enabling discovery on a Public profile increases network visibility on untrusted networks.
- Click Save changes to apply the setting.
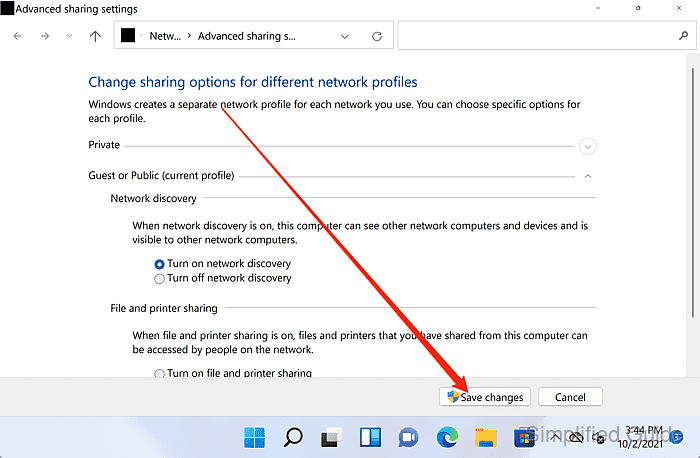
A User Account Control prompt may appear when saving changes.
- Open File Explorer → Network to confirm the expected discovery state.
When discovery is enabled, devices typically appear after a short delay; when disabled, the Network page commonly shows a banner indicating discovery is off.

Mohd Shakir Zakaria is a cloud architect with deep roots in software development and open-source advocacy. Certified in AWS, Red Hat, VMware, ITIL, and Linux, he specializes in designing and managing robust cloud and on-premises infrastructures.


