A trusted storage pool is the cluster membership layer for GlusterFS, allowing multiple servers to cooperate as a single storage system. Forming the pool first enables later steps like creating replicated or distributed volumes without fighting inconsistent peer identities and intermittent disconnects.

GlusterFS builds the pool by exchanging peer information through the glusterd management service on each node. When a peer is probed successfully, the node is registered by hostname and UUID, and cluster operations like volume create rely on that peer database to address servers consistently.
Reliable name resolution and bidirectional network reachability are mandatory before probing peers. Hostnames must resolve to the correct static IP on every node (via real DNS or consistent /etc/hosts entries), and firewalls must allow glusterd traffic between nodes; mismatched hostnames or multiple names for the same node commonly lead to duplicate peer entries and disconnected states.
Steps to set up a trusted storage pool for GlusterFS:
- Install GlusterFS on all server nodes.
- Open a terminal on each node.
- Open the /etc/hosts file on all nodes.
$ sudo vi /etc/hosts
[sudo] password for user:
- Add hostname entries for every cluster node on every node.
# IP               Name                   Alias
192.168.111.70    node1.gluster.local    node1
192.168.111.71    node2.gluster.local    node2
Use the same FQDN for each node everywhere, and ensure the node hostname does not resolve to 127.0.0.1 or 127.0.1.1.
- Ping each node name from each node to confirm name resolution and reachability.
$ ping -c3 node1
PING node1.gluster.local (192.168.111.70) 56(84) bytes of data.
64 bytes from node1.gluster.local (192.168.111.70): icmp_seq=1 ttl=64 time=0.018 ms
64 bytes from node1.gluster.local (192.168.111.70): icmp_seq=2 ttl=64 time=0.020 ms
64 bytes from node1.gluster.local (192.168.111.70): icmp_seq=3 ttl=64 time=0.035 ms

--- node1.gluster.local ping statistics ---
3 packets transmitted, 3 received, 0% packet loss, time 2029ms
rtt min/avg/max/mdev = 0.018/0.024/0.035/0.007 ms
$ ping -c3 node2
PING node2.gluster.local (192.168.111.71) 56(84) bytes of data.
64 bytes from node2.gluster.local (192.168.111.71): icmp_seq=1 ttl=64 time=1.72 ms
64 bytes from node2.gluster.local (192.168.111.71): icmp_seq=2 ttl=64 time=0.626 ms
64 bytes from node2.gluster.local (192.168.111.71): icmp_seq=3 ttl=64 time=0.410 ms

--- node2.gluster.local ping statistics ---
3 packets transmitted, 3 received, 0% packet loss, time 2015ms
rtt min/avg/max/mdev = 0.410/0.919/1.722/0.574 ms
If ICMP is filtered, name resolution still needs to work consistently for the gluster peer probe.
- Create the trusted storage pool by probing each additional node from the first node.
$ sudo gluster peer probe node2.gluster.local
peer probe: success.
Probing the same node under different names (alias vs FQDN) can create duplicate peer entries and require a detach/cleanup to recover.
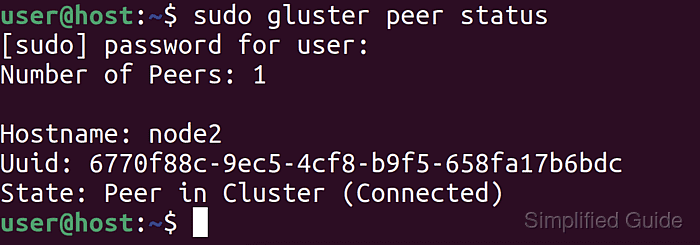
- Check the peer connection state from any node.
$ sudo gluster peer status
Number of Peers: 1

Hostname: node2.gluster.local
Uuid: 6770f88c-9ec5-4cf8-b9f5-658fa17b6bdc
State: Peer in Cluster (Connected)
- Verify the pool membership list from any node.
$ sudo gluster pool list
UUID          Hostname            State
bca7490b-64c2-46d1-ae9a-4577cc03625f  node1.gluster.local  Connected
6770f88c-9ec5-4cf8-b9f5-658fa17b6bdc  node2.gluster.local  Connected

Mohd Shakir Zakaria is a cloud architect with deep roots in software development and open-source advocacy. Certified in AWS, Red Hat, VMware, ITIL, and Linux, he specializes in designing and managing robust cloud and on-premises infrastructures.
