How to install WordPress on Ubuntu with Apache and MariaDB
Installing WordPress on Ubuntu with Apache and MariaDB gives a server a direct publishing stack without a control panel or distro-repackaged WordPress build. It fits a VPS or VM where the site needs a normal Apache virtual host, a local database, and upstream WordPress files under a dedicated document root.
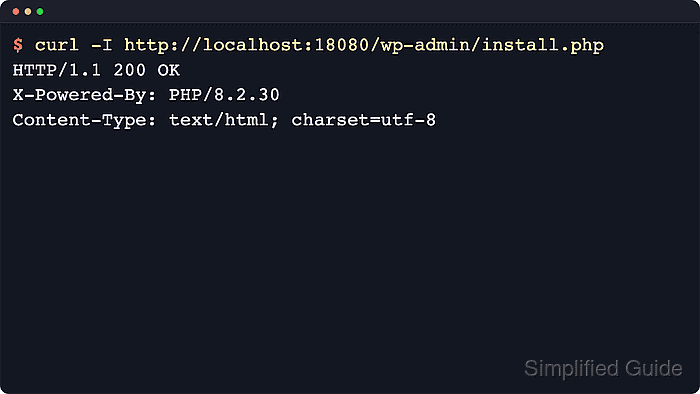
Ubuntu packages provide Apache, MariaDB, PHP, and the PHP extensions used by a typical WordPress site. WordPress itself comes from the official wordpress.org tarball, then wp-config.php connects that file tree to the local MariaDB database.
Start with sudo access, a hostname that resolves to the server, and an empty database dedicated to this site. Apache should return 200 OK from the installer endpoint before browser setup starts, and the finished site should respond from the home page after the initial administrator account is created.
Steps to install WordPress on Ubuntu with Apache and MariaDB:
- Open a terminal with sudo privileges.
- Refresh the package index.
$ sudo apt update
- Install Apache, MariaDB, PHP, and common WordPress PHP extensions.
$ sudo apt install --yes \
  apache2 mariadb-server php \
  libapache2-mod-php php-mysql \
  php-xml php-curl php-zip php-gd \
  php-intl php-mbstring ca-certificates \
  curl tar
Reading package lists... Done
Building dependency tree... Done
##### snipped #####
Current WordPress requirements call for PHP 8.3 or newer and MariaDB 10.6 or newer, or MySQL 8.0 or newer. Ubuntu 26.04 validation used PHP 8.5 and MariaDB 11.8 from the default repositories; older Ubuntu releases need package versions that meet the same minimums.
- Enable Apache and MariaDB at boot and start them now.
$ sudo systemctl enable --now apache2
$ sudo systemctl enable --now mariadb
Ubuntu uses the systemd unit names apache2 and mariadb for this stack.
- Confirm both services are active.
$ systemctl is-active apache2 mariadb
active
active
- Open the local MariaDB shell.
$ sudo mariadb
Ubuntu commonly authenticates the local MariaDB root account through the Unix socket, so sudo mariadb is usually the correct entry point.
- Create a dedicated WordPress database and database user.
MariaDB [(none)]> CREATE DATABASE wordpress
    -> CHARACTER SET utf8mb4
    -> COLLATE utf8mb4_unicode_ci;
MariaDB [(none)]> CREATE USER 'wordpress'@'localhost'
    -> IDENTIFIED BY 'wp_db_password_here';
MariaDB [(none)]> GRANT ALL PRIVILEGES
    -> ON wordpress.* TO 'wordpress'@'localhost';
MariaDB [(none)]> FLUSH PRIVILEGES;
MariaDB [(none)]> EXIT;
Replace wp_db_password_here with a unique password and reuse that same value only in wp-config.php.
- Set the document root path for the site.
$ DOCROOT=/var/www/example.com
- Create the dedicated document root.
$ sudo mkdir -p "$DOCROOT"
- Move to a temporary working directory.
$ cd /tmp
- Download the current WordPress tarball.
$ curl -fsSLO \
  https://wordpress.org/latest.tar.gz
- Extract the WordPress tarball.
$ tar -xzf latest.tar.gz
- Copy the extracted WordPress files into the document root.
$ sudo cp -a wordpress/. "$DOCROOT"
The dot after wordpress/ copies the contents of the extracted directory into the document root instead of nesting another wordpress directory below it.
- Move into the WordPress document root.
$ cd "$DOCROOT"
- Create wp-config.php from the sample file.
$ sudo cp wp-config-sample.php \
  wp-config.php
- Edit wp-config.php with the database values.
$ sudo nano wp-config.php
- wp-config.php
define( 'DB_NAME', 'wordpress' );
define( 'DB_USER', 'wordpress' );
define( 'DB_PASSWORD', 'wp_db_password_here' );
define( 'DB_HOST', 'localhost' );
Keep DB_HOST as localhost when MariaDB runs on the same server.
- Fetch new authentication keys and salts from the official WordPress API.
$ curl -s \
  https://api.wordpress.org/secret-key/1.1/salt/
Paste the returned define(… ) lines over the default authentication-key section in wp-config.php. Do not reuse keys copied from documentation or another site.
- Set the document root owner to the Apache runtime user.
$ sudo chown -R www-data:www-data .
- Set directory and file permissions across the WordPress tree.
$ sudo chmod -R u=rwX,g=rX,o=rX .
The capital X grants execute permission to directories while leaving ordinary files non-executable.
- Restrict wp-config.php permissions.
$ sudo chmod 640 wp-config.php
- Move to the Apache sites directory.
$ cd /etc/apache2/sites-available
- Create an Apache virtual host for the site.
$ sudo nano example.com.conf
- example.com.conf
<VirtualHost *:80>
    ServerName example.com
    ServerAlias www.example.com
    DocumentRoot /var/www/example.com

    <Directory /var/www/example.com>
        Options FollowSymLinks
        AllowOverride All
        Require all granted
        DirectoryIndex index.php
    </Directory>

</VirtualHost>
Replace example.com and www.example.com with the real hostname before enabling the virtual host.
- Enable the Apache rewrite module.
$ sudo a2enmod rewrite
WordPress permalinks depend on mod_rewrite when Apache serves the site directly.
Related: How to enable or disable Apache modules - Enable the new Apache virtual host.
$ sudo a2ensite example.com.conf
- Disable the default Apache site.
$ sudo a2dissite 000-default.conf
- Test the Apache configuration.
$ sudo apache2ctl configtest
Syntax OK
Syntax OK confirms the virtual host parses. If an AH00558 hostname warning also appears, it is separate from WordPress and can be fixed with a global ServerName if needed.
Related: How to test Apache configuration
Related: How to fix "Could not reliably determine the server’s fully qualified domain name" warning in Apache - Reload Apache so the virtual host becomes active.
$ sudo systemctl reload apache2
- Allow HTTP traffic if the host uses UFW.
$ sudo ufw allow Apache
Skip this command when UFW is inactive or when a cloud firewall, nftables, or another firewall layer already controls port 80.
- Verify that the WordPress installer endpoint responds.
$ curl -I --silent \
  http://www.example.com/wp-admin/install.php
HTTP/1.1 200 OK
Server: Apache/2.4.66 (Ubuntu)
Content-Type: text/html; charset=utf-8
If this check fails on a local-only build, confirm that the hostname resolves to the server in /etc/hosts before troubleshooting Apache, PHP, or MariaDB.
- Open the installer URL in a browser.
http://example.com/wp-admin/install.php
- Complete the initial site title, administrator account, and password setup.
If the page reports Already Installed instead of showing the first-run form, the target database already contains WordPress tables. Use an empty database or remove the old tables before retrying.
Related: How to configure SEO-friendly URLs in WordPress
Related: How to redirect HTTP to HTTPS in WordPress
Related: How to disable XML-RPC in WordPress - Verify that the finished site responds from the home page.
$ curl -I --silent http://www.example.com/
HTTP/1.1 200 OK
Server: Apache/2.4.66 (Ubuntu)
Content-Type: text/html; charset=UTF-8
- Remove the temporary WordPress download files.
$ rm -rf /tmp/wordpress /tmp/latest.tar.gz