How to export a virtual machine in VirtualBox
Exporting a virtual machine (VM) in VirtualBox allows you to create a backup or move it to another platform. By exporting, the entire virtual environment, including system configurations and disk images, is packaged into a format that can be reused. This is useful when migrating between VirtualBox, VMware, or other compatible platforms like QEMU. The exported appliance can be imported back into VirtualBox or other supported hypervisors.
VirtualBox supports exporting VMs to Open Virtualization Format (OVF), which is a widely used standard for virtual machine distribution. You can export the VM as an OVF folder with multiple files or as a single compressed OVA archive file. This flexibility allows the virtual machine to be used across different environments or stored for backup purposes.
Exporting a virtual machine helps maintain its configurations and settings across different systems. Whether you are using it for migration, backup, or deployment, the process ensures the VM's integrity is preserved. The export process is straightforward and allows you to tailor the output to your specific needs.
Related: How to import Virtual Machine to VirtualBox
Related: How to move VirtualBox VM to another drive or computer
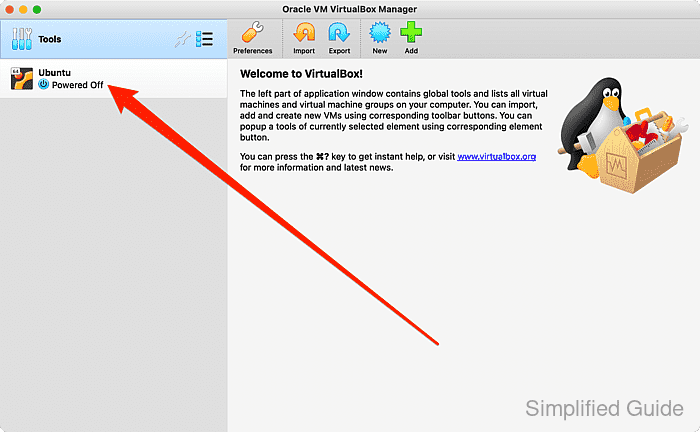
===== Steps to export a virtual machine from VirtualBox: ===== - Launch VirtualBox. 
- Ensure the virtual machine is powered off.
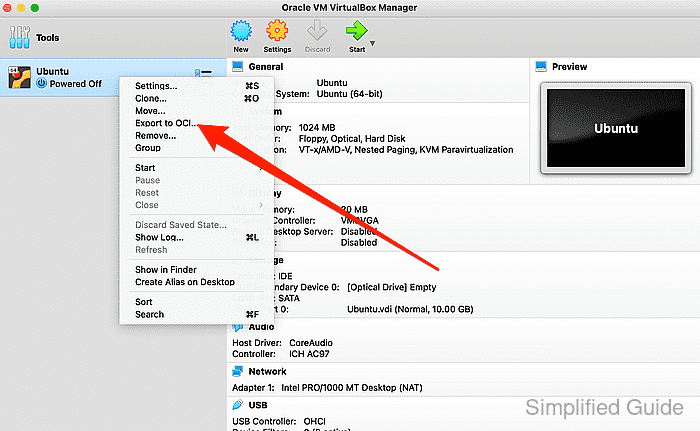
- Right-click the virtual machine and click on Export to OCI.
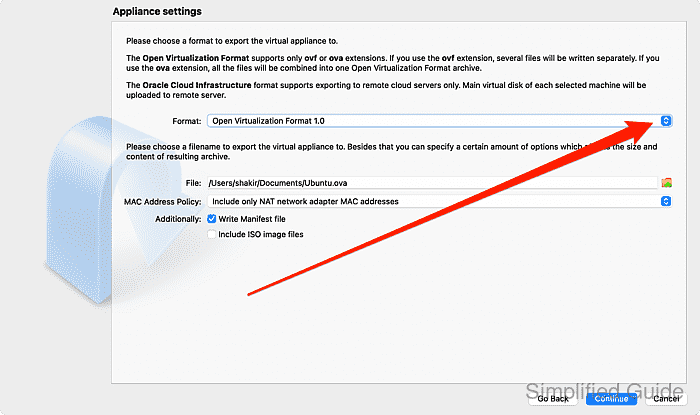
- In the export window, click on the dropdown for Format.
- Select the appropriate OVF version based on your requirements.
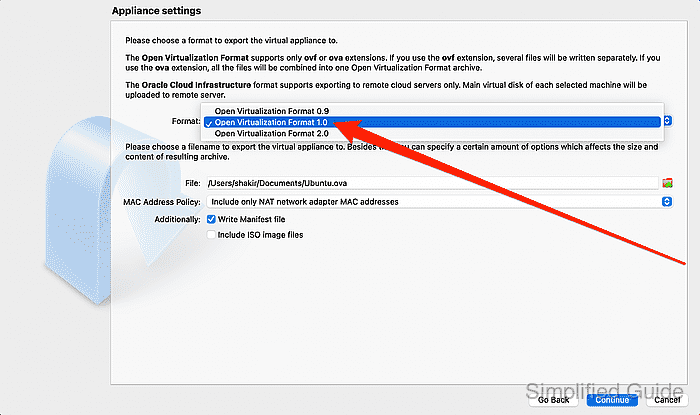
Newer versions may offer more features but could be incompatible with older software.
- Click on the folder icon to specify the target location for export.
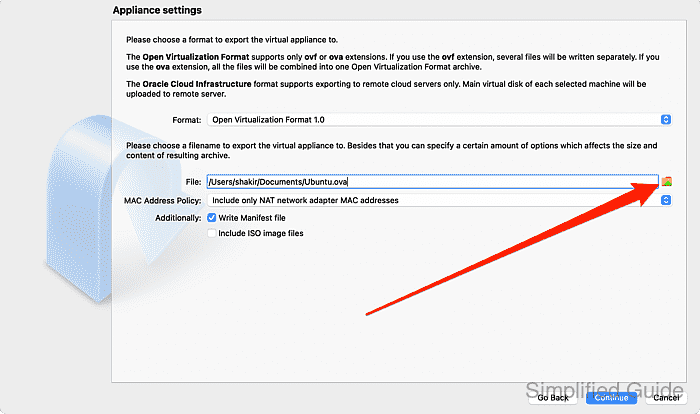
- Enter the target filename, select target location and click on Format dropdown list.
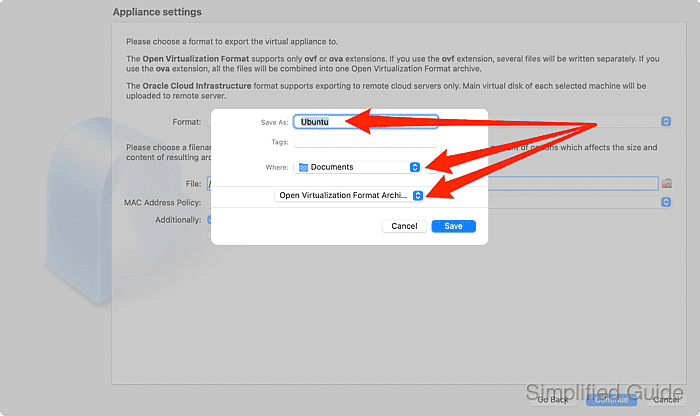
- Choose whether to export as ovf (multiple files) or ova (single archive file).
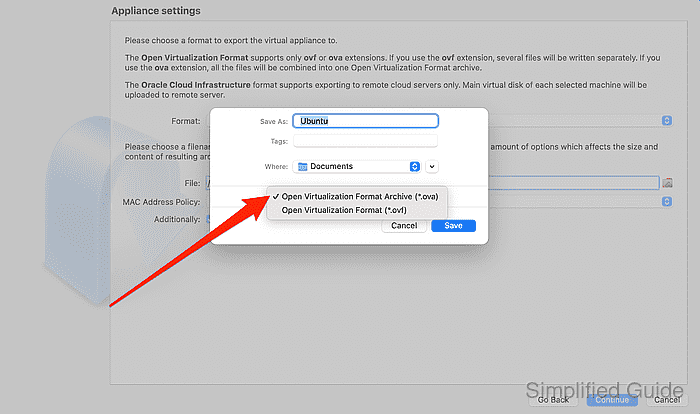
.ovf produces separate files for disks and metadata, while .ova creates a compressed file for easier transfer.
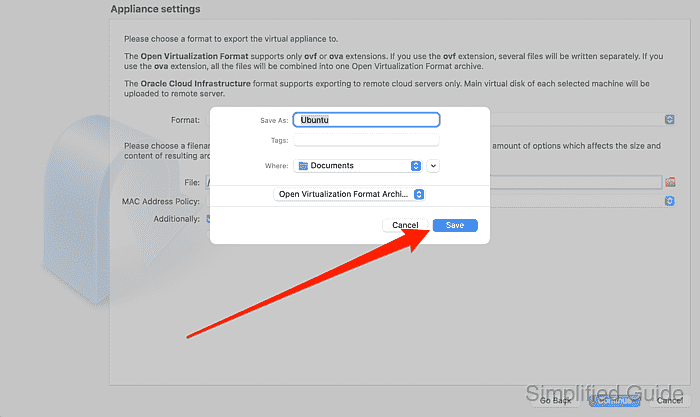
- Click on the Save button.
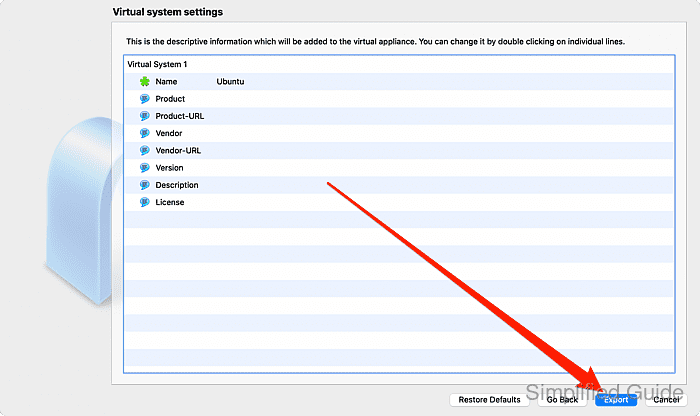
- Review the settings and parameters of the export and click on Export.
CLI method to export a virtual machine in VirtualBox:
You can also export a virtual machine using the command line interface with VBoxManage. Below is a step-by-step guide to export the VM as an .ovf or .ova file:
- List available virtual machines. This will display all virtual machines currently registered in VirtualBox.
VBoxManage list vms "Ubuntu-VM" {a-unique-uuid} "AnotherVM" {another-unique-uuid} - Export the virtual machine. This command exports the VM to an .ova or .ovf format, depending on the option provided.
VBoxManage export "Ubuntu-VM" --output ~/Exports/Ubuntu-VM.ova --ovf20
- Verify the export. This will confirm that the virtual machine has been successfully exported and saved at the specified location.
ls ~/Exports/Ubuntu-VM.ova