How to create a virtual environment in Python
Creating a Python virtual environment before installing project packages keeps dependency experiments, console scripts, and interpreter paths out of the base runtime. That separation matters when one project needs a package set that should not affect the operating system, editor integrations, automation jobs, or other repositories on the same host.
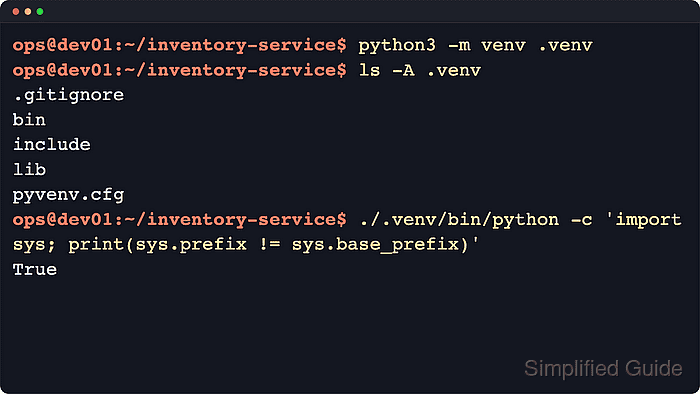
The built-in venv module creates a directory such as .venv with its own Python executable, activation scripts, private site-packages tree, and a pyvenv.cfg file that records the base interpreter. Python bootstraps pip by default unless --without-pip is used, and current releases also add a Git ignore file inside the environment by default.
The steps below use a POSIX shell with python3 and create .venv from the project root. If a Debian or Ubuntu interpreter reports that ensurepip is unavailable, install the matching python3-venv package first. On Windows, use py -m venv .venv and the scripts under .venv\Scripts, and recreate the environment instead of copying or moving it because installed scripts keep absolute interpreter paths.
Steps to create a Python virtual environment:
- Change to the project directory where the virtual environment should be created.
$ cd ~/inventory-service
Keeping the environment inside the project directory makes it easier to pair the interpreter with the correct source tree and dependency files.
- Confirm which Python interpreter will build the environment.
$ python3 --version
Python 3.14.4
Use the same interpreter command that will run the project, such as python or py when python3 is not the local command name. Related: How to check Python version
- Create the virtual environment in a dedicated directory such as .venv.
$ python3 -m venv .venv
The command normally returns no output on success and bootstraps pip into the environment unless --without-pip is used.
Add --upgrade-deps when the new environment should immediately update pip from PyPI instead of keeping only the bundled bootstrap version.
If Debian or Ubuntu reports that ensurepip is unavailable, install the matching python3-venv package for that interpreter and rerun the command.
- Inspect the new environment directory to confirm the expected files were created.
$ ls -A .venv
.gitignore
bin
include
lib
lib64
pyvenv.cfg
Current Python releases create a .gitignore file in the environment by default; use --without-scm-ignore-files if that behavior is not wanted. On Windows, the scripts and interpreter are created under .venv\Scripts instead of .venv/bin.
- Review the pyvenv.cfg file to verify which base interpreter created the environment and whether system packages are isolated.
$ cat .venv/pyvenv.cfg
home = /usr/bin
include-system-site-packages = false
version = 3.14.4
executable = /usr/bin/python3.14
command = /usr/bin/python3 -m venv /home/ops/inventory-service/.venv
The exact home and executable paths depend on how the base interpreter was installed, but include-system-site-packages = false remains the default isolated mode. Use --system-site-packages only when the environment must inherit packages from the base interpreter.
- Verify that the new environment owns its bundled pip without activating the shell.
$ ./.venv/bin/python -m pip --version
pip 25.1.1 from /home/ops/inventory-service/.venv/lib/python3.14/site-packages/pip (python 3.14)
The path after from should point inside the new .venv directory.
- Confirm that the interpreter is running from the virtual environment.
$ ./.venv/bin/python -c 'import sys; print(sys.prefix != sys.base_prefix)'
True
A True result is the standard interpreter-level check that the running Python process is using a virtual environment instead of the base interpreter.