How to create a self-signed certificate using OpenSSL
A self-signed certificate lets a private service present TLS before a public or internal certificate authority is part of the deployment. It works best for development, labs, and deliberate internal testing where the server name, certificate role, and private key location are controlled by the same operator.
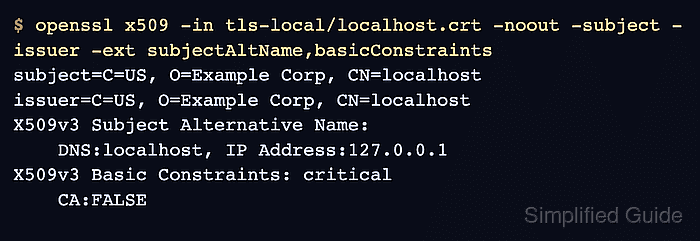
OpenSSL can create the private key with openssl genpkey and issue a self-signed X.509 certificate with openssl req -new -x509. The certificate uses server.example.com and www.example.com as DNS identities, stores the private key beside the certificate, and sets Basic Constraints to CA:FALSE so the certificate is not a local CA root.
Clients do not trust a self-signed leaf certificate automatically. Install trust only on the systems that should accept it, keep the private key owner-readable only, and create a local CA instead when several internal certificates need one reusable trust anchor.
Steps to create a self-signed certificate using OpenSSL:
- Create a restricted directory for the certificate and key.
$ install -m 700 -d tls-selfsigned
- Set a restrictive file-creation mask for the current shell.
$ umask 077
Files created after this command are not readable by group or other users unless a later command changes the mode explicitly.
- Generate an unencrypted RSA private key for the certificate.
$ openssl genpkey -quiet -algorithm RSA -pkeyopt rsa_keygen_bits:3072 -out tls-selfsigned/server.key
The private key is not encrypted. Keep the directory and key permissions restrictive, and use a passphrase-protected key when the target service and operating procedure can support one.
- Check that OpenSSL can read the private key.
$ openssl pkey -in tls-selfsigned/server.key -check -noout
Key is valid
- Create the self-signed certificate from the private key.
$ openssl req -new -x509 -sha256 -days 365 \
  -key tls-selfsigned/server.key \
  -out tls-selfsigned/server.crt \
  -subj "/C=US/O=Example Corp/CN=server.example.com" \
  -addext "subjectAltName = DNS:server.example.com,DNS:www.example.com" \
  -addext "basicConstraints = critical,CA:FALSE" \
  -addext "keyUsage = critical,digitalSignature,keyEncipherment" \
  -addext "extendedKeyUsage = serverAuth"
Change the subject and Subject Alternative Name list before creating a certificate for a different host. Use DNS: entries for hostnames and IP: entries for literal IP addresses.
- Make the public certificate readable by the target service or deployment user.
$ chmod 644 tls-selfsigned/server.crt
- Check the certificate and key file permissions.
$ ls -l tls-selfsigned
total 8
-rw-r--r-- 1 user user 1696 Jun 30 08:25 server.crt
-rw------- 1 user user 2484 Jun 30 08:25 server.key
- Inspect the certificate subject, issuer, validity, and TLS server extensions.
$ openssl x509 -in tls-selfsigned/server.crt -noout \ -subject -issuer -dates \ -ext subjectAltName,basicConstraints,keyUsage,extendedKeyUsage subject=C=US, O=Example Corp, CN=server.example.com issuer=C=US, O=Example Corp, CN=server.example.com notBefore=Jun 30 08:25:17 2026 GMT notAfter=Jun 30 08:25:17 2027 GMT X509v3 Subject Alternative Name: DNS:server.example.com, DNS:www.example.com X509v3 Basic Constraints: critical CA:FALSE X509v3 Key Usage: critical Digital Signature, Key Encipherment X509v3 Extended Key Usage: TLS Web Server Authentication - Confirm the certificate matches the primary DNS name clients will use.
$ openssl x509 -in tls-selfsigned/server.crt -noout -checkhost server.example.com
Hostname server.example.com does match certificate
- Verify the self-signed certificate as a trusted server certificate when this exact file is the trust anchor.
$ openssl verify -CAfile tls-selfsigned/server.crt \
  -purpose sslserver -verify_hostname server.example.com \
  tls-selfsigned/server.crt
tls-selfsigned/server.crt: OK
- Extract the public key from the certificate.
$ openssl x509 -in tls-selfsigned/server.crt -pubkey -noout -out tls-selfsigned/server.crt.pub
- Extract the public key from the private key.
$ openssl pkey -in tls-selfsigned/server.key -pubout -out tls-selfsigned/server.key.pub
- Compare the public keys to prove the certificate and private key belong together.
$ diff -s tls-selfsigned/server.key.pub tls-selfsigned/server.crt.pub
Files tls-selfsigned/server.key.pub and tls-selfsigned/server.crt.pub are identical
- Remove the temporary public-key comparison files.
$ rm tls-selfsigned/server.crt.pub tls-selfsigned/server.key.pub