How to restore Nextcloud from backup
A full Nextcloud recovery has to bring application files and database rows back to the same point in time. That matters after a failed server, bad upgrade, storage loss, or migration rollback where ordinary file recovery is not enough.
The restore set must come from one recovery point. Mixing a newer database with older user files, or an older config with newer app files, can leave file indexes, app settings, and sync clients disagreeing about the recovered state.
Use a disposable restore target when possible, and keep public traffic blocked until the recovered instance passes its checks. The target environment uses a MariaDB database and a Linux install under /var/www/nextcloud; replace paths, database names, and the web-server user to match the server being recovered.
Related: How to create a Nextcloud backup
Related: How to run Nextcloud occ commands
Steps to restore Nextcloud from backup:
- Choose one matching backup set for the restore.
The set should contain the Nextcloud configuration directory, data directory, database dump, and any custom themes from the same recovery point. Example paths used below are under /srv/backups/nextcloud.
- Change into the Nextcloud installation directory.
$ cd /var/www/nextcloud
Use the directory that contains the occ file. Archive, package, and container installs can use different web-root paths.
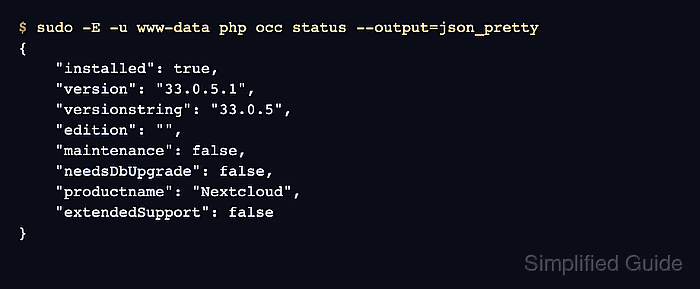
- Check the current instance status when occ still works.
$ sudo -E -u www-data php occ status --output=json_pretty
{
    "installed": true,
    "version": "33.0.5.1",
    "versionstring": "33.0.5",
    "edition": "",
    "maintenance": false,
    "needsDbUpgrade": false,
    "productname": "Nextcloud",
    "extendedSupport": false
}
Replace www-data with the HTTP user used by the server.
- Put the current instance into maintenance mode if it is still reachable.
$ sudo -E -u www-data php occ maintenance:mode --on
Maintenance mode enabled
If the old instance cannot run occ, block web access at the proxy, firewall, or service layer before restoring. User writes during restore can mix old and recovered state.
- Restore the configuration directory from the backup.
$ sudo rsync -a --delete /srv/backups/nextcloud/config/ /var/www/nextcloud/config/
The --delete option removes destination files that are not in the selected backup. Confirm the source path before running it.
- Restore the data directory from the same backup set.
$ sudo rsync -a --delete /srv/backups/nextcloud/data/ /var/www/nextcloud/data/
Do not restore over a data directory that contains newer production uploads unless the recovery decision explicitly discards those changes.
- Restore custom themes when the backup set includes them.
$ sudo rsync -a --delete /srv/backups/nextcloud/themes/ /var/www/nextcloud/themes/
Skip this step when the instance never used custom themes or the full installation directory was restored as one unit.
- Re-enable maintenance mode after the restored config is in place.
$ sudo -E -u www-data php occ maintenance:mode --on
Maintenance mode enabled
A restored /config/config.php can contain the backup's old maintenance value, so set the lock again before rebuilding the database.
- Drop and recreate the Nextcloud database.
$ mariadb -h db.example.com -u dbadmin -p -e "DROP DATABASE nextcloud; CREATE DATABASE nextcloud CHARACTER SET utf8mb4 COLLATE utf8mb4_general_ci; GRANT ALL PRIVILEGES ON nextcloud.* TO 'nextcloud'@'app.example.com'; FLUSH PRIVILEGES;"
Enter password:
Dropping the wrong database destroys live data. Confirm the host, database name, and restore target before running the command.
- Import the database dump from the selected backup set.
$ mariadb -h db.example.com -u nextcloud -p nextcloud < /srv/backups/nextcloud/db/nextcloud.sql
Enter password:
Add --default-character-set=utf8mb4 when the backup was created from a MariaDB setup that uses Nextcloud's 4-byte support.
- Update the data fingerprint after restoring the files and database.
$ sudo -E -u www-data php occ maintenance:data-fingerprint
Updated data-fingerprint to b8a2bebb54aa14aac45cf84f4b10c956
maintenance:data-fingerprint tells sync clients that server-side data changed outside their normal sync path.
- Disable maintenance mode before running a file scan.
$ sudo -E -u www-data php occ maintenance:mode --off
Maintenance mode disabled
files:scan is unavailable while maintenance mode is on because app commands are not loaded. Keep public traffic blocked until the scan and smoke test pass.
- Scan restored files when the data directory may not match the restored database index.
$ sudo -E -u www-data php occ files:scan --all
Starting scan for user 1 out of 1 (admin)
+---------+-------+-----+---------+---------+--------+--------------+
| Folders | Files | New | Updated | Removed | Errors | Elapsed time |
+---------+-------+-----+---------+---------+--------+--------------+
| 5       | 64    | 0   | 0       | 0       | 0      | 00:00:00     |
+---------+-------+-----+---------+---------+--------+--------------+
Large installations can take much longer. Use a specific user ID instead of --all when only one user's externally restored files need indexing.
Related: How to scan files with Nextcloud occ - Check the restored server status.
$ sudo -E -u www-data php occ status --output=json_pretty { "installed": true, "version": "33.0.5.1", "versionstring": "33.0.5", "edition": "", "maintenance": false, "needsDbUpgrade": false, "productname": "Nextcloud", "extendedSupport": false } - Request the public status endpoint before reopening normal traffic.
$ curl -sS https://cloud.example.com/status.php
{"installed":true,"maintenance":false,"needsDbUpgrade":false,"version":"33.0.5.1","versionstring":"33.0.5","edition":"","productname":"Nextcloud","extendedSupport":false}
After the endpoint returns the expected state, sign in as a normal user and open a known restored file before declaring the recovery complete.