How to create a GlusterFS trusted storage pool
A GlusterFS trusted storage pool has to exist before any volume can span multiple storage servers. If nodes resolve each other by the wrong name or join through a temporary address, later volume creation can inherit peer entries that are disconnected, duplicated, or hard to remove.
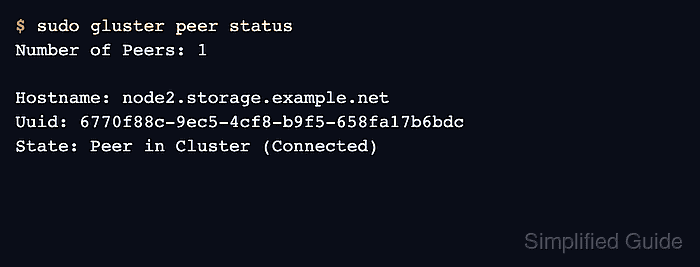
The pool is managed by glusterd, the management daemon that accepts gluster CLI requests and shares peer state between storage nodes. A successful peer probe adds another server to the trusted pool, and peer status should show each remote peer as Peer in Cluster (Connected) before bricks are assigned to a volume.
Use one stable hostname per node across the whole cluster. Internal DNS is usually better than hand-maintained files, but consistent /etc/hosts entries work for small clusters when every node has the same mapping. The management port must also be reachable between nodes before the probe runs, otherwise the command can fail or leave a peer in a disconnected state.
Steps to create a GlusterFS trusted storage pool:
- Install GlusterFS server packages on every storage node.
- Enable and start glusterd on each storage node.
$ sudo systemctl enable --now glusterd
- Check the glusterd service state on each node.
$ sudo systemctl status glusterd ● glusterd.service - GlusterFS, a clustered file-system server Loaded: loaded (/usr/lib/systemd/system/glusterd.service; enabled; preset: enabled) Active: active (running) since Tue 2026-06-16 10:14:21 UTC; 2min ago ##### snipped ##### - Add matching host entries on every node if internal DNS does not already provide the storage names.
# GlusterFS storage nodes
192.0.2.11    node1.storage.example.net    node1
192.0.2.12    node2.storage.example.net    node2
Use the same fully qualified name for each node everywhere. Do not probe the same server once by alias and again by FQDN.
- Check hostname resolution from each storage node.
$ getent hosts node1.storage.example.net node2.storage.example.net
192.0.2.11    node1.storage.example.net node1
192.0.2.12    node2.storage.example.net node2
Replace the documentation addresses with the real storage-network addresses. Hostnames that resolve to 127.0.0.1 or 127.0.1.1 are not suitable peer names.
- Check that the glusterd management port is reachable from the first node to the peer.
$ nc -vz node2.storage.example.net 24007
Connection to node2.storage.example.net (192.0.2.12) 24007 port [tcp/*] succeeded!
Repeat the reachability check for every peer direction that a firewall, security group, or routed storage network could block.
- Probe the second node from a node that is already in the pool.
$ sudo gluster peer probe node2.storage.example.net
peer probe: success.
Probe new servers from an existing trusted-pool member. A new, untrusted server cannot add itself to an established pool.
- Register the first node name from the added peer when hostname consistency needs to be enforced.
$ sudo gluster peer probe node1.storage.example.net
peer probe: success.
Run this from node2.storage.example.net after the first probe if peer output shows the first server as an IP address or localhost instead of the intended storage hostname.
- Check the peer connection state from the first node.
$ sudo gluster peer status
Number of Peers: 1

Hostname: node2.storage.example.net
Uuid: 6770f88c-9ec5-4cf8-b9f5-658fa17b6bdc
State: Peer in Cluster (Connected)
- List the full trusted pool from the first node.
$ sudo gluster pool list
UUID                                    Hostname                   State
bca7490b-64c2-46d1-ae9a-4577cc03625f    localhost                  Connected
6770f88c-9ec5-4cf8-b9f5-658fa17b6bdc    node2.storage.example.net   Connected
localhost is the node where the command is running. The remote peer should appear by the same stable hostname used during the probe.