A Voronoi diagram partitions a coordinate plane into cells whose locations are closest to one input point. SciPy exposes the vertices and ridges behind those cells, so the same result can support geometry analysis as well as a saved plot.
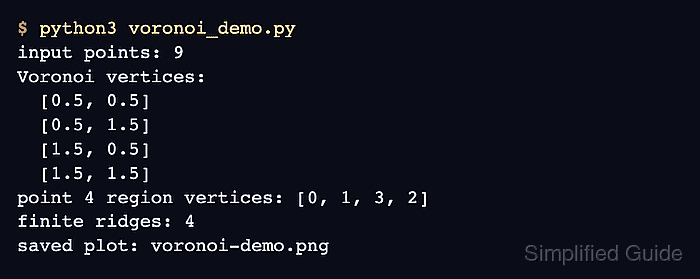
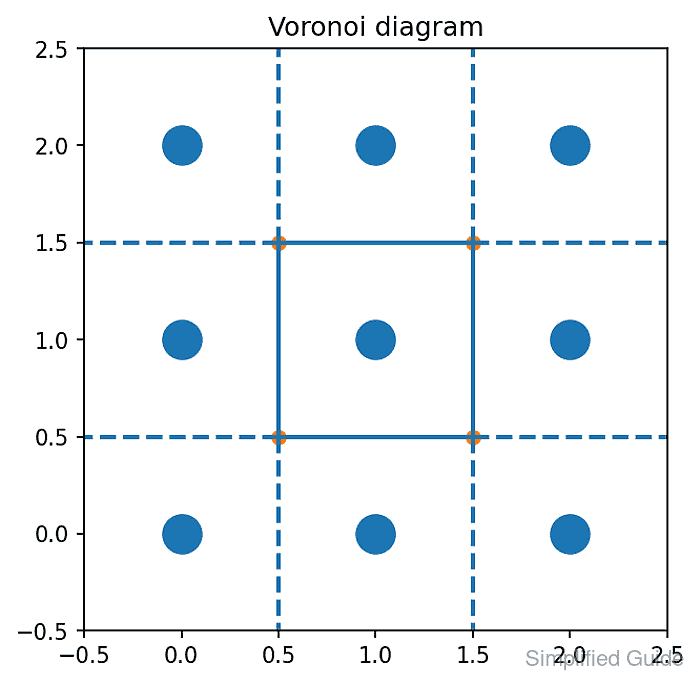
The script uses a regular three-by-three point grid because its center point produces one bounded region with four finite vertices. point_region identifies that cell, while a -1 entry in other region lists marks a boundary that extends to infinity.
SciPy's voronoi_plot_2d() handles the 2-D visualization and requires Matplotlib. The non-interactive Agg backend writes a PNG without opening a desktop window, which keeps the script usable from a terminal or another headless runtime.
Steps to create a Voronoi diagram with SciPy:
- Create voronoi_demo.py with the headless plotting imports.
- voronoi_demo.py
import matplotlib

matplotlib.use("Agg")

import numpy as np
from pathlib import Path
from scipy.spatial import Voronoi, voronoi_plot_2d
- Append the nine-point coordinate array to voronoi_demo.py.
points = np.array(
    [
        [0.0, 0.0],
        [0.0, 1.0],
        [0.0, 2.0],
        [1.0, 0.0],
        [1.0, 1.0],
        [1.0, 2.0],
        [2.0, 0.0],
        [2.0, 1.0],
        [2.0, 2.0],
    ]
)
- Append the Voronoi construction and bounded-center check to voronoi_demo.py.
vor = Voronoi(points)
center_point = 4
center_region = vor.regions[vor.point_region[center_point]]

if not center_region or -1 in center_region:
    raise RuntimeError("The center point did not produce a bounded region")

finite_ridges = sum(-1 not in ridge for ridge in vor.ridge_vertices)
Duplicate, collinear, or nearly degenerate points can raise QhullError. The QJ Qhull option adds small perturbations, but it changes how Qhull resolves the geometry.
- Append the PNG rendering block to voronoi_demo.py.
fig = voronoi_plot_2d(
    vor,
    show_vertices=True,
    line_colors="tab:blue",
    line_width=2,
    point_size=35,
)
ax = fig.axes[0]
ax.set_aspect("equal", adjustable="box")
ax.set_xlim(-0.5, 2.5)
ax.set_ylim(-0.5, 2.5)
ax.set_title("Voronoi diagram")

output_path = Path("voronoi-demo.png")
fig.savefig(output_path, dpi=150, bbox_inches="tight")

print("bounded center region:", center_region)
print("finite ridges:", finite_ridges)
print("saved plot:", output_path)
- Run voronoi_demo.py from its directory to create voronoi-demo.png.
$ python3 voronoi_demo.py
bounded center region: [0, 1, 3, 2]
finite ridges: 4
saved plot: voronoi-demo.png
- Load voronoi-demo.png with Matplotlib to confirm the saved image is readable.
$ python3 -c 'import matplotlib.image as mpimg; image = mpimg.imread("voronoi-demo.png"); print(f"readable PNG: {image.shape[1]} x {image.shape[0]} pixels")'
readable PNG: 666 x 650 pixels

Mohd Shakir Zakaria is a cloud architect with deep roots in software development and open-source advocacy. Certified in AWS, Red Hat, VMware, ITIL, and Linux, he specializes in designing and managing robust cloud and on-premises infrastructures.


