A static HTML page becomes interactive when the browser reaches JavaScript that can find and change page elements. Loading a separate .js file with a deferred <script> tag keeps the markup readable and gives the script access to DOM nodes after the browser has parsed them.
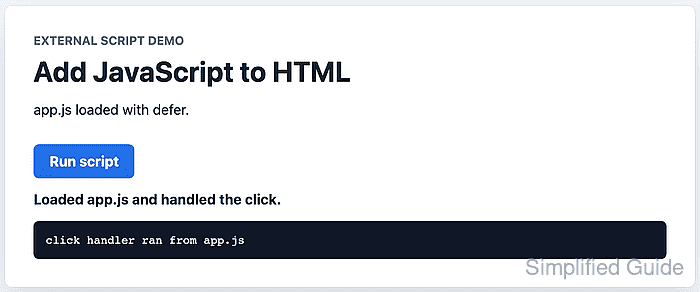
The <script> element either contains JavaScript directly or references a file with src. For maintainable page behavior, keep the JavaScript in an external file and use defer so the browser downloads it during parsing, then runs it after the document structure is ready.
A two-file page is enough for the check. index.html holds the button and status elements, while app.js changes their text after loading and after a click. Browser console checks confirm that the script ran in the page instead of merely existing as a tag.
Related: Load JavaScript with defer
Related: Add a JavaScript event listener
Tool: HTML Boilerplate Generator
Steps to add JavaScript to HTML:
- Create the HTML page with a deferred external script tag.
- index.html
<!doctype html>
<html lang="en">
<head>
  <meta charset="utf-8">
  <meta name="viewport" content="width=device-width, initial-scale=1">
  <title>JavaScript embed demo</title>
  <script src="app.js" defer></script>
</head>
<body>
  <p id="script-status" role="status">Waiting for app.js.</p>
  <button id="show-message" type="button">Run script</button>
  <output id="message-output" aria-live="polite">Button has not run yet.</output>
  <pre id="script-log">script event log will appear here</pre>
</body>
</html>
Use defer only on external classic scripts. Module scripts with type="module" defer by default, and defer has no effect on inline script blocks.
- Create the external JavaScript file in the same directory.
- app.js
const button = document.querySelector("#show-message");
const status = document.querySelector("#script-status");
const output = document.querySelector("#message-output");
const log = document.querySelector("#script-log");

if (!button || !status || !output || !log) {
  throw new Error("The HTML elements for the script demo were not found.");
}

status.textContent = "app.js loaded with defer.";
button.dataset.ready = "true";
log.textContent = "app.js selected the button and status elements.";

button.addEventListener("click", () => {
  output.textContent = "Loaded app.js and handled the click.";
  log.textContent = "click handler ran from app.js";
});
Keep reusable behavior in a .js file. Reserve inline event attributes such as onclick for throwaway demos because they mix behavior into the markup.
Related: Add a JavaScript event listener - Open index.html in a browser.
- Click Run script.
- Confirm the deferred script loaded and attached to the button.
> document.querySelector("#script-status").textContent
"app.js loaded with defer."
> document.querySelector("#show-message").dataset.ready
"true"
The data-ready value is set by app.js after it selects the button. If it is missing, check the script path, file name, and element IDs.
- Confirm the click handler updated the page.
> document.querySelector("#message-output").textContent
"Loaded app.js and handled the click."
> document.querySelector("#script-log").textContent
"click handler ran from app.js"

Mohd Shakir Zakaria is a cloud architect with deep roots in software development and open-source advocacy. Certified in AWS, Red Hat, VMware, ITIL, and Linux, he specializes in designing and managing robust cloud and on-premises infrastructures.


