CRUSH device classes let Ceph split placement by storage media without maintaining separate host trees for every tier. They are useful in mixed clusters where capacity HDD pools, SSD metadata pools, and NVMe latency pools must target different OSD sets.
Ceph automatically assigns hdd, ssd, or nvme to most OSDs at startup from the backing device type. Operators set a class manually when the automatic class is missing, wrong, or too broad for the placement policy, such as separating NVMe devices from other solid-state drives.
An existing class must be removed before another class can be assigned. Class changes alter the shadow CRUSH hierarchy that class-targeted rules use, so inspect current membership and wait for placement groups to settle before assigning a production pool to a new rule.
Related: How to check Ceph cluster health
Related: How to create a replicated pool in Ceph
Related: How to add an OSD device to Ceph
Steps to set a CRUSH device class in Ceph:
- Check cluster health before changing CRUSH classes.
$ ceph -s
  cluster:
    id:     11111111-2222-3333-4444-555555555555
    health: HEALTH_OK

  services:
    mon: 3 daemons, quorum ceph-node1,ceph-node2,ceph-node3
    mgr: ceph-admin(active)
    osd: 8 osds: 8 up, 8 in

  data:
    pools:   4 pools, 128 pgs
    objects: 1.20M objects, 3.8 TiB
    usage:   11 TiB used, 37 TiB / 48 TiB avail
    pgs:     128 active+clean
Delay class changes while placement groups are degraded, remapped, backfilling, or stuck. A class-targeted rule can move data as soon as a pool uses it.
Related: How to check Ceph cluster health - List OSDs and their current classes.
$ ceph osd tree
ID  CLASS  WEIGHT    TYPE NAME             STATUS  REWEIGHT  PRI-AFF
-1         24.00000  root default
-3         12.00000      host ceph-node1
10    hdd   6.00000          osd.10            up   1.00000  1.00000
12    ssd   6.00000          osd.12            up   1.00000  1.00000
-5         12.00000      host ceph-node2
11    hdd   6.00000          osd.11            up   1.00000  1.00000
13    ssd   6.00000          osd.13            up   1.00000  1.00000
The target OSDs are osd.12 and osd.13, which should be moved from the broad ssd class to the more specific nvme class.
- Clear the existing class from the target OSDs when the class must change.
$ ceph osd crush rm-device-class osd.12 osd.13
Clearing a class removes those OSDs from the matching shadow hierarchy. Pools already using a class-specific rule can remap data away from those OSDs.
- Assign the new CRUSH device class.
$ ceph osd crush set-device-class nvme osd.12 osd.13
Use the class name that matches the placement policy, such as hdd, ssd, nvme, archive, or another local tier name.
- Confirm the class on the target OSDs.
$ ceph osd tree
ID  CLASS  WEIGHT    TYPE NAME             STATUS  REWEIGHT  PRI-AFF
-1         24.00000  root default
-3         12.00000      host ceph-node1
10    hdd   6.00000          osd.10            up   1.00000  1.00000
12   nvme   6.00000          osd.12            up   1.00000  1.00000
-5         12.00000      host ceph-node2
11    hdd   6.00000          osd.11            up   1.00000  1.00000
13   nvme   6.00000          osd.13            up   1.00000  1.00000
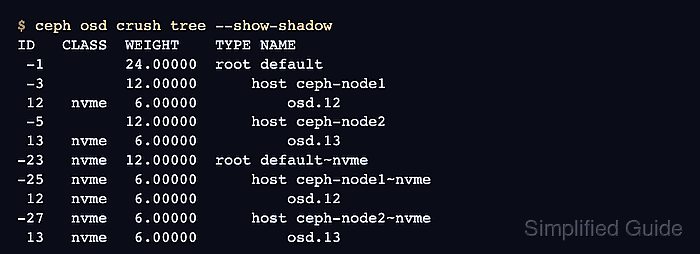
- Inspect the class shadow hierarchy.
$ ceph osd crush tree --show-shadow
ID   CLASS  WEIGHT    TYPE NAME
 -1         24.00000  root default
 -3         12.00000      host ceph-node1
 10    hdd   6.00000          osd.10
 12   nvme   6.00000          osd.12
 -5         12.00000      host ceph-node2
 11    hdd   6.00000          osd.11
 13   nvme   6.00000          osd.13
-17    hdd  12.00000  root default~hdd
-19    hdd   6.00000      host ceph-node1~hdd
 10    hdd   6.00000          osd.10
-21    hdd   6.00000      host ceph-node2~hdd
 11    hdd   6.00000          osd.11
-23   nvme  12.00000  root default~nvme
-25   nvme   6.00000      host ceph-node1~nvme
 12   nvme   6.00000          osd.12
-27   nvme   6.00000      host ceph-node2~nvme
 13   nvme   6.00000          osd.13
The default~nvme shadow root contains only OSDs in the nvme class. Class-targeted CRUSH rules place data through that shadow tree.
- Create a replicated CRUSH rule for the class when a pool should use it.
$ ceph osd crush rule create-replicated replicated-nvme default host nvme
The rule starts at the default root, spreads replicas across host buckets, and restricts placement to the nvme class.
Related: How to create a replicated pool in Ceph - Verify the new rule targets the class shadow tree.
$ ceph osd crush rule dump replicated-nvme { "rule_id": 5, "rule_name": "replicated-nvme", "type": 1, "steps": [ { "op": "take", "item": -23, "item_name": "default~nvme" }, { "op": "chooseleaf_firstn", "num": 0, "type": "host" }, { "op": "emit" } ] } - Assign the rule to the target pool after confirming the pool is ready for movement.
$ ceph osd pool set fastdata crush_rule replicated-nvme
set pool 8 crush_rule to replicated-nvme
Changing a pool's crush_rule can move existing objects. Apply the rule during a maintenance window when the pool already contains production data.
- Confirm the pool uses the class-targeted rule.
$ ceph osd pool get fastdata crush_rule
crush_rule: replicated-nvme
- Check cluster health after the pool remaps.
$ ceph -s
  cluster:
    id:     11111111-2222-3333-4444-555555555555
    health: HEALTH_OK

  services:
    mon: 3 daemons, quorum ceph-node1,ceph-node2,ceph-node3
    mgr: ceph-admin(active)
    osd: 8 osds: 8 up, 8 in

  data:
    pools:   4 pools, 128 pgs
    objects: 1.20M objects, 3.8 TiB
    usage:   11 TiB used, 37 TiB / 48 TiB avail
    pgs:     128 active+clean

Mohd Shakir Zakaria is a cloud architect with deep roots in software development and open-source advocacy. Certified in AWS, Red Hat, VMware, ITIL, and Linux, he specializes in designing and managing robust cloud and on-premises infrastructures.


