How to install WordPress on Fedora or RHEL-compatible Linux
Installing WordPress on Fedora or RHEL-compatible Linux pairs the upstream application files with distribution-managed Apache, PHP-FPM, and MariaDB packages. That layout fits administrators who want a normal virtual host, predictable service names, and a filesystem tree that follows the package and security conventions of dnf-based systems.
Current Fedora and RHEL-family hosts serve PHP through php-fpm while httpd owns the public virtual host. The packaged php.conf file connects Apache to the PHP-FPM socket, MariaDB stores the site data, and wp-config.php holds the database credentials that let the installer create the first tables.
A dedicated document root under /var/www, a local database, and an HTTP virtual host keep the first install easy to inspect before HTTPS is added. Enforcing SELinux systems need a writable label on the upload directory, and hosts with firewalld need port 80 allowed before remote browsers can reach the first-run installer.
Steps to install WordPress with Apache, MariaDB, and PHP-FPM on Fedora or RHEL-compatible Linux:
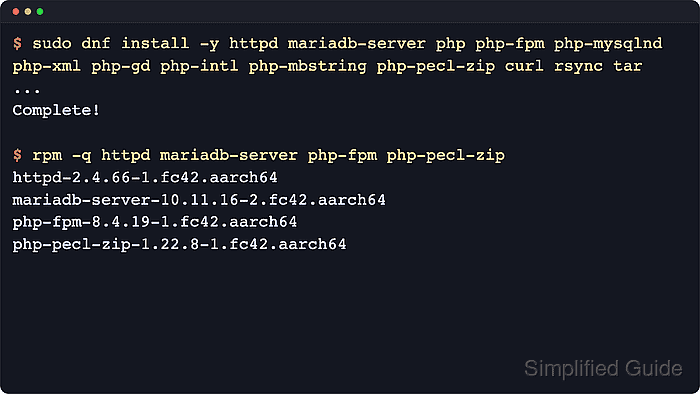
- Install Apache, MariaDB, PHP-FPM, and common WordPress PHP extensions.
$ sudo dnf install --assumeyes httpd mariadb-server php php-fpm php-mysqlnd php-xml php-gd php-intl php-mbstring php-pecl-zip php-curl php-opcache ca-certificates curl rsync tar
WordPress recommends PHP 8.3 or newer, MariaDB 10.6 or newer or MySQL 8.0 or newer, Apache or Nginx with rewrite support, and HTTPS. Use vendor-supported repositories that meet those versions on older RHEL-compatible releases.
- Enable the Apache, MariaDB, and PHP-FPM services at boot and start them now.
$ sudo systemctl enable --now httpd mariadb php-fpm
- Confirm that the web, database, and PHP services are active.
$ systemctl is-active httpd mariadb php-fpm
active
active
active
RHEL-family Apache packages use the httpd service name, and PHP requests depend on the separate php-fpm service.
- Allow inbound HTTP traffic when firewalld manages the host firewall.
$ sudo firewall-cmd --permanent --add-service=http
success
$ sudo firewall-cmd --reload
success
Skip this step when another firewall layer, load balancer, or cloud security group controls port 80 instead.
- Open the local MariaDB shell.
$ sudo mariadb
Fresh MariaDB packages commonly authenticate the local root account through the Unix socket, so sudo mariadb is the expected entry point.
- Create a dedicated WordPress database and user.
MariaDB [(none)]> CREATE DATABASE wordpress CHARACTER SET utf8mb4 COLLATE utf8mb4_unicode_ci;
MariaDB [(none)]> CREATE USER 'wordpress'@'localhost' IDENTIFIED BY 'strong_password_here';
MariaDB [(none)]> GRANT ALL PRIVILEGES ON wordpress.* TO 'wordpress'@'localhost';
MariaDB [(none)]> FLUSH PRIVILEGES;
MariaDB [(none)]> EXIT;
Replace strong_password_here with a unique password that is not reused for another account.
- Create a dedicated document root for the site.
$ sudo mkdir -p /var/www/example.com/public_html
- Download the current WordPress tarball into /tmp.
$ curl -fsSLo /tmp/latest.tar.gz https://wordpress.org/latest.tar.gz
- Extract the WordPress tarball.
$ tar -xzf /tmp/latest.tar.gz -C /tmp
- Copy the extracted WordPress files into the document root.
$ sudo rsync -a /tmp/wordpress/ /var/www/example.com/public_html/
The trailing slashes copy the contents of the extracted wordpress directory into the document root instead of nesting another wordpress directory below it.
- Create wp-config.php from the sample file.
$ sudo cp /var/www/example.com/public_html/wp-config-sample.php /var/www/example.com/public_html/wp-config.php
- Edit wp-config.php with the database connection values.
$ sudo vi /var/www/example.com/public_html/wp-config.php
define( 'DB_NAME', 'wordpress' );
define( 'DB_USER', 'wordpress' );
define( 'DB_PASSWORD', 'strong_password_here' );
define( 'DB_HOST', 'localhost' );
Keep DB_HOST as localhost when MariaDB runs on the same host and uses the packaged local socket.
- Fetch fresh authentication keys and salts from the official WordPress API.
$ curl --silent https://api.wordpress.org/secret-key/1.1/salt/
Paste the returned define(… ) lines over the placeholder authentication-key block in wp-config.php before saving the file.
- Set Apache ownership on the WordPress tree.
$ sudo chown -R apache:apache /var/www/example.com/public_html
- Set directory permissions on the WordPress tree.
$ sudo find /var/www/example.com/public_html -type d -exec chmod 755 {} \; - Set file permissions on the WordPress tree.
$ sudo find /var/www/example.com/public_html -type f -exec chmod 644 {} \; - Restrict direct reads of wp-config.php.
$ sudo chmod 640 /var/www/example.com/public_html/wp-config.php
- Create the upload directory.
$ sudo mkdir -p /var/www/example.com/public_html/wp-content/uploads
- Check the SELinux mode before adding upload labels.
$ getenforce
Enforcing
Skip the labeling commands when getenforce returns Permissive or Disabled.
- Install the SELinux management helper when the host is enforcing policy.
$ sudo dnf install --assumeyes policycoreutils-python-utils
- Persist a writable SELinux label for uploads.
$ sudo semanage fcontext -a -t httpd_sys_rw_content_t '/var/www/example.com/public_html/wp-content/uploads(/.*)?'
Without the writable SELinux context, the installer can succeed while later media uploads fail with permission errors.
- Apply the saved SELinux label to the upload directory.
$ sudo restorecon -Rv /var/www/example.com/public_html/wp-content/uploads
- Create an Apache virtual host for the WordPress site.
$ sudo vi /etc/httpd/conf.d/example.com.conf
- /etc/httpd/conf.d/example.com.conf
<VirtualHost *:80>
    ServerName example.com
    ServerAlias www.example.com
    DocumentRoot /var/www/example.com/public_html

    <Directory /var/www/example.com/public_html>
        AllowOverride All
        Require all granted
        DirectoryIndex index.php
    </Directory>

    ErrorLog /var/log/httpd/example.com-error.log
    CustomLog /var/log/httpd/example.com-access.log combined
</VirtualHost>
Replace example.com and www.example.com with the real hostnames before reloading Apache.
WordPress writes permalink rules to .htaccess, so AllowOverride All must remain enabled for this document root unless rewrite rules are moved into the virtual host.
Tool: Apache Virtual Host Generator - Test the Apache configuration.
$ sudo httpd -t
AH00558: httpd: Could not reliably determine the server's fully qualified domain name, using 192.0.2.10. Set the 'ServerName' directive globally to suppress this message
Syntax OK
The AH00558 line is a global ServerName warning, not a virtual-host syntax failure. Syntax OK confirms Apache can parse the configuration.
Related: How to test Apache configuration - Reload Apache after the syntax test passes.
$ sudo systemctl reload httpd
- Verify that the browser installer responds through the virtual host.
$ curl --head http://www.example.com/wp-admin/install.php
HTTP/1.1 200 OK
Server: Apache
Content-Type: text/html; charset=utf-8
If this request fails on a local-only build, confirm the hostname resolves to the server before troubleshooting Apache, PHP-FPM, or the database credentials.
- Open the installer URL in a browser and complete the site title, administrator account, and password setup.
http://www.example.com/wp-admin/install.php
If the page reports Already Installed instead of showing the first-run form, the selected database already contains WordPress tables. Use an empty database or remove the old tables before retrying.
Related: How to configure SEO-friendly URLs in WordPress
Related: How to redirect HTTP to HTTPS in WordPress
Related: How to disable XML-RPC in WordPress - Remove the temporary WordPress download files.
$ rm -r /tmp/latest.tar.gz /tmp/wordpress