How to draw text and shape overlays with OpenCV
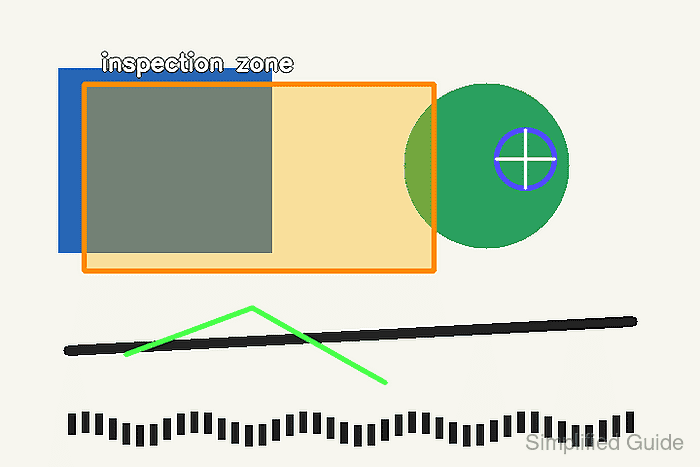
Computer-vision results are easier to review when the saved frame carries the same boxes, labels, and landmarks used during processing. OpenCV can add those annotations to an image array before writing the result to disk.
Most drawing functions modify their destination array in place. Keeping image as the source and drawing on annotated = image.copy() preserves the original pixels for comparison while letting every coordinate scale with the actual image dimensions.
Three-channel colors use blue, green, red order in OpenCV, and cv.putText() places its origin at the lower-left corner of the text. A translucent fill needs a temporary image plus cv.addWeighted() because ordinary drawing calls replace the pixels they touch.
Related: How to read and write an image with OpenCV
Related: How to install OpenCV on Ubuntu
Steps to draw text and shape overlays with OpenCV:
- Create draw_image_overlays.py with argument parsing and a writable image copy.
- draw_image_overlays.py
#!/usr/bin/env python3
import argparse
from pathlib import Path

import cv2 as cv
import numpy as np


parser = argparse.ArgumentParser(description="Draw text and shape overlays with OpenCV.")
parser.add_argument("input_image", type=Path)
parser.add_argument("output_image", type=Path)
args = parser.parse_args()

image = cv.imread(str(args.input_image), cv.IMREAD_COLOR)
if image is None:
    raise SystemExit(f"could not read image: {args.input_image}")

annotated = image.copy()
height, width = annotated.shape[:2]
- Append proportional overlay geometry below the image dimensions.
box_start = (int(width * 0.12), int(height * 0.18))
box_end = (int(width * 0.62), int(height * 0.58))
label_origin = (box_start[0] + 18, box_start[1] - 14)
center = (int(width * 0.75), int(height * 0.34))
radius = max(18, min(width, height) // 16)
polyline = np.array(
    [
        (int(width * 0.18), int(height * 0.76)),
        (int(width * 0.36), int(height * 0.66)),
        (int(width * 0.55), int(height * 0.82)),
    ],
    dtype=np.int32,
).reshape((-1, 1, 2))
Each point is calculated from width and height so the same annotations stay in comparable regions on other image sizes.
- Append the translucent inspection zone below the geometry block.
overlay = annotated.copy()
cv.rectangle(overlay, box_start, box_end, (0, 180, 255), cv.FILLED)
cv.addWeighted(overlay, 0.35, annotated, 0.65, 0, annotated)
The two weights total 1.0. The orange fill contributes 35 percent of each output pixel while the current annotated image contributes 65 percent.
- Append the opaque annotation calls below the blend operation.
cv.rectangle(annotated, box_start, box_end, (0, 140, 255), 3, cv.LINE_AA)
cv.putText(
    annotated,
    "inspection zone",
    label_origin,
    cv.FONT_HERSHEY_SIMPLEX,
    0.8,
    (0, 0, 0),
    4,
    cv.LINE_AA,
)
cv.putText(
    annotated,
    "inspection zone",
    label_origin,
    cv.FONT_HERSHEY_SIMPLEX,
    0.8,
    (255, 255, 255),
    2,
    cv.LINE_AA,
)
cv.circle(annotated, center, radius, (255, 80, 80), 3, cv.LINE_AA)
cv.drawMarker(annotated, center, (255, 255, 255), cv.MARKER_CROSS, radius * 2, 2, cv.LINE_AA)
cv.polylines(annotated, [polyline], False, (80, 255, 80), 4, cv.LINE_AA)
The black text stroke is drawn first, then the narrower white stroke creates a readable outlined label. cv.LINE_AA smooths the visible edges on this 8-bit image.
Related: How to convert image color spaces with OpenCV - Append output writing and changed-pixel validation at the end of the script.
args.output_image.parent.mkdir(parents=True, exist_ok=True)
if not cv.imwrite(str(args.output_image), annotated):
    raise SystemExit(f"could not write image: {args.output_image}")

changed = cv.absdiff(image, annotated)
changed_pixels = int(np.count_nonzero(cv.cvtColor(changed, cv.COLOR_BGR2GRAY)))
if changed_pixels == 0:
    raise SystemExit("no overlay pixels changed")

print(f"saved: {args.output_image}")
print(f"size: {width}x{height}")
print(f"changed pixels: {changed_pixels}")
- Run the completed script against input/scene.png.
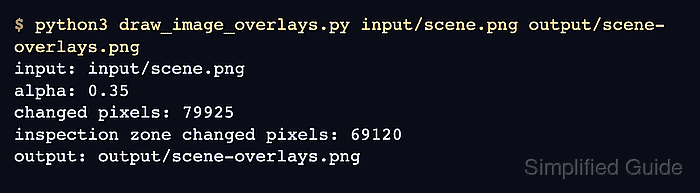
$ python3 draw_image_overlays.py input/scene.png output/scene-overlays.png
saved: output/scene-overlays.png
size: 720x480
changed pixels: 79925
- Verify the saved overlay against the source image.
$ python3 - <<'PY'
import cv2 as cv
import numpy as np

source = cv.imread("input/scene.png")
result = cv.imread("output/scene-overlays.png")
if source is None or result is None:
    raise SystemExit("could not read source or overlay output")
if source.shape != result.shape:
    raise SystemExit("source and overlay dimensions differ")

changed = cv.absdiff(source, result)
changed_pixels = int(np.count_nonzero(cv.cvtColor(changed, cv.COLOR_BGR2GRAY)))
if changed_pixels == 0:
    raise SystemExit("overlay output matches the source")

print(f"overlay verified: {result.shape[1]}x{result.shape[0]}")
print(f"changed pixels: {changed_pixels}")
PY
overlay verified: 720x480
changed pixels: 79925