How to retry failed Espresso tests
Failed Espresso runs need a narrower second pass than rerunning the whole suite. A controlled retry keeps the original failing class, method, device, and runner visible so a passing retry can be treated differently from a deterministic failure.
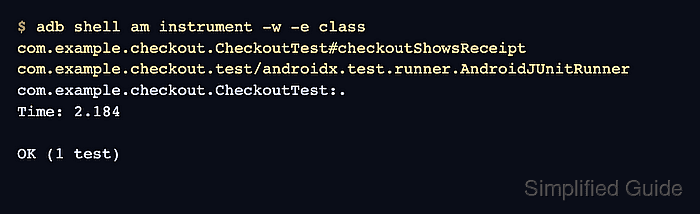
Android's instrumentation runner can select one test method with -e class after the connected Gradle task has installed the app and test APK. The retry should use the same emulator or device when possible, because changing API level, locale, build variant, or test data can create a new signal instead of confirming the original one.
Use the retry to classify the failure, not to hide it. A retry that passes belongs in a flaky-test investigation with the original failed output attached; a retry that fails the same way should move toward a focused fix; a retry that fails differently usually means the environment or app state changed before the rerun.
Steps to retry failed Espresso tests:
- Run the connected Espresso task that produced the failed result.
$ ./gradlew :app:connectedDebugAndroidTest
> Task :app:connectedDebugAndroidTest

com.example.checkout.CheckoutTest > checkoutShowsReceipt[emulator-5554] FAILED
    androidx.test.espresso.NoMatchingViewException: No views in hierarchy found matching: with text: "Receipt"

FAILURE: Build failed with an exception.
##### snipped #####
Use the connected test task for the same module and build variant that failed, such as :app:connectedDebugAndroidTest or :mobile:connectedReleaseAndroidTest. Keep the class, method, device, and first failure message together for the retry comparison.
- Identify the installed instrumentation runner for the app under test.
$ adb shell pm list instrumentation
instrumentation:com.example.checkout.test/androidx.test.runner.AndroidJUnitRunner (target=com.example.checkout)
Choose the instrumentation whose target= package matches the app that produced the failed Espresso result. The value before the first space is the component used by am instrument.
- Retry only the failed method through AndroidJUnitRunner.
$ adb shell am instrument -w \
-e class com.example.checkout.CheckoutTest#checkoutShowsReceipt \
com.example.checkout.test/androidx.test.runner.AndroidJUnitRunner
com.example.checkout.CheckoutTest:.
Time: 2.184

OK (1 test)
The -e class argument accepts ClassName#methodName for a single method. A pass here means the failed method can pass in isolation on this device; it does not prove that the original failure was harmless.
- Repeat the focused retry once when the first retry passes.
$ adb shell am instrument -w \
-e class com.example.checkout.CheckoutTest#checkoutShowsReceipt \
com.example.checkout.test/androidx.test.runner.AndroidJUnitRunner
com.example.checkout.CheckoutTest:.
Time: 2.091

OK (1 test)
Do not erase the original failure just because a retry passed. Treat a fail-then-pass sequence as a flaky signal until the timing, selector, data, animation, or device condition is explained.
- Save the retry comparison with the failure record.
Original connected run:
  com.example.checkout.CheckoutTest#checkoutShowsReceipt FAILED on emulator-5554
  NoMatchingViewException: with text "Receipt"

Focused retry 1:
  PASSED on emulator-5554

Focused retry 2:
  PASSED on emulator-5554

Classification:
  retry-pass flaky signal; keep the failure open for timing or state investigation
If the focused retry fails with the same message, classify the result as deterministic and fix that failure path before rerunning the full task. If it fails with a different message, reset app state or device state before comparing the run.
Related: How to debug a flaky Espresso test
Related: How to reset test data before Espresso tests