How to create a path-limited CephFS client key
CephFS client keys control which filesystem a client can see, which metadata operations it can perform, and which tree path it can mount. A path-limited key is useful when an application or host should write only under one directory such as /srv/app instead of receiving broad access to the whole filesystem.
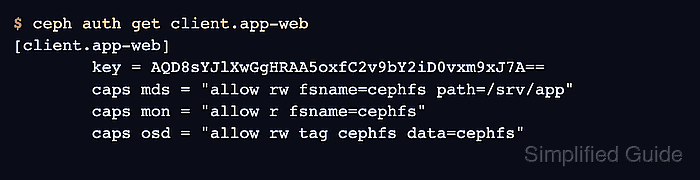
The ceph fs authorize command creates the client entity and assigns MDS, MON, and OSD capabilities that match the selected CephFS name and path. The mount test must use the same subdirectory in the device string, because a client restricted to /srv/app should not be able to mount the filesystem root.
Path restrictions protect the CephFS metadata tree, not every possible access path to the underlying RADOS objects. Use a fresh client identity when tightening access, because later ceph fs authorize runs can add paths and change read/write mode but do not remove older broad capabilities from an existing client.
Related: How to create a CephFS filesystem
Steps to create a path-limited CephFS client key:
- Confirm the CephFS name from an admin shell.
$ ceph fs ls
name: cephfs, metadata pool: cephfs_metadata, data pools: [cephfs_data]
- Check whether the planned client identity already exists.
$ ceph auth get client.app-web
Error ENOENT: failed to find client.app-web
If the client already has broad mds or osd capabilities, create a new client ID or replace the caps deliberately with ceph auth caps. Re-running ceph fs authorize for another path adds access instead of removing the old path.
- Authorize the client for the intended CephFS path.
$ ceph fs authorize cephfs client.app-web /srv/app rw
[client.app-web]
        key = AQD8sYJlXwGgHRAA5oxfC2v9bY2iD0vxm9xJ7A==
Use r instead of rw for a read-only mount. Add snapshot or layout flags only when the client must manage those CephFS features inside the authorized path.
- Export the client keyring for installation on the Linux client.
$ ceph auth get client.app-web -o ceph.client.app-web.keyring
exported keyring for client.app-web
- Verify that the saved capabilities name the filesystem and path.
$ ceph auth get client.app-web [client.app-web] key = AQD8sYJlXwGgHRAA5oxfC2v9bY2iD0vxm9xJ7A== caps mds = "allow rw fsname=cephfs path=/srv/app" caps mon = "allow r fsname=cephfs" caps osd = "allow rw tag cephfs data=cephfs" - Install the keyring on the client host.
$ sudo install -m 600 ceph.client.app-web.keyring /etc/ceph/ceph.client.app-web.keyring
The client also needs /etc/ceph/ceph.conf or another normal Ceph configuration source that lets the mount helper find the monitors.
- Create the local mount point.
$ sudo mkdir -p /mnt/app-cephfs
- Mount only the authorized CephFS path.
$ sudo mount -t ceph app-web@.cephfs=/srv/app /mnt/app-cephfs
Related: How to mount CephFS on Linux
- Verify that the mount points at the scoped path.
$ findmnt /mnt/app-cephfs
TARGET          SOURCE                     FSTYPE OPTIONS
/mnt/app-cephfs app-web@.cephfs=/srv/app  ceph   rw,relatime,name=app-web
- Write a small file through the scoped mount.
$ sudo touch /mnt/app-cephfs/client-key-test
- Verify that the test file exists inside the authorized path.
$ ls /mnt/app-cephfs/client-key-test
/mnt/app-cephfs/client-key-test
- Create a separate mount point for the denied-path test.
$ sudo mkdir -p /mnt/cephfs-denied
- Confirm that the same key cannot mount the filesystem root.
$ sudo mount -t ceph app-web@.cephfs=/ /mnt/cephfs-denied
mount error 13 = Permission denied
A denied root mount proves the client must request the authorized subtree. If this succeeds, inspect the existing client.app-web caps for an older root or broader path grant.
- Remove the temporary test file.
$ sudo rm /mnt/app-cephfs/client-key-test
- Unmount the scoped CephFS path.
$ sudo umount /mnt/app-cephfs