When using VirtualBox with a NAT network, the guest virtual machine cannot be accessed directly from the host. The NAT network isolates the guest in a private network, separate from the host machine. This limits external access to the guest VM.
To enable communication between the host and guest, port forwarding is required. This process maps a port from the host’s IP to a port on the guest’s IP. It allows you to access services running on the guest, such as SSH or RDP, through the host machine.
Configuring port forwarding in VirtualBox involves creating rules that direct traffic from a specific port on the host to the corresponding port on the guest. These rules are applied to the VM’s NAT network, ensuring proper access while keeping the network structure intact.
Steps to configure NAT port forwarding in VirtualBox:
- Open VirtualBox and ensure the virtual machine is powered off.
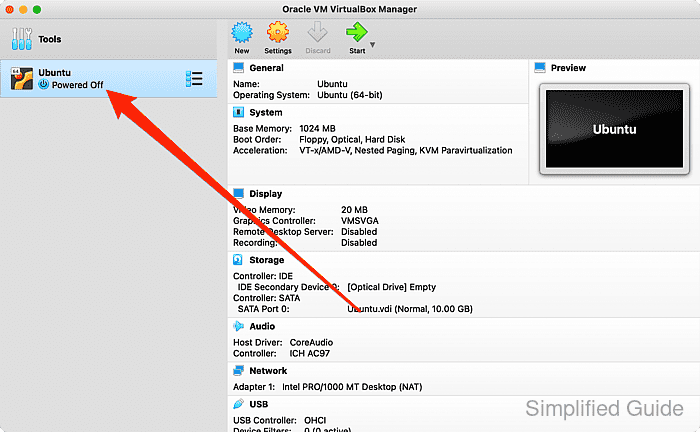
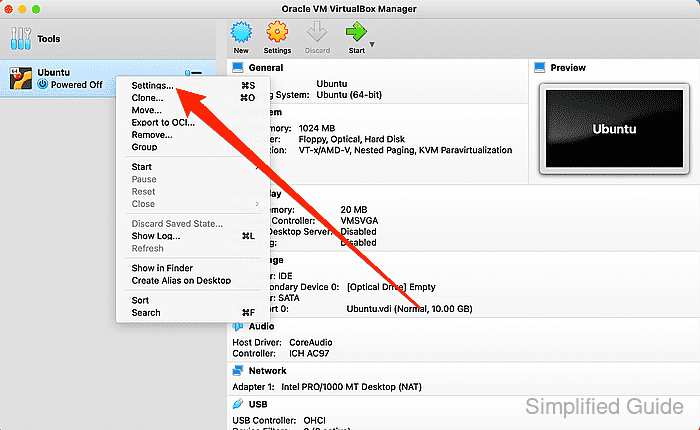
- Right-click on the virtual machine and select Settings.
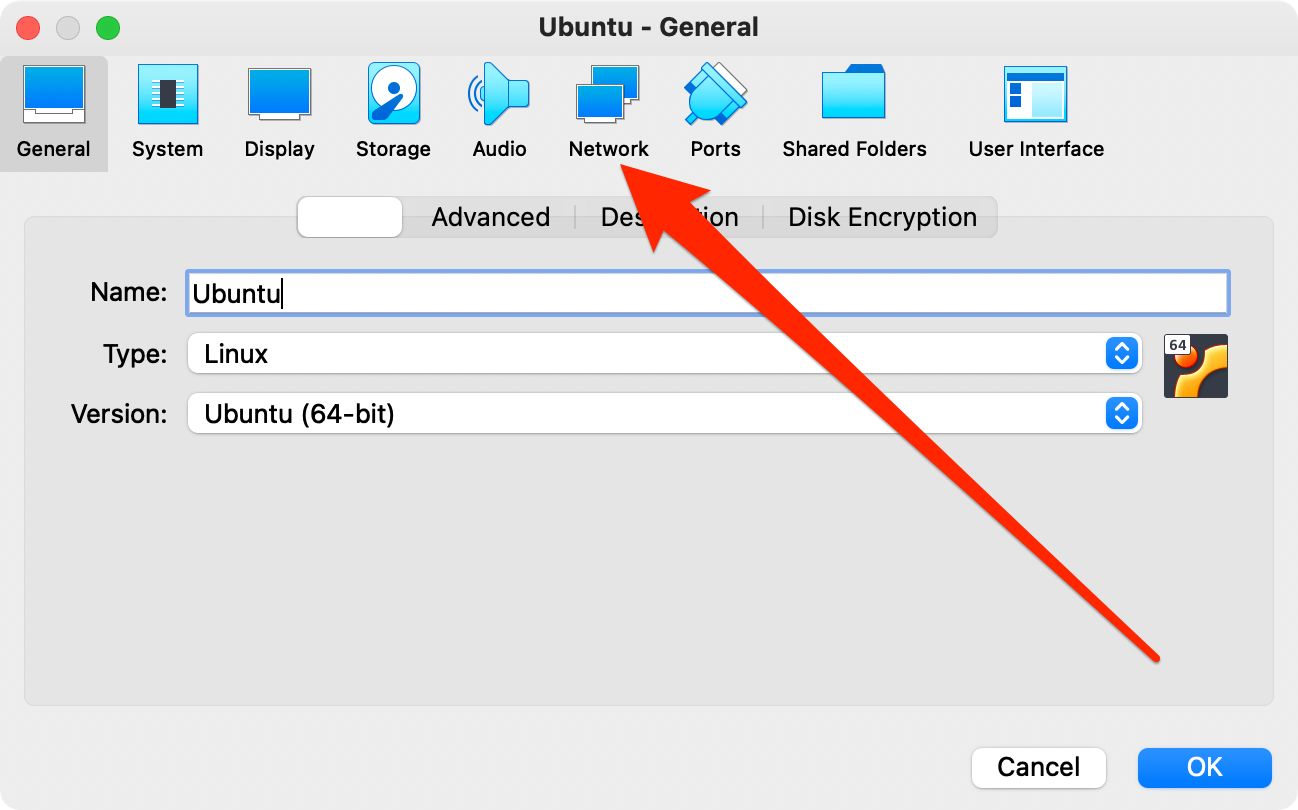
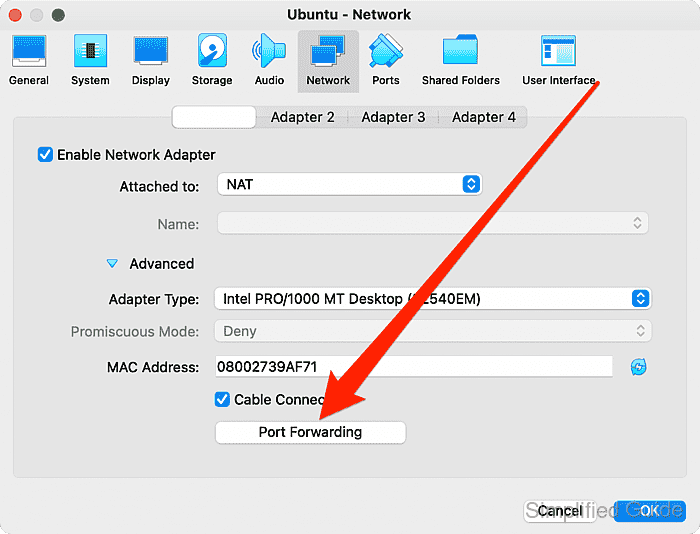
- Go to the Network tab in the settings menu.
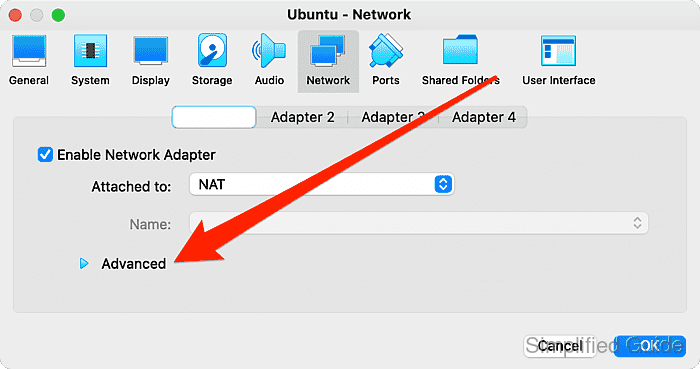
- Click on Advanced at the bottom of the Network settings.
- Select Port Forwarding.
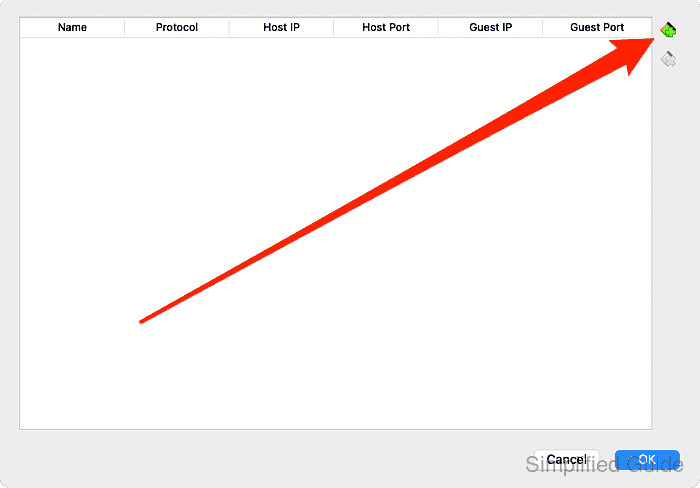
- Click the + icon to add a new port forwarding rule.
- Some of fields are filled up by default.
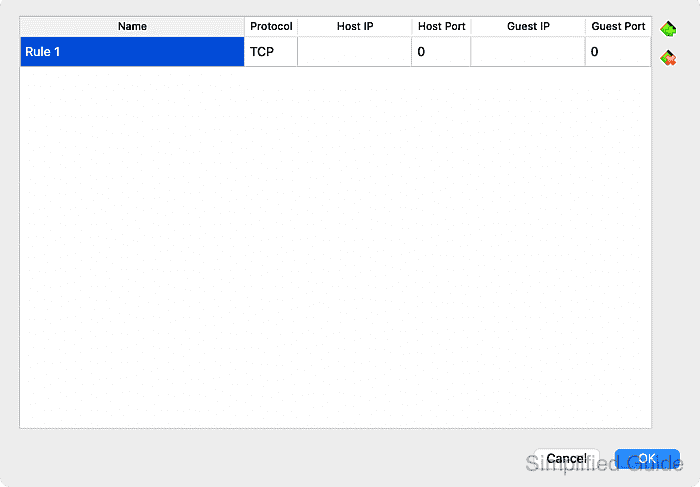
- Enter the desired host and guest ports.
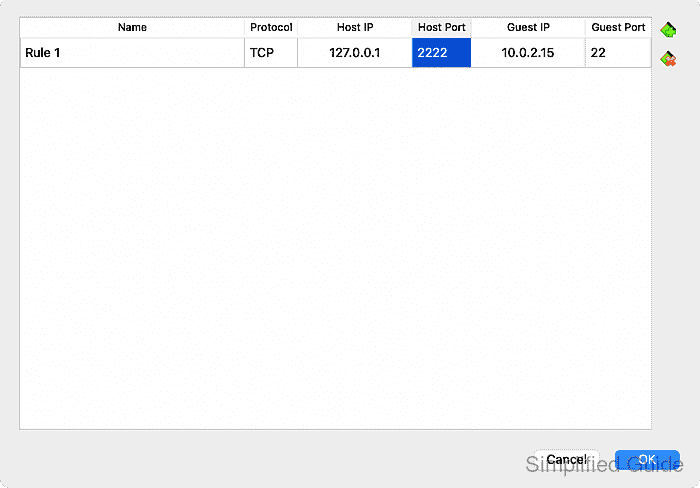
For example, forward TCP packets on port 2222 of the host machine to port 22 of the guest machine where 10.0.2.15 is the default IP for the guest under the NAT network.
Leave Host IP and Guest IP fields blank to use the default settings. Leaving these fields blank will default Host IP to 127.0.0.1 and Guest IP to the assigned IP of the guest VM.
- Confirm the rule by clicking OK.
- Test the forwarding rule.
user@host:~ $ ssh -p2222 user@127.0.0.1
Warning: Permanently added '[127.0.0.1]:2222' (ECDSA) to the list of known hosts.
user@127.0.0.1's password:
Welcome to Ubuntu 18.04 LTS (GNU/Linux 4.15.0-20-generic x86_64)

 * Documentation:  https://help.ubuntu.com
 * Management:     https://landscape.canonical.com
 * Support:        https://ubuntu.com/advantage

  System information as of Wed Sep  5 16:52:59 +08 2018

  System load:  0.0               Processes:             91
  Usage of /:   18.8% of 8.80GB   Users logged in:       1
  Memory usage: 6%                IP address for enp0s3: 10.0.2.15
  Swap usage:   0%


138 packages can be updated.
72 updates are security updates.


Last login: Wed Sep  5 16:47:16 2018 from 10.0.2.2
To run a command as administrator (user "root"), use "sudo <command>".
See "man sudo_root" for details.

user@host:~$
The above example uses SSH as an example and SSH by default runs on port 22. In this case, the host's port 2222 forwards to the guest's port 22.
CLI method to configure NAT port forwarding in VirtualBox:
You can configure port forwarding using the command line interface with VBoxManage. Below is a step-by-step guide to set up port forwarding rules for a virtual machine:
- List available virtual machines. This will display all virtual machines currently registered in VirtualBox.
VBoxManage list vms "YourVMName" {a-unique-uuid} "AnotherVM" {another-unique-uuid} - List existing port forwarding rules. This will show the current network settings of the virtual machine, including any existing port forwarding rules.
VBoxManage showvminfo "YourVMName" --details
Name:            YourVMName
Guest OS:        Ubuntu (64-bit)
UUID:            a-unique-uuid
NIC 1:           MAC: your-mac-address, Network Adapter: NAT
NIC 1 Rule(0):   name = Rule 1, protocol = TCP, host port = 2222, guest port = 22
- Add a new port forwarding rule. This command adds a rule to forward TCP packets from the host's port 2222 to the guest's port 22. Replace YourVMName with the name of your VM.
VBoxManage modifyvm "YourVMName" --natpf1 "Rule 1,tcp,,2222,,22"
Port forwarding rule added:
Rule 1: Protocol: TCP, Host Port: 2222, Guest Port: 22
- Verify the new port forwarding rule. This will show the updated network settings and confirm that the new port forwarding rule has been added.
VBoxManage showvminfo "YourVMName" --details
Name:            YourVMName
Guest OS:        Ubuntu (64-bit)
UUID:            a-unique-uuid
NIC 1:           MAC: your-mac-address, Network Adapter: NAT
NIC 1 Rule(0):   name = Rule 1, protocol = TCP, host port = 2222, guest port = 22
- Remove an existing port forwarding rule. If you need to remove the rule, use the following command. Replace Rule 1 with the rule name you want to delete.
VBoxManage modifyvm "YourVMName" --natpf1 delete "Rule 1"
Port forwarding rule removed:
Rule 1 deleted.
- Check all VM settings again. Run this command to ensure the rule has been successfully deleted.
VBoxManage showvminfo "YourVMName" --details
Name:            YourVMName
Guest OS:        Ubuntu (64-bit)
UUID:            a-unique-uuid
NIC 1:           MAC: your-mac-address, Network Adapter: NAT
No port forwarding rules.

Mohd Shakir Zakaria is a cloud architect with deep roots in software development and open-source advocacy. Certified in AWS, Red Hat, VMware, ITIL, and Linux, he specializes in designing and managing robust cloud and on-premises infrastructures.
