VirtualBox allows users to add virtual disk images to a virtual machine's optical drive. These virtual optical disk files can be in formats such as ISO, Joliet, or UDF. Adding these disk images is necessary for tasks like installing an operating system or software within the virtual environment. VirtualBox supports the use of virtual CD, DVD, and Blu-ray disk images, allowing seamless setup without physical media.
In VirtualBox, a virtual optical drive is included by default. Users can insert virtual disk images into this drive while the virtual machine is running or powered off. This flexibility makes it easy to load disk images at any time, whether for installation, testing, or running media. The platform supports disk images created in advance or selected from an existing list.
Inserting a disk image is a straightforward process. Users can either choose an existing virtual disk image or create a new one from local storage. The process is identical whether the machine is powered off or running. By inserting the correct virtual disk, users ensure the virtual machine has the necessary media to function.
Steps to insert ISO or disk image into running VirtualBox VM:
Inserting a virtual optical disk file into a running VirtualBox VM allows you to load media like an ISO image without restarting the virtual machine. This method is useful for installing software or loading an operating system while the VM is active. Follow these steps to add a disk image to the virtual CD or DVD drive of a running VM.
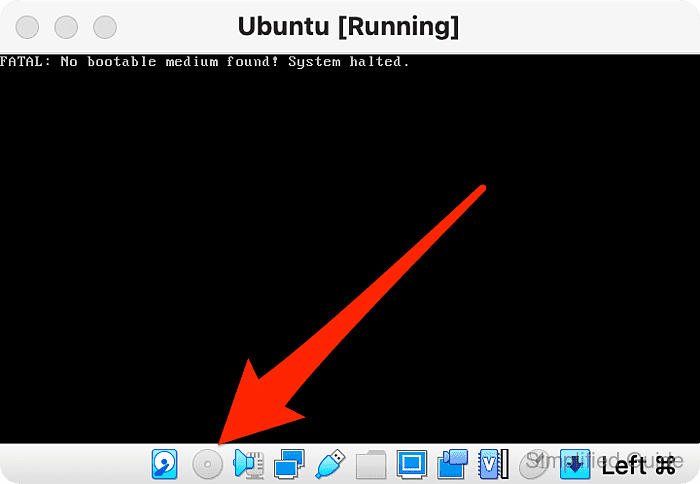
- Select the running VM window.
- Click on the CD ROM icon at the bottom of the window.
- Select the Choose a disk file option.
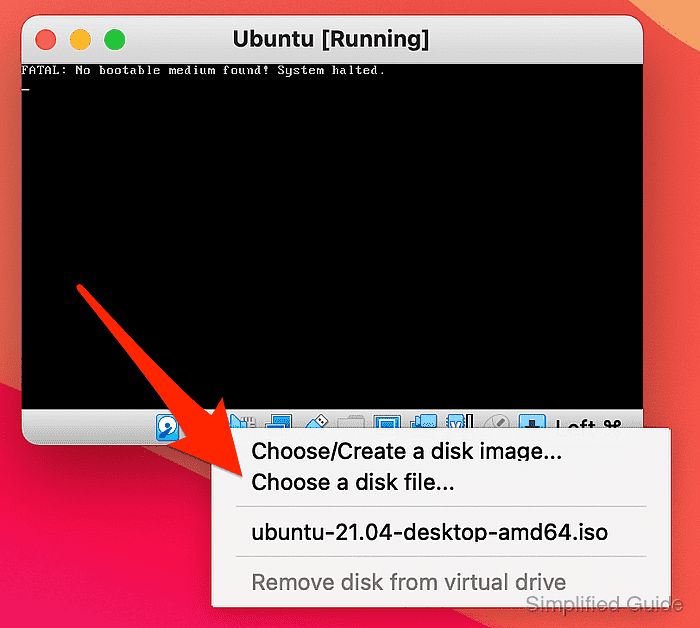
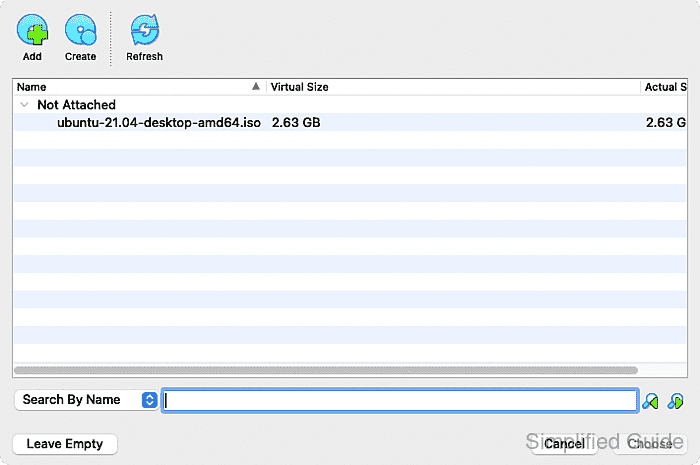
Select a CD or ISO image already listed from the list if available or click on Choose/Create a disk image to open the disk image creation and selection window.
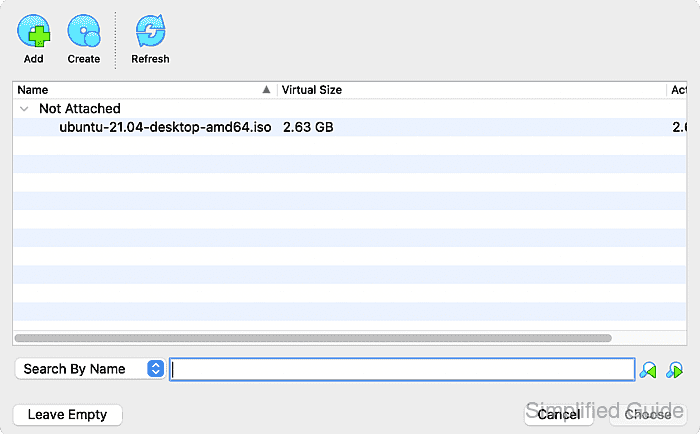
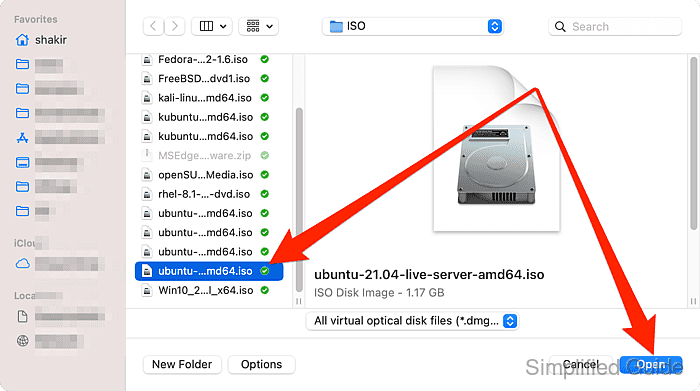
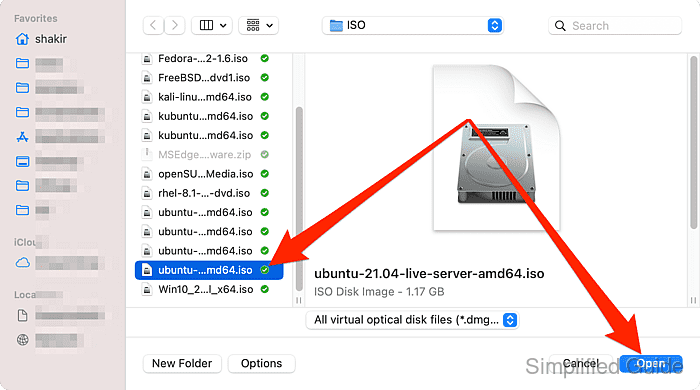
- Select the disk image from local storage and click Open.
Steps to insert ISO or disk image into stopped VirtualBox VM:
If the virtual machine is powered off, inserting a disk image can be done through the settings interface. This method allows you to configure the virtual CD or DVD drive before starting the VM. Once the disk image is added, it will be available when you boot the machine. The following steps guide you through this process.
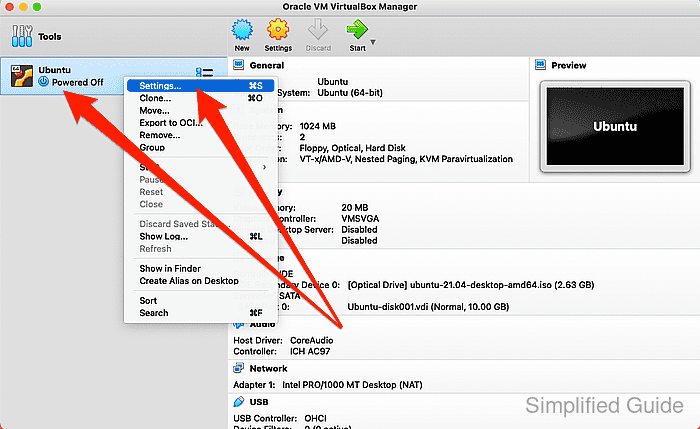
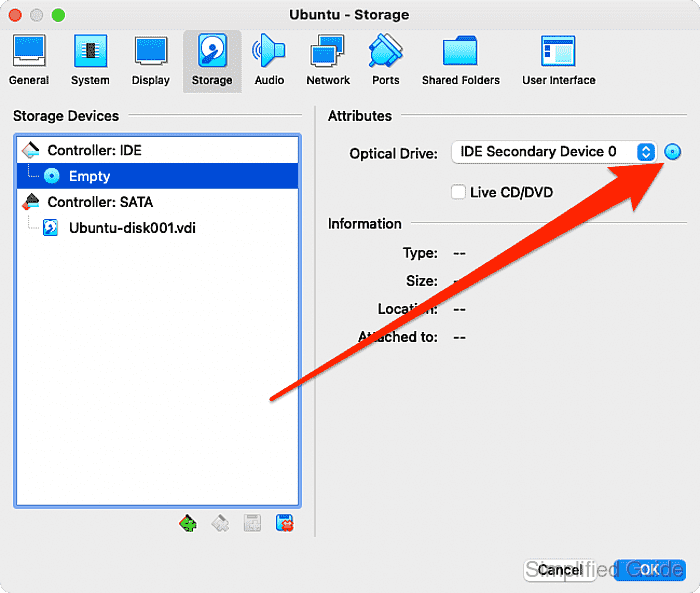
- Right-click on the powered-off VM and select Settings.
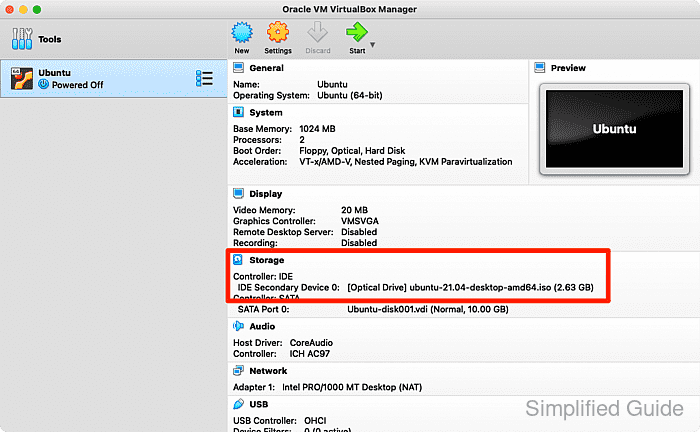
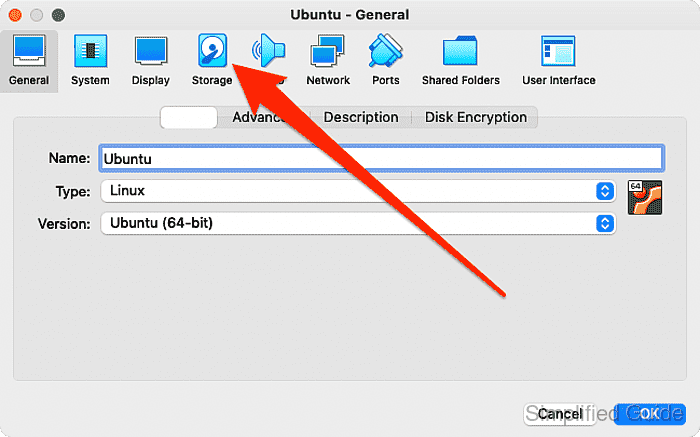
- Go to the Storage tab.
- Click on the CD ROM device marked Empty.
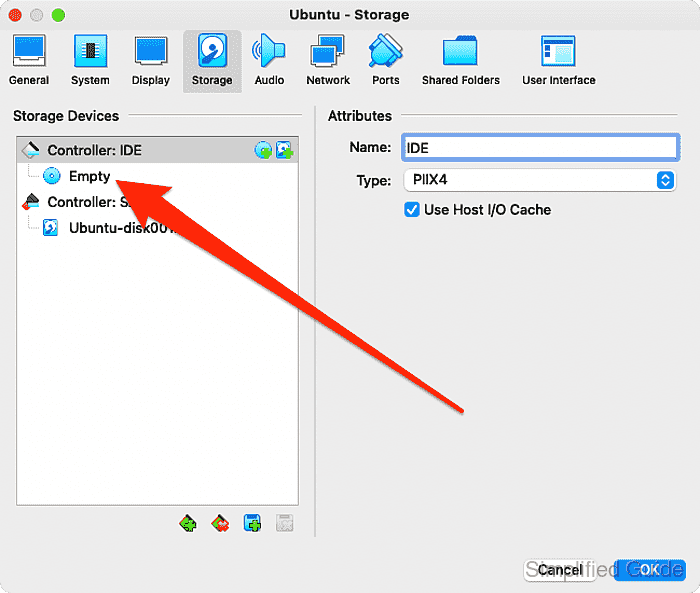
- Click on the CD ROM icon on the right.
- Select the Choose a disk file option.
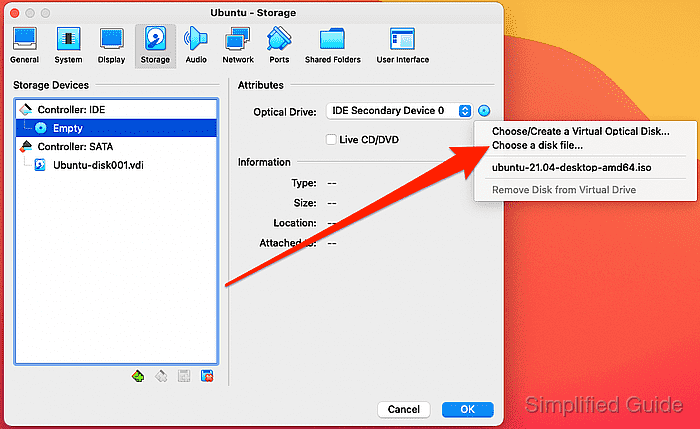
Select a CD or ISO image already listed from the list if available or click on Choose/Create a disk image to open the disk image creation and selection window.
- Select the disk image from local storage and click Open.
- Click OK.

CLI method to insert ISO or disk image into VirtualBox:
You can also insert an ISO or disk image into a VirtualBox VM using the command line interface with VBoxManage. Below is a step-by-step guide to attach a virtual optical disk file to a virtual machine:
- List available virtual machines. This will show all VMs currently registered in VirtualBox, so you can identify the correct VM name.
VBoxManage list vms "YourVMName" {UUID-1234-5678} "AnotherVMName" {UUID-8765-4321} - Attach a disk image to a running VM. Use this command to attach an ISO or virtual optical disk file to a running VM’s optical drive. Replace the placeholder values accordingly.
VBoxManage storageattach "YourVMName" --storagectl "IDE Controller" --port 0 --device 0 --type dvddrive --medium /path/to/your/disk-image.iso
- Attach a disk image to a stopped VM. This command can be used to attach a disk image to a powered-off VM. It follows the same logic as for a running VM.
VBoxManage storageattach "YourVMName" --storagectl "IDE Controller" --port 0 --device 0 --type dvddrive --medium /path/to/your/disk-image.iso
- Verify that the disk image is attached. After attaching the disk image, you can check if it was successfully added to the virtual machine’s optical drive by listing the VM’s storage configuration.
VBoxManage showvminfo "YourVMName"
Name:            YourVMName
Guest OS:        Ubuntu (64-bit)
UUID:            a-unique-uuid
Storage Controllers:
    IDE Controller (0, 0): /path/to/your/disk-image.iso (UUID: image-uuid)

Mohd Shakir Zakaria is a cloud architect with deep roots in software development and open-source advocacy. Certified in AWS, Red Hat, VMware, ITIL, and Linux, he specializes in designing and managing robust cloud and on-premises infrastructures.


