Vim is a popular text editor used for its efficiency in handling text, code, and configuration files. One of its useful features is the ability to show line numbers, which helps in navigating through the file, especially when debugging or referring to specific lines. Line numbering in Vim can be easily enabled or disabled depending on the user's preference.
Vim provides both absolute and relative line numbering. Absolute numbering shows the exact line number for every line in the file, while relative numbering shows the number of lines relative to the current line. Understanding how to enable or disable these options and customize them for your workflow can improve navigation and productivity.
Additionally, you can make line numbering settings permanent by editing the .vimrc file. This ensures that line numbering behaves consistently across all Vim sessions.
Steps to enable or disable line numbering in Vim:
- Press Esc to enter command mode.
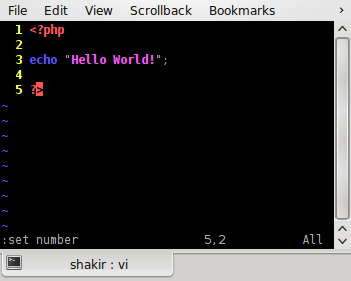
- Type :set number to enable line numbering.
:set number
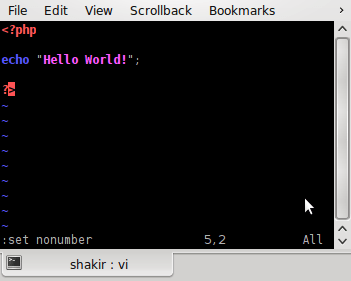
- Type :set nonumber to disable line numbering.
:set nonumber
- Type :set relativenumber to enable relative line numbering.
:set relativenumber
Relative numbering shows how far each line is from the current line.
- Type :set norelativenumber to disable relative line numbering.
:set norelativenumber
- Combine both absolute and relative numbering.
:set number relativenumber
This displays the current line number as absolute and all other lines as relative numbers.
- Open the .vimrc configuration file to make the changes permanent.
vim ~/.vimrc
- Add a command to enable line numbering automatically.
set number
- Enable relative numbering automatically.
set relativenumber
- Save and close the .vimrc file.
:wq
- Reopen any file to verify that line numbering is enabled by default.

Mohd Shakir Zakaria is a cloud architect with deep roots in software development and open-source advocacy. Certified in AWS, Red Hat, VMware, ITIL, and Linux, he specializes in designing and managing robust cloud and on-premises infrastructures.


