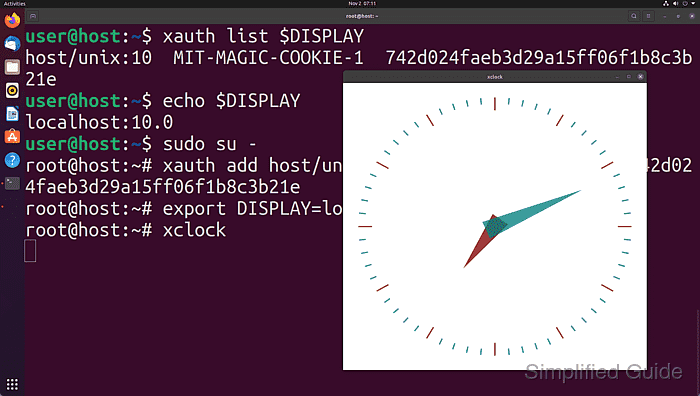
X11 forwarding enables graphical applications on a remote Linux host to display windows on a local desktop through an encrypted SSH connection. Administrative tools and configuration utilities often provide only graphical front-ends, so reliable forwarding remains important even when privileged access is required via sudo or su. Misconfigured forwarding frequently surfaces as errors such as "Can't open display" or "X11 connection rejected because of wrong authentication." when commands are re-run as root.

During an X11-forwarded session, the remote sshd process allocates a virtual display like localhost:10.0 and negotiates a MIT-MAGIC-COOKIE-1 token that is written into the initiating account's /home/user/.Xauthority file. The DISPLAY environment variable and .Xauthority entry are kept in sync for that account, allowing graphical clients to authenticate to the tunneled X server. After switching to root or another account, the elevated shell inherits neither the original DISPLAY nor the corresponding cookie in its own .Xauthority file, so X11 connections from that user fail.
$ sudo xclock
[sudo] password for user:
X11 connection rejected because of wrong authentication.
Error: Can't open display: localhost:10.0
Forwarding graphical programs for privileged accounts therefore requires exporting the same forwarded DISPLAY value and copying the active X authorization cookie into the target user's environment. The procedure assumes that basic SSH X11 forwarding already works for the unprivileged account, that a local X server is running, and that X11Forwarding yes is configured in /etc/ssh/sshd_config. Sharing the same cookie with a privileged shell grants that shell the ability to draw and observe windows on the local display, so the SSH account and key used for forwarding must remain tightly controlled.
Steps to use SSH X11-Forwarding for sudo or su:
- Ensure graphical programs already start correctly through SSH X tunneling as the regular user.
- Establish an SSH connection with X11 forwarding enabled.
$ ssh -X user@host.example.net "echo $DISPLAY"
localhost:10.0
- Confirm that a graphical program runs successfully under the current unprivileged account.
$ xclock
- Retrieve the X authorization entry for the active forwarded display.
$ xauth list $DISPLAY
host/unix:10  MIT-MAGIC-COOKIE-1  a2c41c071b5f5899ca8ccaab2498a222
- Print the current DISPLAY environment variable value.
$ echo $DISPLAY
localhost:10.0
The forwarded display typically appears as localhost:10.0 or another localhost:N.0 value.
- Add the captured X authorization entry into the .Xauthority file of the elevated user.
$ echo UserPassw0rd! | sudo -S xauth add host/unix:10 MIT-MAGIC-COOKIE-1 a2c41c071b5f5899ca8ccaab2498a222
Exposing the active MIT-MAGIC-COOKIE-1 token to additional accounts allows those processes to draw on and observe the forwarded X11 display, so only trusted privileged shells should receive this cookie.
- Verify that the .Xauthority file for the elevated user now contains the forwarded display cookie.
$ echo UserPassw0rd! | sudo -S xauth list $DISPLAY
host/unix:10  MIT-MAGIC-COOKIE-1  a2c41c071b5f5899ca8ccaab2498a222
- Export the same DISPLAY value inside the elevated shell.
# export DISPLAY=localhost:10.0
The DISPLAY value must match the one recorded before switching users for the cookie to be accepted by the X server.
- Start a graphical program as the elevated user to confirm that X11 forwarding functions correctly.
# xclock


Mohd Shakir Zakaria is a cloud architect with deep roots in software development and open-source advocacy. Certified in AWS, Red Hat, VMware, ITIL, and Linux, he specializes in designing and managing robust cloud and on-premises infrastructures.
