Redmine is a Ruby on Rails project management application for issues, projects, wikis, and repository links. On Ubuntu, a source-release install is the direct path when the distribution repositories do not provide an installable Redmine application package or when the site needs the upstream supported stable release.
The install uses Ubuntu packages for Ruby, PostgreSQL, build headers, ImageMagick, Ghostscript, and Bundler, then runs Redmine under a dedicated application account. PostgreSQL stores the application data, and Puma provides the first local web session for initial login.
Keep the first Puma listener on localhost until a service unit, reverse proxy, TLS, and firewall policy are ready. The default admin login reaches Redmine's password-change screen on a new database, so replace that password before adding projects or users.
Steps to install Redmine on Ubuntu:
- Open a terminal with sudo privileges.
- Refresh the package index.
$ sudo apt update
- Install the Redmine runtime and build dependencies.
$ sudo apt install curl ca-certificates build-essential ruby ruby-dev bundler libpq-dev postgresql postgresql-contrib libyaml-dev libxml2-dev libxslt1-dev zlib1g-dev imagemagick ghostscript
libpq-dev lets Bundler compile the PostgreSQL adapter, while ImageMagick and Ghostscript support image and PDF handling inside Redmine.
- Create the dedicated application account.
$ sudo adduser --system --group --home /opt/redmine redmine
The account owns the application tree and runs the Rails commands without giving Redmine a normal login shell.
- Confirm PostgreSQL accepts local connections.
$ sudo -u postgres psql -c 'SELECT version();'
                                                   version
-------------------------------------------------------------------------------------------------------------
 PostgreSQL 18.4 (Ubuntu 18.4-0ubuntu0.26.04.1)
(1 row)
If the package did not start PostgreSQL automatically, start it with sudo systemctl enable --now postgresql on a normal Ubuntu host.
- Create the Redmine database role and database.
$ sudo -u postgres psql
postgres=# CREATE ROLE redmine LOGIN ENCRYPTED PASSWORD 'change-this-password' NOINHERIT;
CREATE ROLE
postgres=# CREATE DATABASE redmine WITH ENCODING='UTF8' OWNER=redmine;
CREATE DATABASE
postgres=# \q
Use a long unique database password and keep the same value for /opt/redmine/config/database.yml.
- Download the current Redmine release archive.
$ curl -fsSLO https://www.redmine.org/releases/redmine-6.1.3.tar.gz
Redmine 6.1.3 is the current fully supported stable release in the upstream release list used for this install. Use the matching archive and checksum when a newer stable release replaces it.
- Verify the release archive checksum.
$ sha256sum redmine-6.1.3.tar.gz
61db3008c7fd18a3afc559ed656fd38fdf8df8220ac69598b319095183190b7a  redmine-6.1.3.tar.gz
- Extract the release into /opt/redmine.
$ sudo tar -xzf redmine-6.1.3.tar.gz -C /opt/redmine --strip-components=1
- Assign the application tree to the redmine account.
$ sudo chown -R redmine:redmine /opt/redmine
- Write the PostgreSQL database configuration.
$ sudo tee /opt/redmine/config/database.yml >/dev/null <<'YAML'
production:
  adapter: postgresql
  database: redmine
  host: localhost
  username: redmine
  password: "change-this-password"
  encoding: utf8
YAML
$ sudo chown redmine:redmine /opt/redmine/config/database.yml
$ sudo chmod 640 /opt/redmine/config/database.yml
- Add Puma as the production application server.
$ sudo tee /opt/redmine/Gemfile.local >/dev/null <<'RUBY'
gem "puma"
RUBY
$ sudo chown redmine:redmine /opt/redmine/Gemfile.local
Redmine loads /opt/redmine/Gemfile.local during Bundler runs, which keeps runtime gems separate from the upstream release files.
- Enter the Redmine application directory.
$ cd /opt/redmine
- Keep Bundler installs inside the Redmine tree.
$ sudo -u redmine bundle config set --local path vendor/bundle
$ sudo -u redmine bundle config set --local without 'development test'
The local bundle path avoids writing application gems into the system Ruby gem cache.
- Install the Ruby gems.
$ sudo -u redmine bundle install
Bundle complete! 53 Gemfile dependencies, 95 gems now installed.
Gems in the groups 'development' and 'test' were not installed.
Bundled gems are installed into `./vendor/bundle`
- Generate the Rails session secret.
$ sudo -u redmine RAILS_ENV=production bundle exec rake generate_secret_token
No output means the secret token was generated successfully.
- Create the Redmine database schema.
$ sudo -u redmine RAILS_ENV=production bundle exec rake db:migrate
== 1 Setup: migrating =========================================================
##### snipped #####
== 20250611092227 EnablePkce: migrated (0.0009s) ==============================
- Load the default Redmine data set.
$ sudo -u redmine RAILS_ENV=production REDMINE_LANG=en bundle exec rake redmine:load_default_data
Default configuration data loaded.
Change REDMINE_LANG only when the site should start with a different default language.
- Prepare writable runtime directories.
$ sudo -u redmine mkdir -p /opt/redmine/tmp /opt/redmine/tmp/pdf /opt/redmine/public/assets
$ sudo chmod -R 755 /opt/redmine/files /opt/redmine/log /opt/redmine/tmp /opt/redmine/public/assets
- Start Redmine with Puma on localhost.
$ sudo -u redmine -H bash -lc 'cd /opt/redmine && RAILS_ENV=production bundle exec rails server -b 127.0.0.1 -p 3000'
=> Booting Puma
=> Rails 7.2.3.1 application starting in production
* Listening on http://127.0.0.1:3000
Use Ctrl-C to stop
Leave the listener on 127.0.0.1 until a reverse proxy, TLS certificate, firewall rule, and persistent service manager are configured.
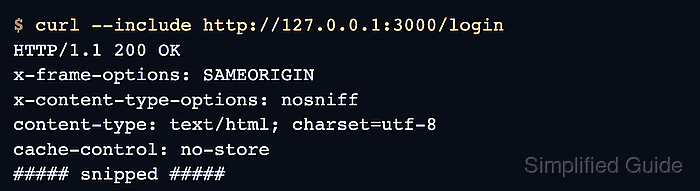
- Verify the login endpoint from another terminal.
$ curl --include http://127.0.0.1:3000/login
HTTP/1.1 200 OK
x-frame-options: SAMEORIGIN
x-content-type-options: nosniff
content-type: text/html; charset=utf-8
cache-control: no-store
##### snipped #####
- Sign in with the initial administrator account and replace its password.
http://127.0.0.1:3000/login
Use admin as the initial login and admin as the initial password only long enough to reach the forced password-change screen.
Related: How to change the Redmine admin password after first login

Mohd Shakir Zakaria is a cloud architect with deep roots in software development and open-source advocacy. Certified in AWS, Red Hat, VMware, ITIL, and Linux, he specializes in designing and managing robust cloud and on-premises infrastructures.


