Key-based SSH authentication in PuTTY requires a .ppk private key, even when the same account already uses a standard OpenSSH key on Linux or other systems. Converting an existing OpenSSH private key avoids maintaining separate keypairs for different clients and keeps access consistent across Windows and non-Windows environments. Reducing extra private keys also simplifies audits and key rotation.
The .ppk file is a client-side container used by PuTTY, while OpenSSH uses a different private key file format. PuTTY Key Generator (PuTTYGen) imports the existing OpenSSH private key material and exports it as a .ppk without changing the underlying keypair. Server-side configuration does not change because the server still validates the matching public key already installed for the account.
Private keys are sensitive credentials; storing the .ppk in a protected location and keeping a passphrase significantly reduces misuse if the file is copied. Import failures commonly come from selecting the public key instead of the private key, or from using an older PuTTYGen that cannot read newer OpenSSH key encodings. Converting the key only creates the .ppk for client use; it does not install or modify keys on the server.
Steps to convert OpenSSH private key to PuTTY Private Key format using PuTTYGen:
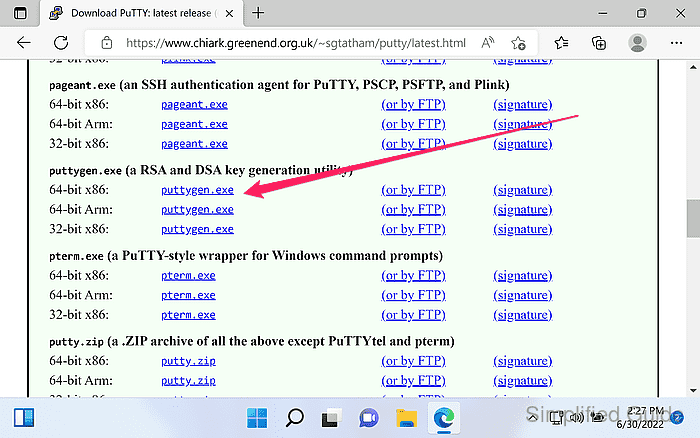
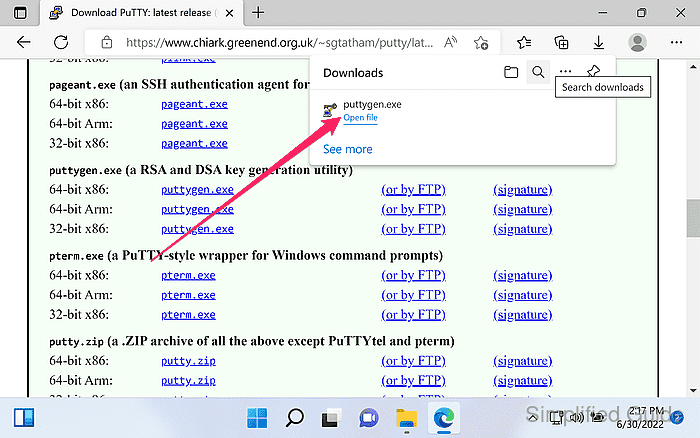
- Download PuTTY Key Generator (puttygen.exe) from the official website.
https://www.chiark.greenend.org.uk/~sgtatham/putty/latest.html
- Launch PuTTYGen.
- Click the Load button.
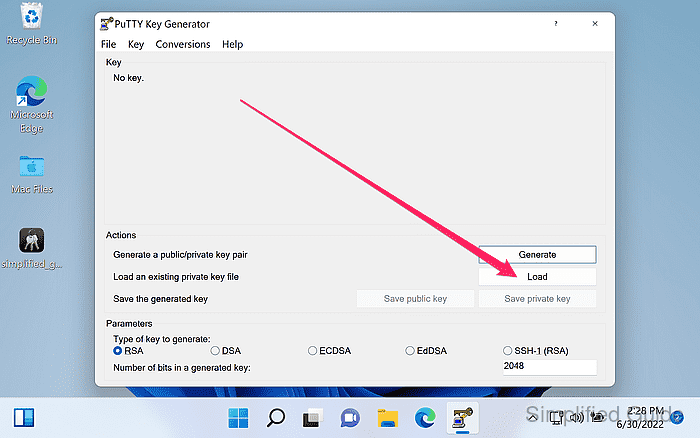
- Set Files of type to All Files (*.*).

OpenSSH private keys often have no extension, so the default filter can hide files such as id_ed25519 or id_rsa.
- Select the OpenSSH private key file and click Open.
If loading fails with a “couldn't load” style error, use a newer PuTTYGen build and confirm the selected file is the private key, not a .pub file.
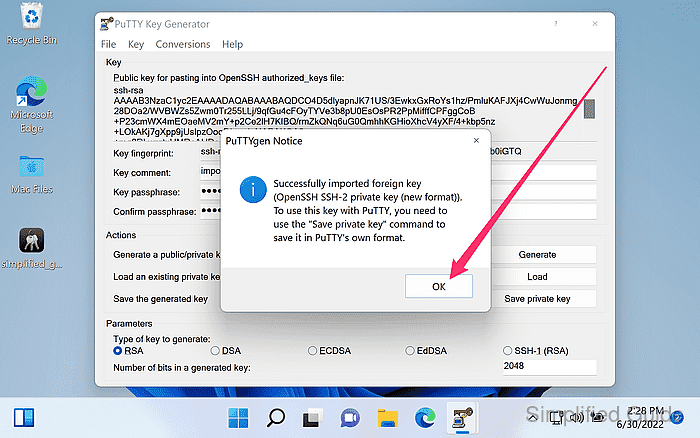
- Enter the key passphrase and click OK.
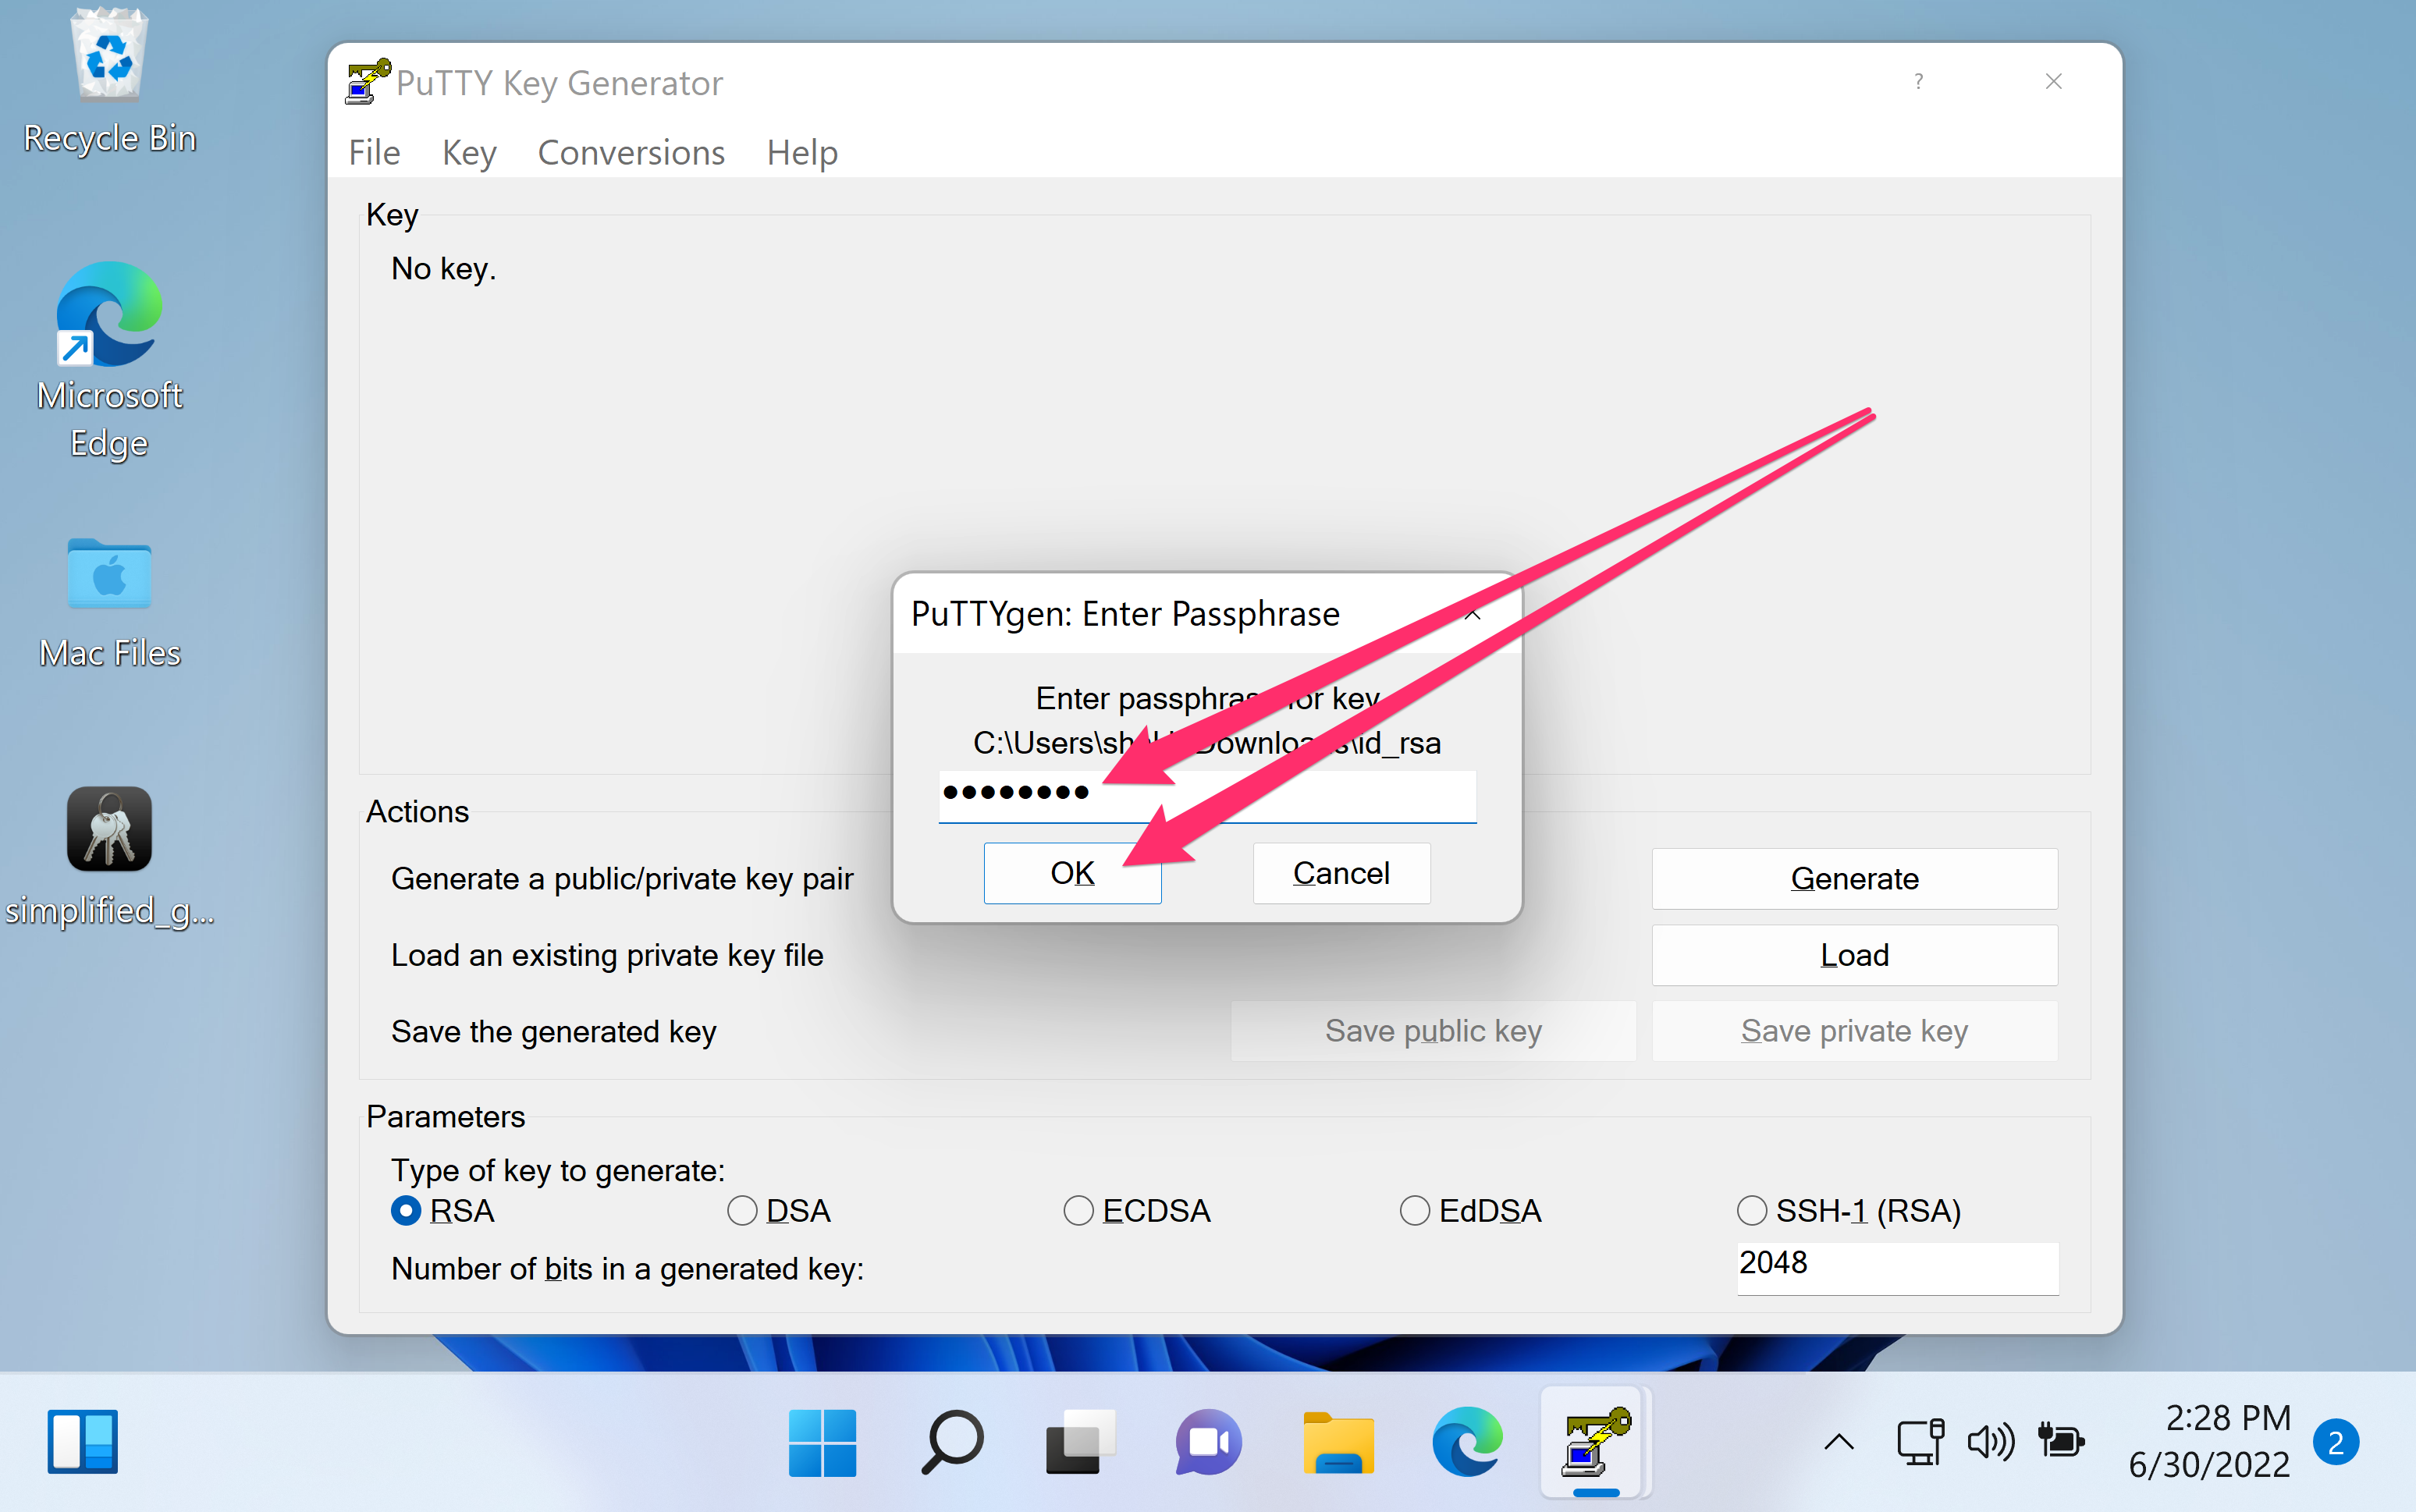
- Confirm the import prompt by clicking OK.
- Verify the key type and fingerprint shown in the main window.
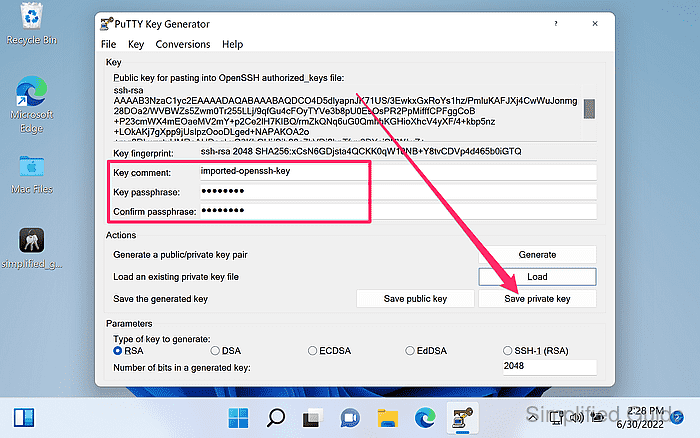
The fingerprint should match the same key when viewed in other clients, indicating the correct private key was imported.
Tool: SSH Public Key Extractor
- Optionally set or update a passphrase in the Key passphrase fields.
- Click Save private key.
Saving a .ppk without a passphrase makes the key usable by anyone who can read the file.
- Select the save location and filename, then click Save.
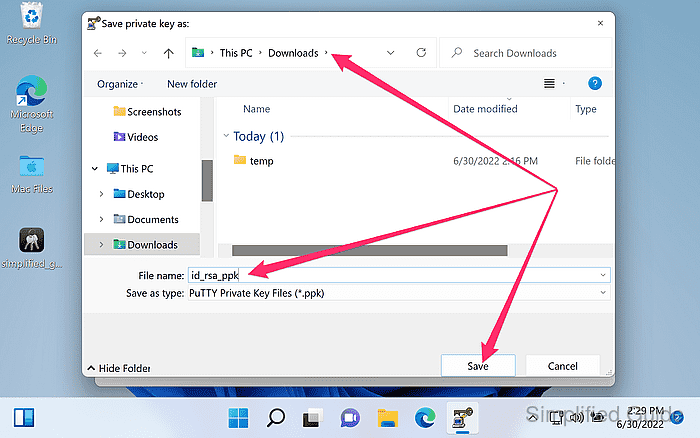
Store the .ppk in a private directory (for example, C:\Users\USERNAME\.ssh) and avoid shared folders or cloud sync locations.
- Load the saved .ppk file in PuTTYGen to confirm it imports successfully.
The .ppk can be selected in PuTTY under Connection → SSH → Auth → Private key file for authentication.

Mohd Shakir Zakaria is a cloud architect with deep roots in software development and open-source advocacy. Certified in AWS, Red Hat, VMware, ITIL, and Linux, he specializes in designing and managing robust cloud and on-premises infrastructures.


