Remote shell access is one of the fastest ways to administer a SUSE system, especially on headless servers, virtual machines, and remote lab hosts. Enabling SSH makes it possible to sign in, transfer files, and run maintenance commands without depending on a local console.
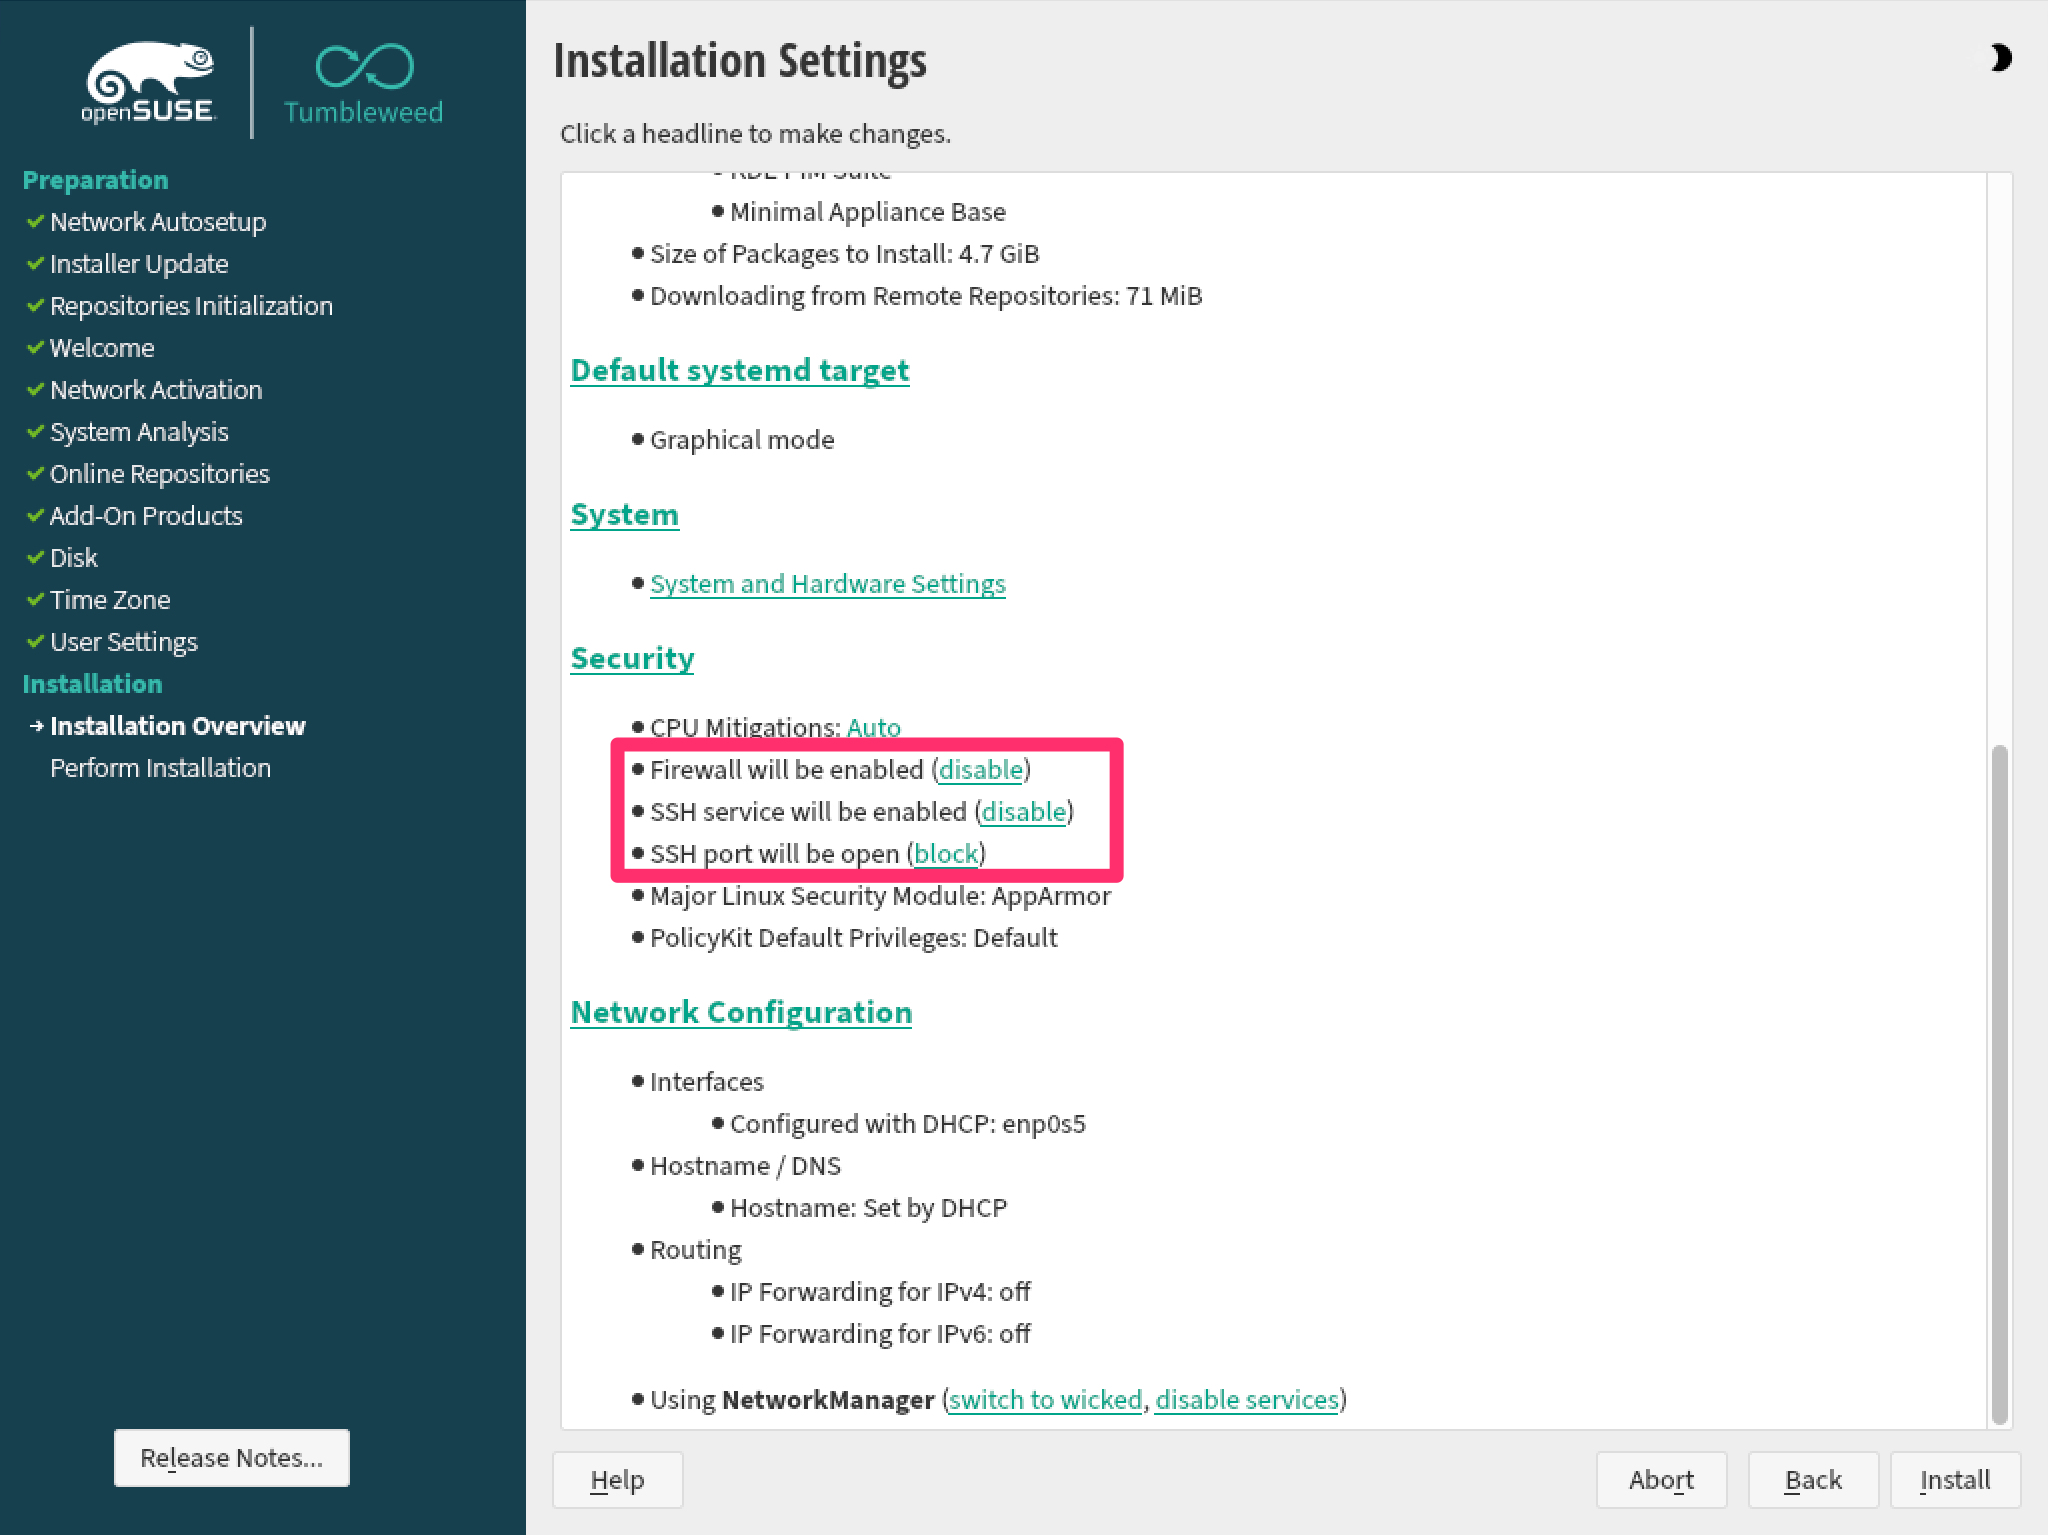
On openSUSE Leap and SLES, remote access is provided by the sshd daemon from the openssh package. Current installations can expose this during setup from the installer security settings, but the same result can be applied later from the shell by making sure the package is present, enabling sshd, and allowing the predefined ssh service through the active firewalld zone.
Current openSUSE Leap systems install OpenSSH by default, while current SLES installers can enable the SSH service automatically but still keep port 22 closed in the firewall until it is opened. Older upgraded systems may still use legacy firewall tooling, and any host exposed beyond a trusted network should review root-login and authentication policy after basic access is working.
Steps to enable SSH on openSUSE and SLES:
- Ensure the OpenSSH package is installed.
$ sudo zypper install openssh
Loading repository data...
Reading installed packages...
'openssh' is already installed.
Nothing to do.
Freshly installed openSUSE Leap and SLES systems usually already include openssh, so this step often confirms the package rather than adding it.
- Enable the sshd service and start it immediately.
$ sudo systemctl enable --now sshd.service
Created symlink /etc/systemd/system/multi-user.target.wants/sshd.service -> /usr/lib/systemd/system/sshd.service.
The --now option starts the daemon immediately while also enabling it for future boots.
- Confirm that sshd is running.
$ sudo systemctl status sshd --no-pager ● sshd.service - OpenSSH Daemon Loaded: loaded (/usr/lib/systemd/system/sshd.service; enabled; preset: disabled) Active: active (running) ##### snipped ##### - Check which firewalld zone handles new interfaces on the server.
$ sudo firewall-cmd --get-default-zone
public
If the command returns a zone other than public, substitute that zone name in the next two steps.
- Allow the predefined ssh service permanently in the active firewall zone.
$ sudo firewall-cmd --zone=public --permanent --add-service=ssh
success
The --permanent rule survives reboots but does not become active until firewalld reloads.
- Reload firewalld to activate the saved rule.
$ sudo firewall-cmd --reload
success
- Verify that the firewall now advertises the ssh service in the selected zone.
$ sudo firewall-cmd --zone=public --list-services
cockpit dhcpv6-client ssh
Service lists vary by host role, but ssh must appear in the output for remote access to pass through the firewall.
- Open an SSH session from another machine to confirm end-to-end access.
$ ssh user@192.0.2.25
user@192.0.2.25's password:
user@server1:~>
The host-key prompt appears only on the first connection from a client that has not seen this server before.
After confirming basic access, tighten the server by reviewing password authentication, root-login policy, and key-based access for any system reachable from untrusted networks.

Mohd Shakir Zakaria is a cloud architect with deep roots in software development and open-source advocacy. Certified in AWS, Red Hat, VMware, ITIL, and Linux, he specializes in designing and managing robust cloud and on-premises infrastructures.


