Display scaling in Windows 11 changes the size of text, icons, and apps without lowering the screen resolution. Proper scaling keeps high-DPI displays readable and avoids the “microscopic menus” problem on modern laptops and 4K monitors.
Windows uses a per-monitor DPI scale factor (percentage) that DPI-aware apps read to render at the correct physical size. The Scale setting in Settings → System → Display applies to the selected monitor and can differ between displays in a multi-monitor setup.
Non-standard values via Custom scaling can cause some legacy apps to appear blurry or have layout issues. Applying custom scaling requires a sign-out, so saving work before committing the change avoids losing unsaved edits.
Steps to configure display scaling in Windows 11:
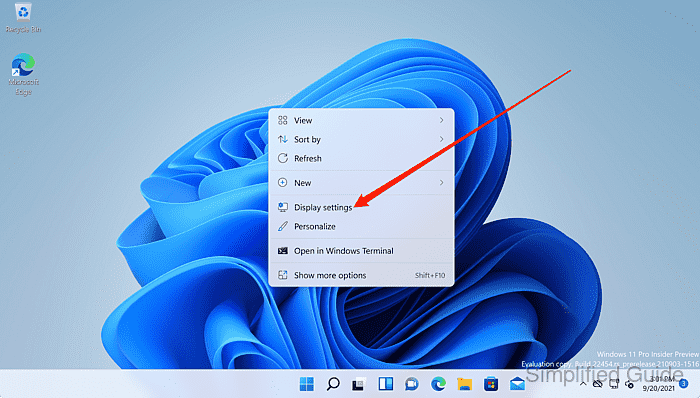
- Right-click on the Windows desktop to open the context menu.

- Select Display settings from the context menu.
- Select the target monitor under Select and rearrange displays when multiple monitors are connected.
- Select the desired value from the Scale drop-down under Scale & layout.
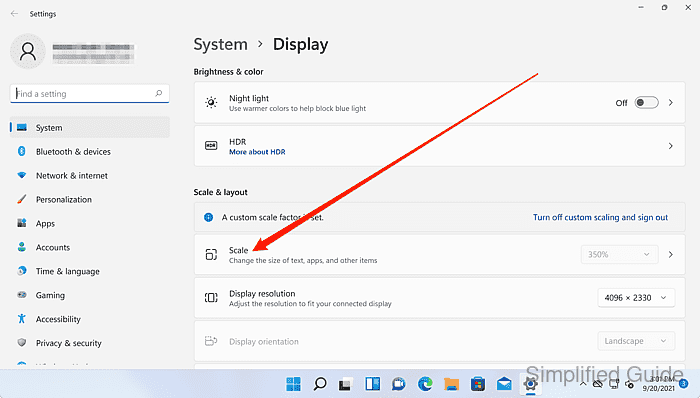
Preset scaling applies immediately and can be set differently per monitor.
- Select Advanced scaling settings to set a custom scale percentage.
- Enter a value between 100% and 500% in the Custom scaling field.
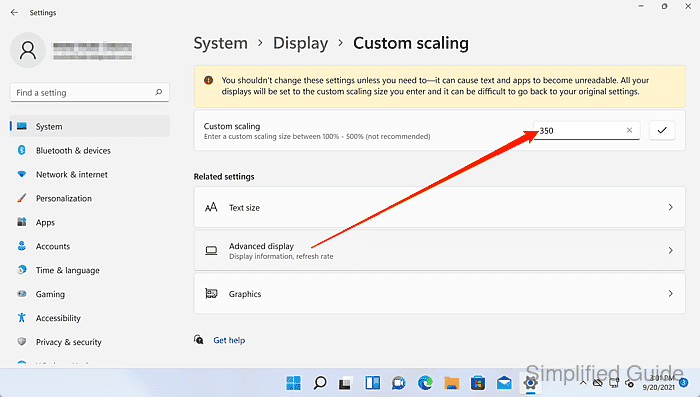
Custom scaling requires a sign-out to apply; revert using Turn off custom scaling and sign out if apps render poorly.
- Apply the custom scale value.
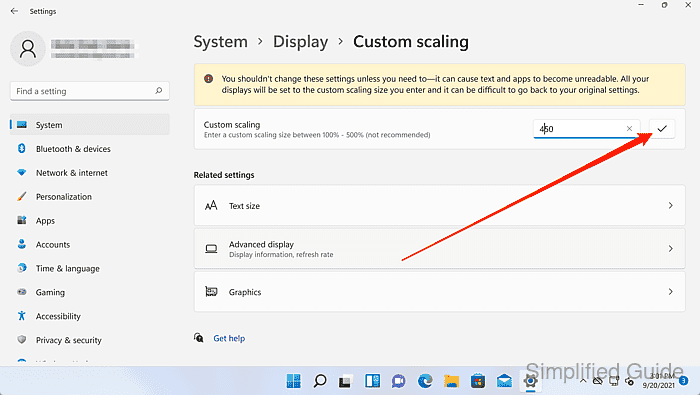
- Click the Sign out now button to finalize the change.

This logs out of the current Windows session; unsaved work will be lost.
- Sign back in to continue.
- Open Display settings to view the active scaling percentage under Scale & layout.

Mohd Shakir Zakaria is a cloud architect with deep roots in software development and open-source advocacy. Certified in AWS, Red Hat, VMware, ITIL, and Linux, he specializes in designing and managing robust cloud and on-premises infrastructures.


