In a multi-monitor setup on macOS, you can designate a specific screen as the primary display. The primary display is where the menu bar, dock, and new windows appear by default. This configuration is useful when you want to use a larger external monitor as your main workspace.
macOS typically assigns the built-in display of a MacBook as the primary display. You can change this setting easily through the Displays preferences in System Settings. This allows you to customize which screen serves as the focal point for your tasks.
Altering the primary display is a simple process that gives you control over your desktop environment. This adjustment helps optimize your workspace for productivity, especially in multi-monitor setups. The following steps will guide you through the process.
Steps to change the primary display in macOS:
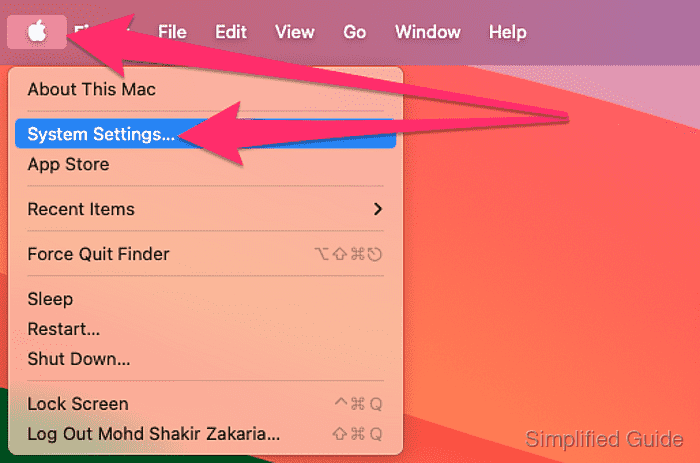
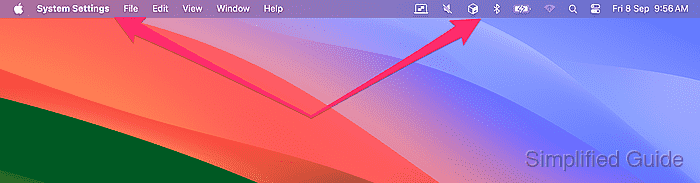
- Open System Settings from the Apple menu at the top left of the screen.
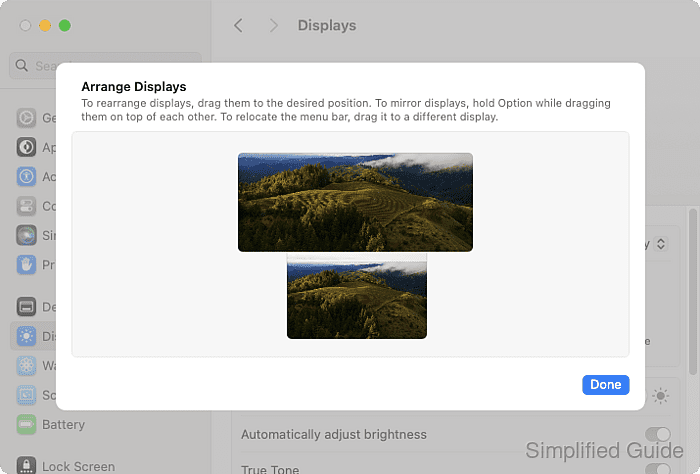
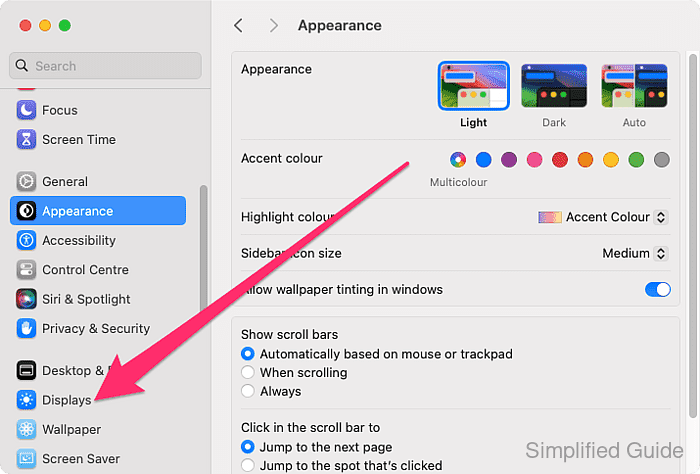
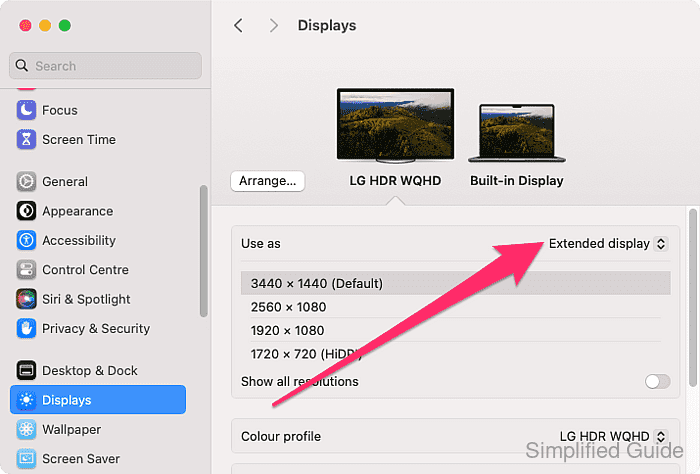
- Open Displays preference panel.
- Click on the display that you want to set as the main display.
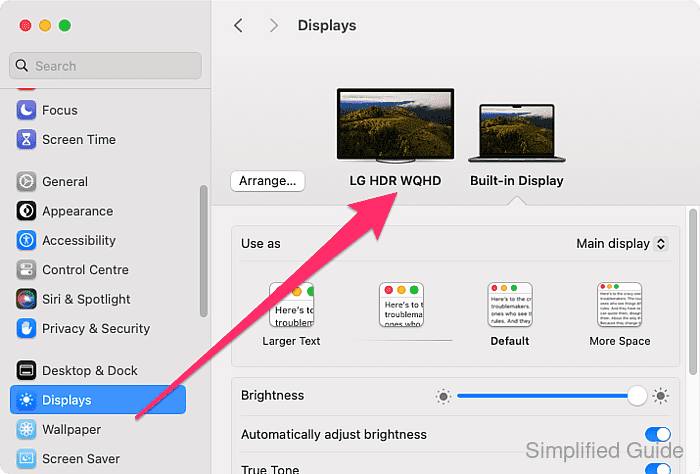
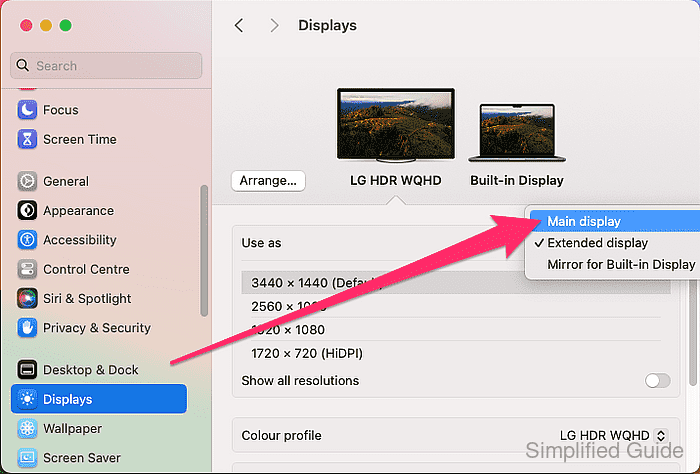
- Click on the Use as select list.
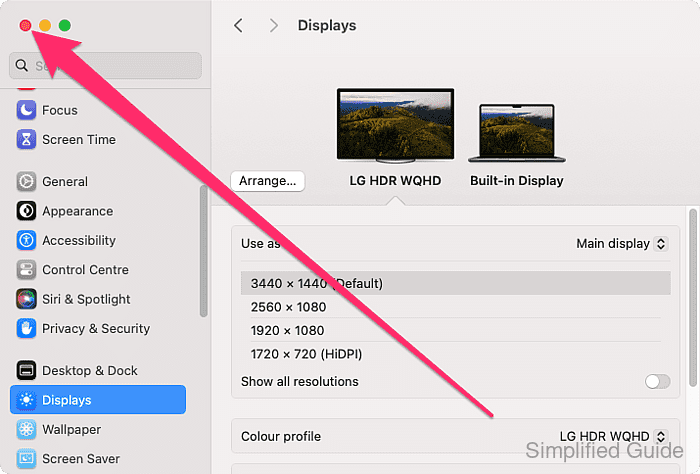
- Select the Main display option.
- Close the Displays preference panel.
- Confirm the menu bar and dock are now on the new primary display.

Mohd Shakir Zakaria is a cloud architect with deep roots in software development and open-source advocacy. Certified in AWS, Red Hat, VMware, ITIL, and Linux, he specializes in designing and managing robust cloud and on-premises infrastructures.


