Losing a partition entry hides installed systems, data volumes, and backups behind a missing record in the partition table while leaving the underlying data largely intact. Restoring that entry re-exposes the existing filesystem, avoiding slower file-by-file recovery and reducing downtime.
On Linux, the tool TestDisk scans block devices such as /dev/sda for filesystem signatures and partition metadata, then proposes entries that rebuild the original partition table layout. Operations work directly on the disk rather than through mounted filesystems, which allows recovery even when no partitions appear in normal tools.
Safe recovery depends on minimizing writes to the affected disk. Booting from a live Linux distribution such as Ubuntu, unmounting any partitions on the target disk, and only writing changes once the proposed layout has been carefully checked helps reduce the risk of further data loss.
Related: How to check disk errors in Linux
Related: How to mount disks and partitions in Linux
Steps to recover lost or deleted partition for free using Linux:
- Boot the computer using a live Linux distribution, such as Ubuntu.
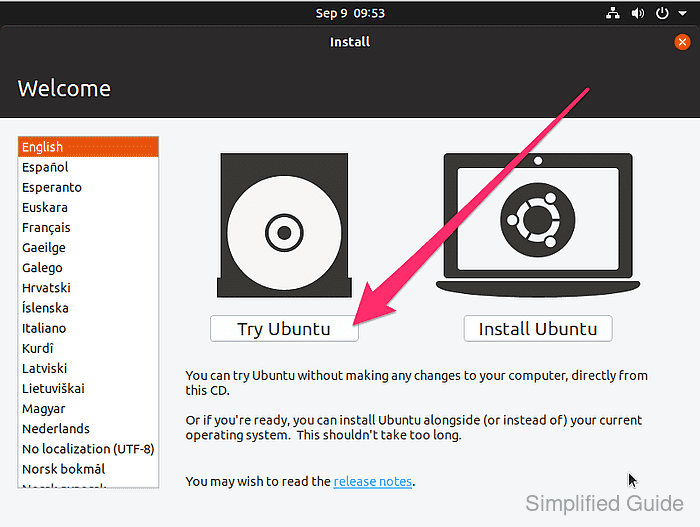
- Enter Live CD mode when available if booting from an installer image.
For Ubuntu installer, click the Try Ubuntu button.
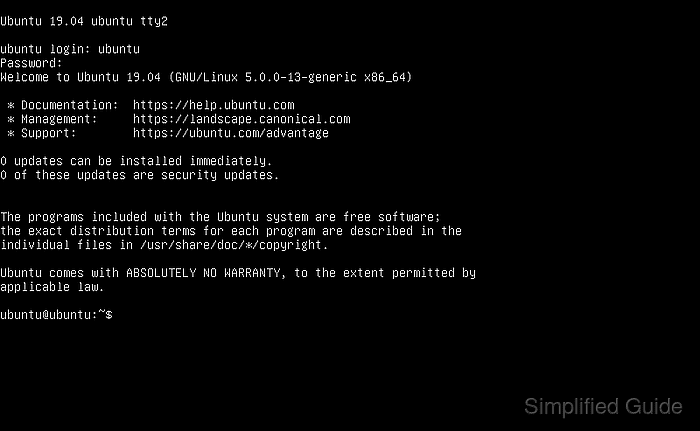
- Open a terminal.
If no Live CD mode is available, press <ctrl> + <alt> + <f2> keys to get to the terminal.
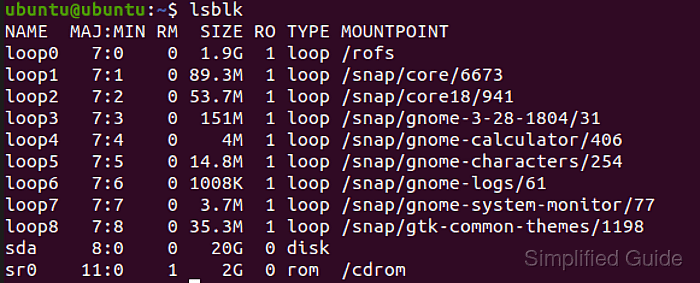
- Identify the disk containing the lost or deleted partition.
$ lsblk
NAME      MAJ:MIN RM   SIZE RO TYPE MOUNTPOINTS
loop0       7:0    0   512M  0 loop /mnt/bench
loop1       7:1    0    64M  0 loop
loop2       7:2    0    32M  0 loop
loop3       7:3    0    64M  0 loop
`-loop3p1 259:0    0    15M  0 part
nbd0       43:0    0     0B  0 disk
nbd1       43:32   0     0B  0 disk
nbd2       43:64   0     0B  0 disk
nbd3       43:96   0     0B  0 disk
nbd4       43:128  0     0B  0 disk
nbd5       43:160  0     0B  0 disk
nbd6       43:192  0     0B  0 disk
nbd7       43:224  0     0B  0 disk
vda       254:0    0   1.8T  0 disk
`-vda1    254:1    0   1.8T  0 part /etc/hosts
                                    /etc/hostname
                                    /etc/resolv.conf
vdb       254:16   0 606.5M  1 disk
nbd8       43:256  0     0B  0 disk
nbd9       43:288  0     0B  0 disk
nbd10      43:320  0     0B  0 disk
nbd11      43:352  0     0B  0 disk
nbd12      43:384  0     0B  0 disk
nbd13      43:416  0     0B  0 disk
nbd14      43:448  0     0B  0 disk
nbd15      43:480  0     0B  0 disk
Look for the disk size or label to identify the correct disk.
- Ensure partitions on the target disk are not mounted before recovery.
$ mount | grep /dev/loop3
$ sudo umount /dev/loop3
umount: /dev/loop3: not mounted.
Writing to mounted partitions on the affected disk can overwrite recoverable data and permanently destroy filesystems.
- Enable additional repositories if TestDisk is not available from the default sources on Ubuntu.
On Ubuntu, the universe component provides TestDisk when it is not present in the base repositories.
- Install TestDisk if it is not already installed.
$ sudo apt install --assume-yes testdisk

WARNING: apt does not have a stable CLI interface. Use with caution in scripts.

Reading package lists...
Building dependency tree...
Reading state information...
testdisk is already the newest version (7.1-5+nmu1build2).
0 upgraded, 0 newly installed, 0 to remove and 5 not upgraded.
- Launch TestDisk from the terminal.
$ sudo testdisk /version
TestDisk 7.1, Data Recovery Utility, July 2019
Christophe GRENIER <grenier@cgsecurity.org>
https://www.cgsecurity.org

Version: 7.1
Compiler: GCC 13.2
ext2fs lib: 1.47.0, ntfs lib: libntfs-3g, reiserfs lib: none, ewf lib: none, curses lib: ncurses 6.4
OS: Linux, kernel 6.12.54-linuxkit (#1 SMP Tue Nov  4 21:21:47 UTC 2025) aarch64
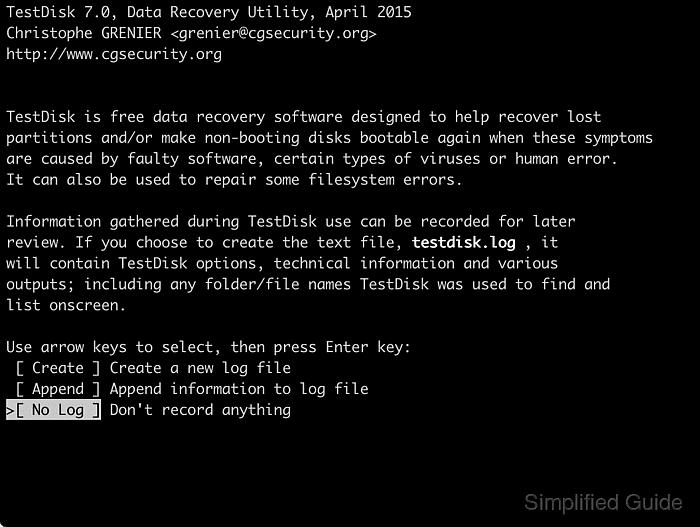
- Select No Log with the arrow keys and press [ENTER].
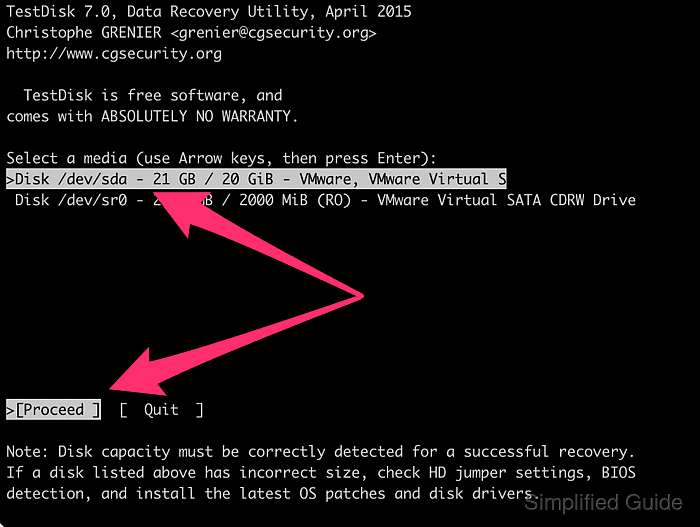
- Select the disk with the lost or deleted partition and press [ENTER] to proceed.
- Select the disk's partition table type and press [ENTER].
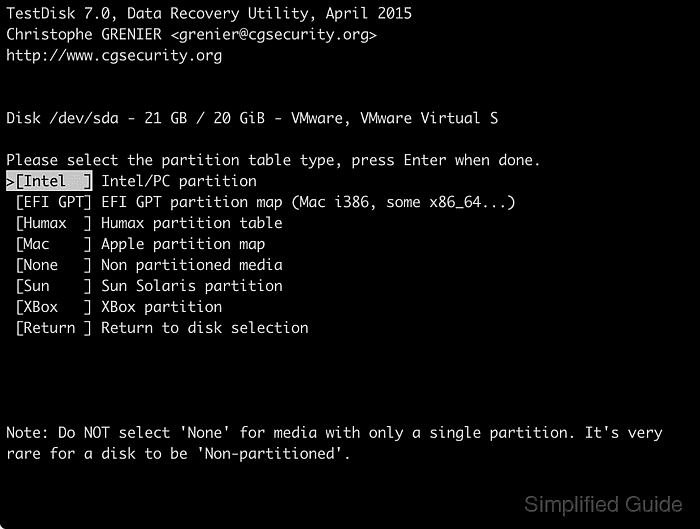
Intel is the most common partition type with EFI GPT starting to gain popularity.
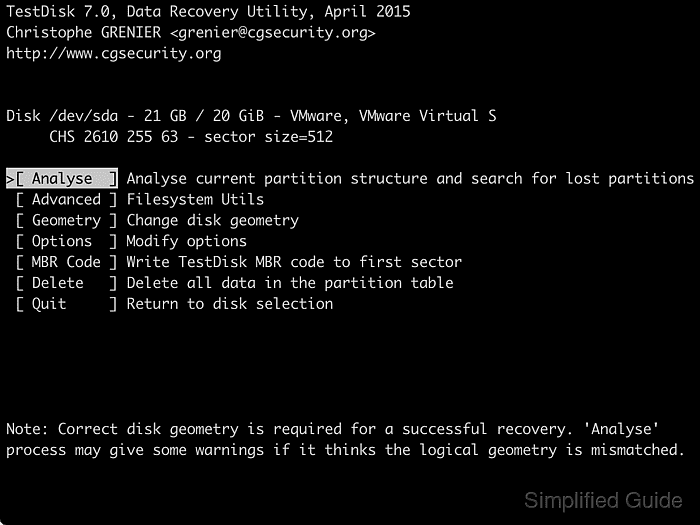
- Press [ENTER] to start analysing the disk.
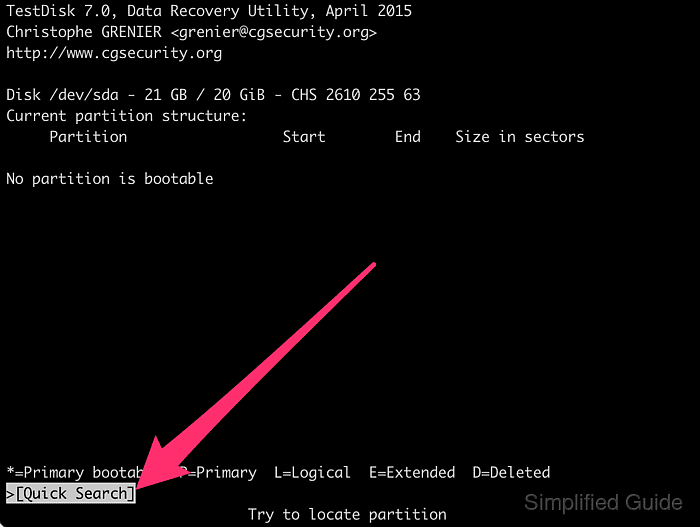
- Press [ENTER] again to search for potential partitions on the chosen disk.
- Select the found partition and press [ENTER] to continue.
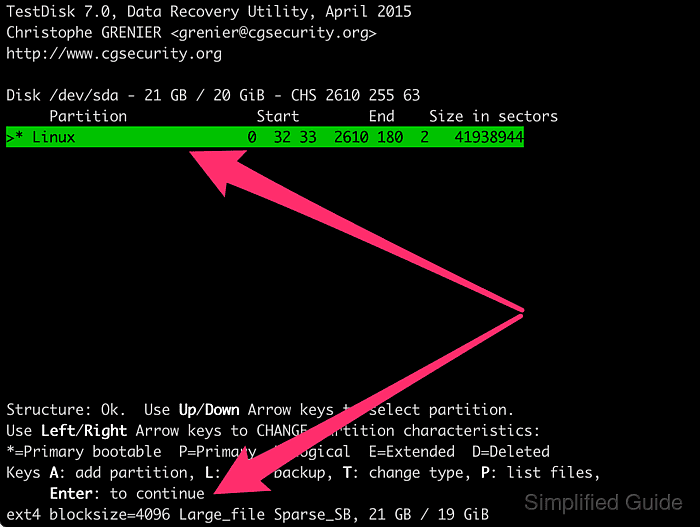
- Choose Write and press [ENTER] to update the partition table.
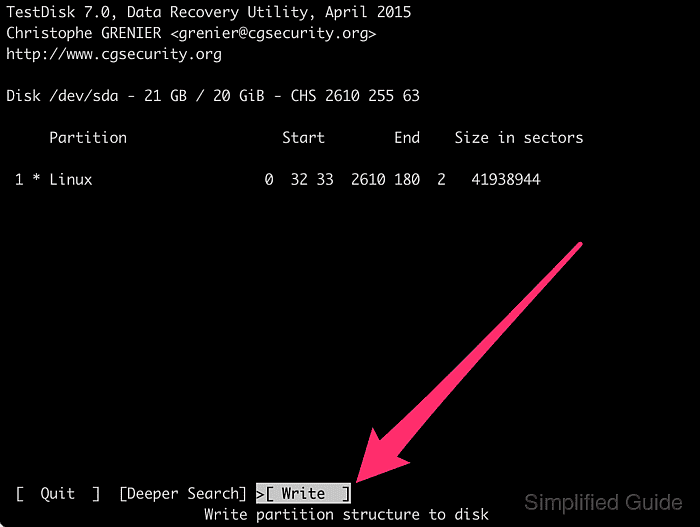
Writing an incorrect partition layout can make existing data harder to recover, so the proposed start and end positions should match expectations before confirming.
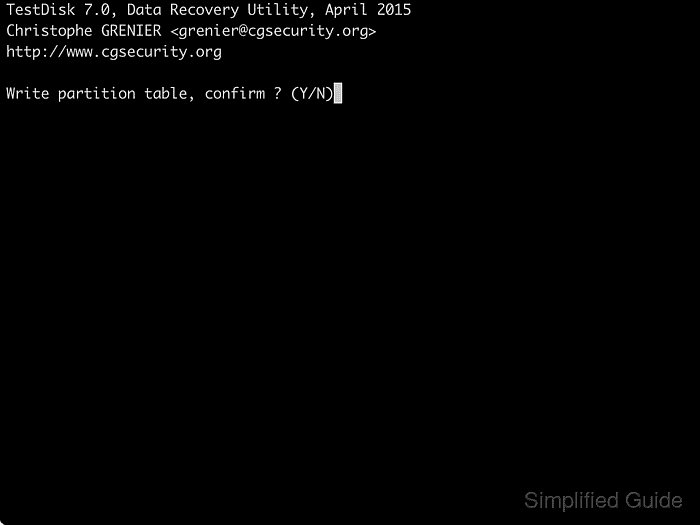
- Press Y to confirm the partition table update.
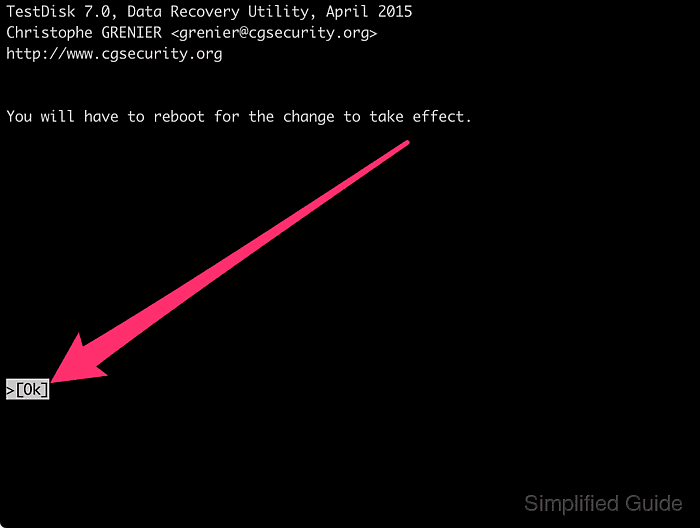
- Press [ENTER] on Ok to continue.
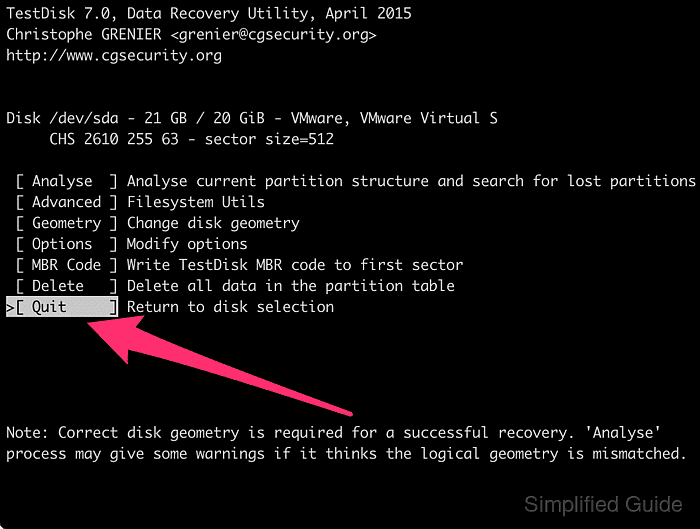
- Select Quit and press [ENTER] to return to the disk selection menu.
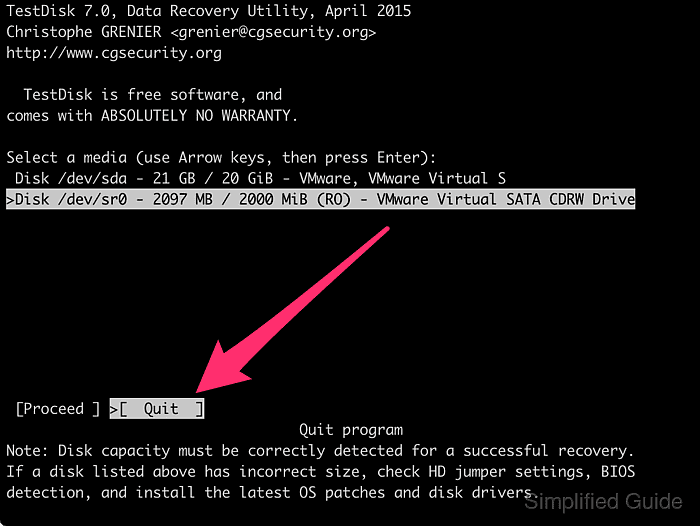
- Select Quit and press [ENTER] to exit TestDisk.
- Verify that the partition has been recovered by listing block devices again.
$ lsblk
NAME      MAJ:MIN RM   SIZE RO TYPE MOUNTPOINTS
loop0       7:0    0   512M  0 loop /mnt/bench
loop1       7:1    0    64M  0 loop
loop2       7:2    0    32M  0 loop
loop3       7:3    0    64M  0 loop
`-loop3p1 259:0    0    15M  0 part
nbd0       43:0    0     0B  0 disk
nbd1       43:32   0     0B  0 disk
nbd2       43:64   0     0B  0 disk
nbd3       43:96   0     0B  0 disk
nbd4       43:128  0     0B  0 disk
nbd5       43:160  0     0B  0 disk
nbd6       43:192  0     0B  0 disk
nbd7       43:224  0     0B  0 disk
vda       254:0    0   1.8T  0 disk
`-vda1    254:1    0   1.8T  0 part /etc/hosts
                                    /etc/hostname
                                    /etc/resolv.conf
vdb       254:16   0 606.5M  1 disk
nbd8       43:256  0     0B  0 disk
nbd9       43:288  0     0B  0 disk
nbd10      43:320  0     0B  0 disk
nbd11      43:352  0     0B  0 disk
nbd12      43:384  0     0B  0 disk
nbd13      43:416  0     0B  0 disk
nbd14      43:448  0     0B  0 disk
nbd15      43:480  0     0B  0 disk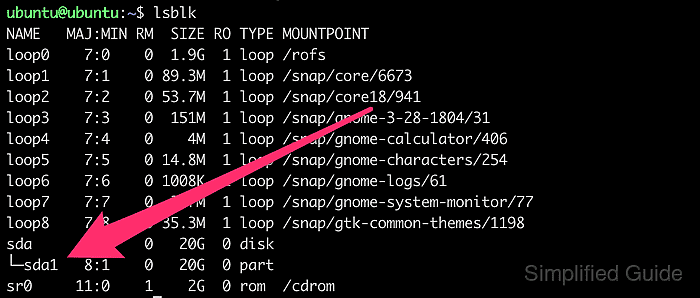
- Restart the computer to apply the changes and load the recovered partition table.

Mohd Shakir Zakaria is a cloud architect with deep roots in software development and open-source advocacy. Certified in AWS, Red Hat, VMware, ITIL, and Linux, he specializes in designing and managing robust cloud and on-premises infrastructures.
