Google Chrome uses the operating system's default proxy settings to connect to the internet. A proxy server acts as an intermediary between your browser and the web, routing traffic through another server. This can help hide your IP address, bypass region restrictions, or manage network access. Changing proxy settings in Chrome can be useful for controlling how traffic flows through the network.
Chrome does not have a dedicated proxy settings page. Instead, it accesses the system’s network configuration through its settings. Changing these settings affects all internet traffic on the machine, not just Chrome. This system-wide configuration can be effective for users who need consistent proxy management across applications, but may not be ideal for those who need more control over individual programs.
For users needing more flexible control, Chrome supports proxy extensions like FoxyProxy or VPN browser plugins. These tools allow you to set proxy settings specifically for Chrome, avoiding the need to modify the entire system's configuration. This can be useful for users accessing specific websites or content, without affecting the overall network setup.
Steps to change proxy settings in Google Chrome and Chromium:
- Open Chrome's Setting page.
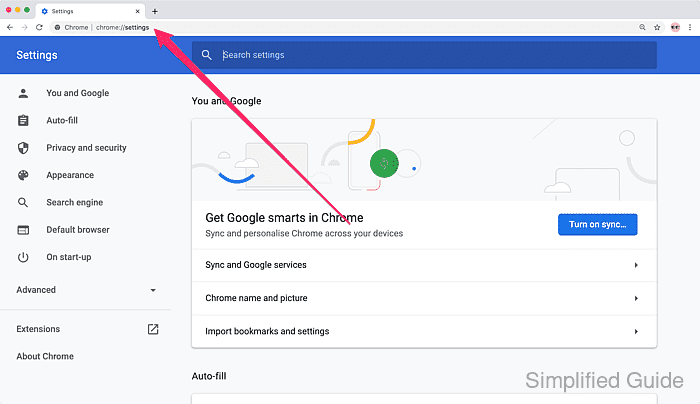
Go to chrome://settings from the URL bar.
- Click on Advanced at the bottom of the page or from the sidebar.

- Scroll down till you come to the System section .
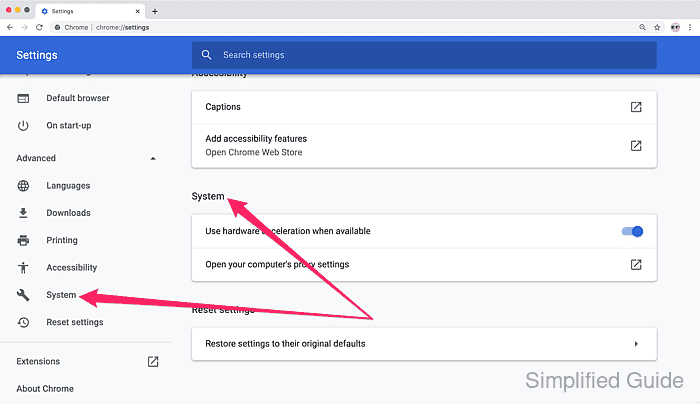
Proxy management browser plugins such as FoxyProxy will be listed in the section if installed
- Click on Open your computer's proxy settings to configure your system's proxy setting.
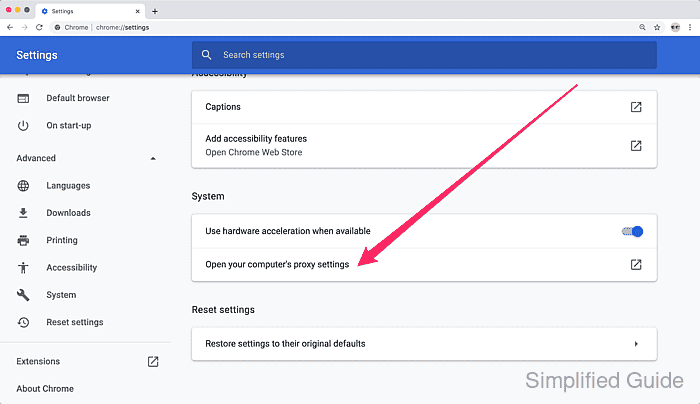
- Configure your proxy accordingly based on your operating system, then verify the public IP address seen by the browser.
Related: How to configure proxy settings in Windows
Related: How to configure proxy settings in macOS
Tool: What Is My IP Address?

The caveat to this approach is that it will configure the system's proxy setting whereby all the other traffic for your systems will go through the configured proxy. To route only your browser's traffic through a proxy, it is advisable to use proxy extensions such as FoxyProxy

Mohd Shakir Zakaria is a cloud architect with deep roots in software development and open-source advocacy. Certified in AWS, Red Hat, VMware, ITIL, and Linux, he specializes in designing and managing robust cloud and on-premises infrastructures.


