Amazon S3 is a service that allows you to store a wide range of files in the cloud. These files can include public assets like JavaScript and CSS files, as well as sensitive data like logs and backups. By default, any bucket you create in S3 is set to private. This ensures that your files are not accessible to the public.
To keep your data secure, it’s essential to configure your S3 bucket settings correctly. You can create a private S3 bucket through the AWS console. Ensure that all public access is blocked during the setup process to maintain the security of your files.
Managing your bucket settings through the S3 dashboard is straightforward. Choose a unique name, select the appropriate region, and verify that the bucket remains private by default. These steps will help you securely store your files in AWS.
Steps to create private AWS S3 bucket:
- Go to S3 section in your AWS Console.
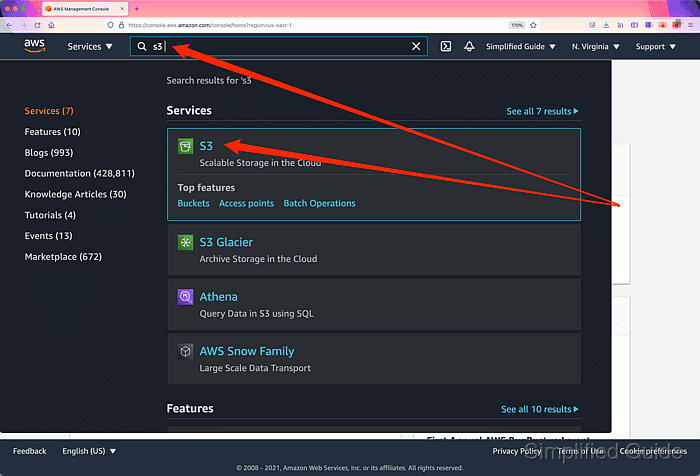
Related: AWS S3 Management Console
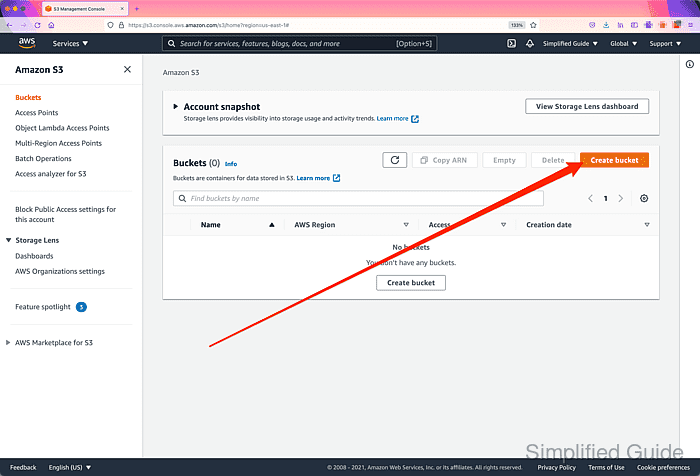
- Click on the Create bucket icon.
- Enter the name of the S3 bucket.
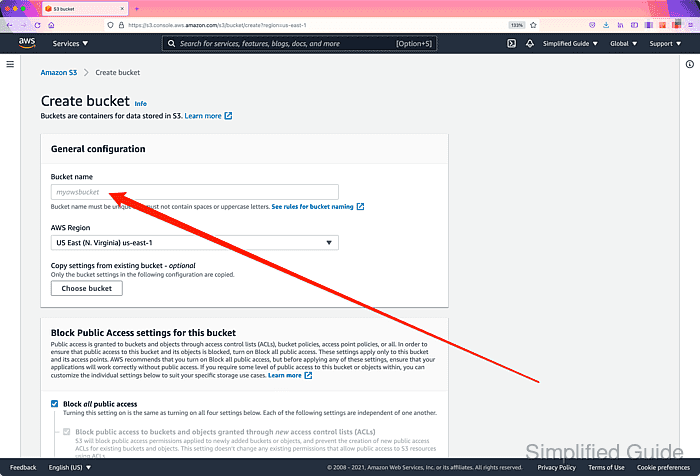
The name must be unique regardless of regions. You'll get an error when trying to use bucket name already being used anywhere within S3
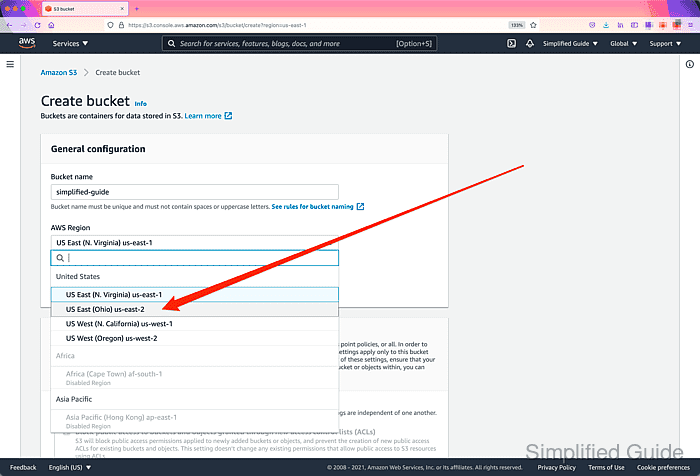
- Click on the AWS Region select list.
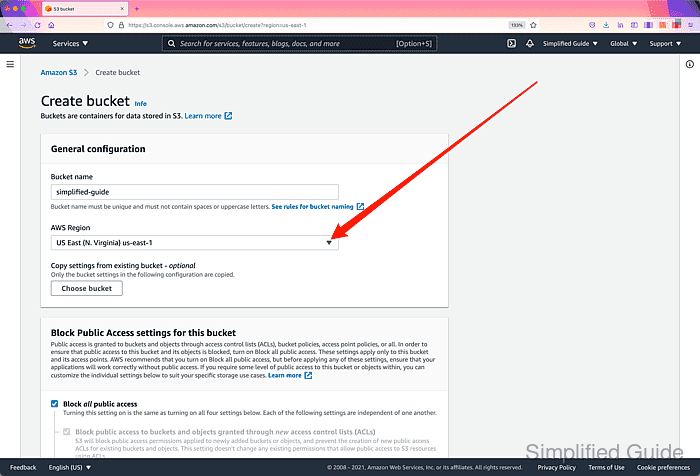
- Select the region for the S3 bucket.
- Accept defults (Block all public access) on the public access section.

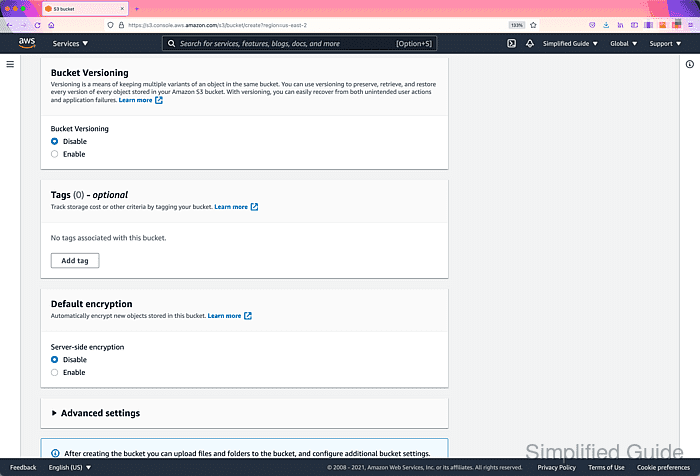
- Configure other options for the S3 bucket as necessary.
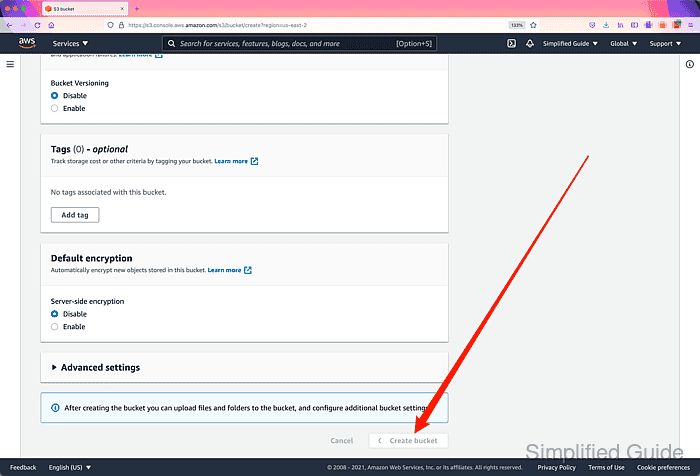
- Click on the Create bucket button.
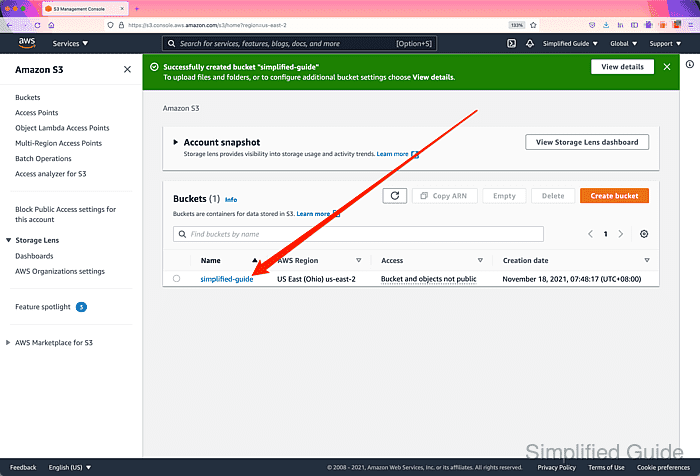
- Click on the bucket that you have just created.
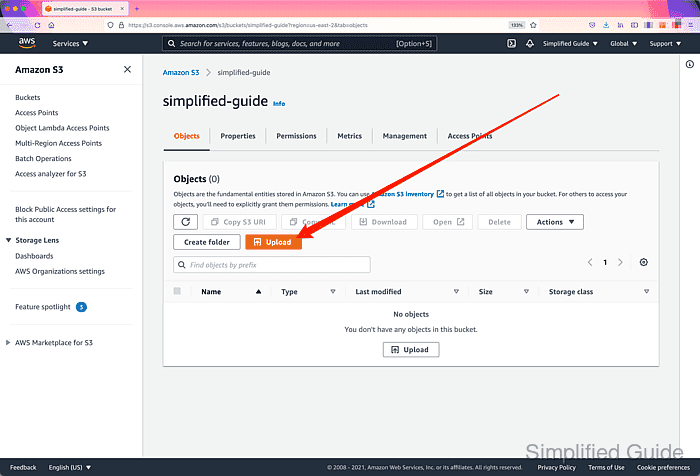
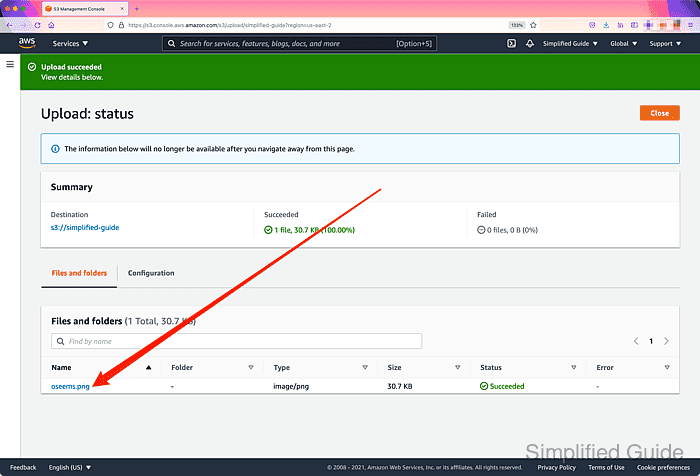
- Click on the Upload button.
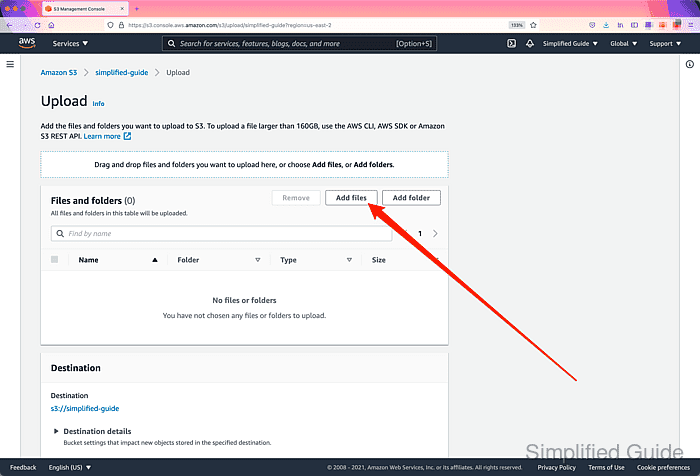
- Click on the Add files button.
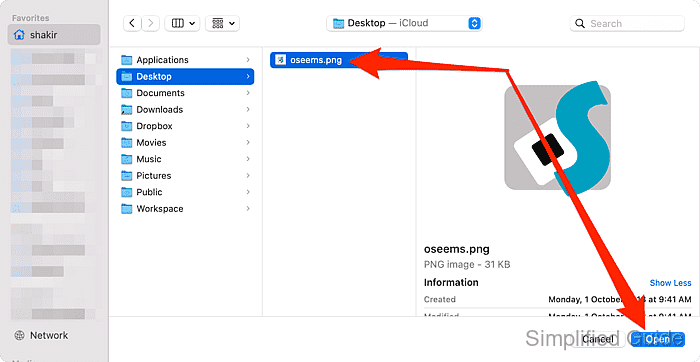
- Select the files to upload and click Open.
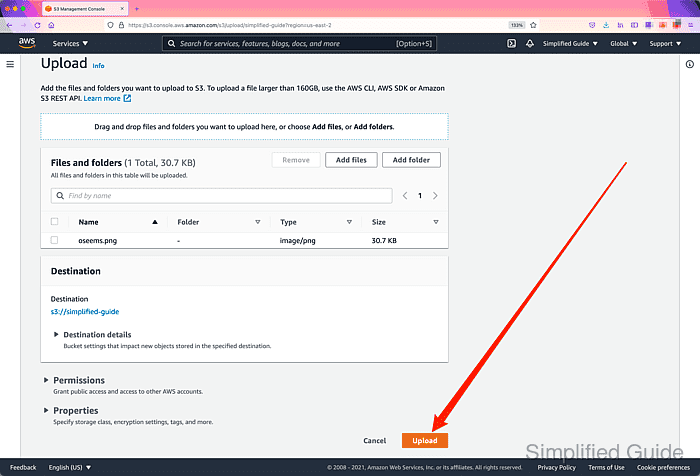
- Click on the Upload button.
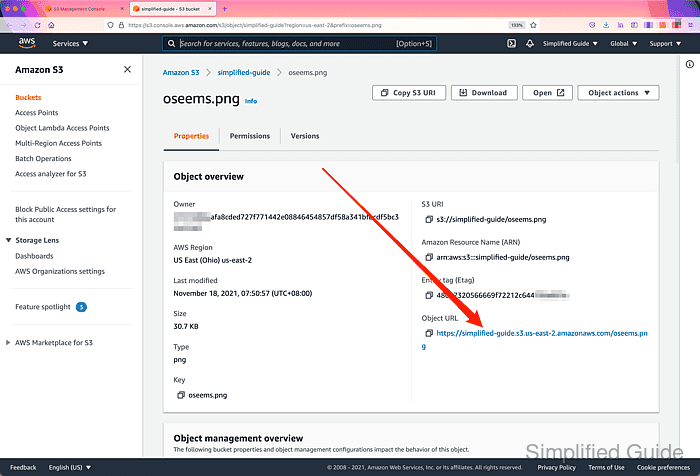
- Click on the file that you have just uploaded.
- Click on the link in the Object URL section.
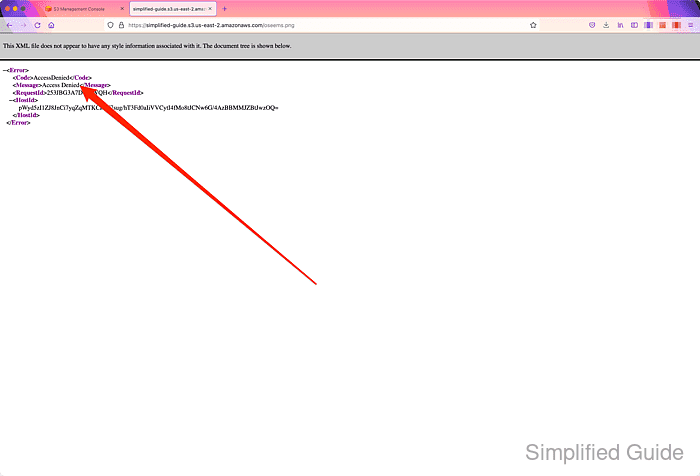
- Confirm S3 bucket is private by getting Access Denied error.

Mohd Shakir Zakaria is a cloud architect with deep roots in software development and open-source advocacy. Certified in AWS, Red Hat, VMware, ITIL, and Linux, he specializes in designing and managing robust cloud and on-premises infrastructures.


