Running an Apache site over HTTPS protects logins, session cookies, and other application traffic before it leaves the server. A self-signed certificate is useful for lab, staging, and internal names when you need encryption immediately and can either accept client trust warnings or distribute the certificate to those clients yourself.
Apache serves TLS through mod_ssl, which binds a 443 VirtualHost to a certificate file and matching private key. On current Debian and Ubuntu packages, a2enmod and a2ensite manage the enabled module and site symlinks under /etc/apache2/, while the certificate itself still needs a subjectAltName entry for every hostname clients will use.
Steps below target the current Debian and Ubuntu apache2 package layout. Modern OpenSSL 3.x builds deprecate -nodes in favor of -noenc for an unencrypted private key, and mod_ssl reads the certificate and key files at server startup, so a restart is the safer final apply step after certificate changes. For Internet-facing sites, replace the self-signed certificate with one from a publicly trusted CA.
Related: How to test Apache configuration
Related: How to enable or disable Apache modules
Related: How to manage the Apache web server service
Steps to set up a self-signed TLS certificate for Apache:
- Open a terminal.
- Create a directory for the certificate and private key with restrictive permissions.
$ sudo install -d -m 700 /etc/apache2/ssl
- Generate a self-signed certificate and private key with OpenSSL, and include every hostname clients will use in subjectAltName.
$ sudo openssl req -x509 -newkey rsa:2048 -sha256 -days 365 -noenc \
  -keyout /etc/apache2/ssl/host.example.net.key \
  -out /etc/apache2/ssl/host.example.net.crt \
  -subj "/CN=host.example.net" \
  -addext "subjectAltName=DNS:host.example.net,DNS:www.host.example.net"
-noenc writes an unencrypted private key, so keep the key readable only by root.
On current OpenSSL 3.x builds, -nodes is deprecated in favor of -noenc. Extend or trim the subjectAltName list to match the exact ServerName and ServerAlias values the site will present.
- Restrict the private key to root-only read access.
$ sudo chmod 600 /etc/apache2/ssl/host.example.net.key
$ sudo ls -l /etc/apache2/ssl/host.example.net.key
-rw------- 1 root root 1704 Jun  6 11:31 /etc/apache2/ssl/host.example.net.key
- Confirm the generated certificate contains the expected subject, subjectAltName entries, and expiry dates.
$ sudo openssl x509 -in /etc/apache2/ssl/host.example.net.crt -noout -subject -ext subjectAltName -dates
subject=CN=host.example.net
X509v3 Subject Alternative Name:
    DNS:host.example.net, DNS:www.host.example.net
notBefore=Jun  6 11:31:52 2026 GMT
notAfter=Jun  6 11:31:52 2027 GMT
If the hostname is missing here, clients will still reject the certificate even when the Common Name looks correct.
Tool: SSL Certificate Decoder
- Enable mod_ssl.
$ sudo a2enmod ssl
Considering dependency mime for ssl:
Module mime already enabled
Considering dependency socache_shmcb for ssl:
Enabling module socache_shmcb.
Enabling module ssl.
See /usr/share/doc/apache2/README.Debian.gz on how to configure SSL and create self-signed certificates.
To activate the new configuration, you need to run:
  service apache2 restart
On current Debian and Ubuntu packages, enabling ssl also enables the required socache_shmcb dependency. The default /etc/apache2/ports.conf/ also adds Listen 443 when ssl is enabled.
- Edit the site configuration file that should present the certificate.
$ sudo vi /etc/apache2/sites-available/host.example.net.conf
If the site already has an HTTP virtual host on port 80, keep it and add a separate 443 block instead of replacing the non-TLS listener.
- Add or update the HTTPS VirtualHost so it references the generated certificate and key.
<VirtualHost *:443>
    ServerName host.example.net
    ServerAlias www.host.example.net
    DocumentRoot /var/www/html

    SSLEngine on
    SSLCertificateFile /etc/apache2/ssl/host.example.net.crt
    SSLCertificateKeyFile /etc/apache2/ssl/host.example.net.key
</VirtualHost>
Keep the hostnames in ServerName and ServerAlias aligned with the names listed in the certificate subjectAltName extension.
- Enable the site configuration if it is not already enabled.
$ sudo a2ensite host.example.net.conf
Enabling site host.example.net.
To activate the new configuration, you need to run:
  service apache2 reload
a2ensite creates the symlink in /etc/apache2/sites-enabled/, but the certificate files themselves are still read by Apache at startup.
- Optionally redirect HTTP traffic to HTTPS in the port 80 VirtualHost for the same site.
<VirtualHost *:80>
    ServerName host.example.net
    Redirect permanent / https://host.example.net/
</VirtualHost>
Place the redirect in the existing port 80 site for the same hostname so unencrypted requests are upgraded before the application handles them.
- Test the Apache configuration for syntax errors before applying the TLS virtual host.
$ sudo apache2ctl configtest
Syntax OK
Do not restart Apache until this returns Syntax OK.
If the command also prints the optional AH00558 warning about a missing global ServerName, the syntax test still passed as long as the final line is Syntax OK.
Related: How to test Apache configuration
- Restart Apache so it reads the new certificate and key files, then confirm the service is still active.
$ sudo systemctl restart apache2
$ sudo systemctl is-active apache2
active
A reload is often enough for plain vhost edits, but a restart is the safer single path after enabling ssl or replacing certificate material because mod_ssl reads those files at server startup.
- Verify that the site serves HTTPS successfully with the self-signed certificate.
$ curl -kI https://host.example.net
HTTP/1.1 200 OK
Date: Sat, 06 Jun 2026 11:31:53 GMT
Server: Apache/2.4.66 (Ubuntu)
Content-Type: text/html
##### snipped #####
Use –resolve host.example.net:443:127.0.0.1 when you are testing from the web server before public DNS points at the host.
- Optionally trust the self-signed certificate on a Debian or Ubuntu client so browsers and CLI tools stop warning about it.
$ sudo cp /etc/apache2/ssl/host.example.net.crt /usr/local/share/ca-certificates/host.example.net-self-signed.crt
$ sudo update-ca-certificates
Updating certificates in /etc/ssl/certs...
1 added, 0 removed; done.
Running hooks in /etc/ca-certificates/update.d...
done.
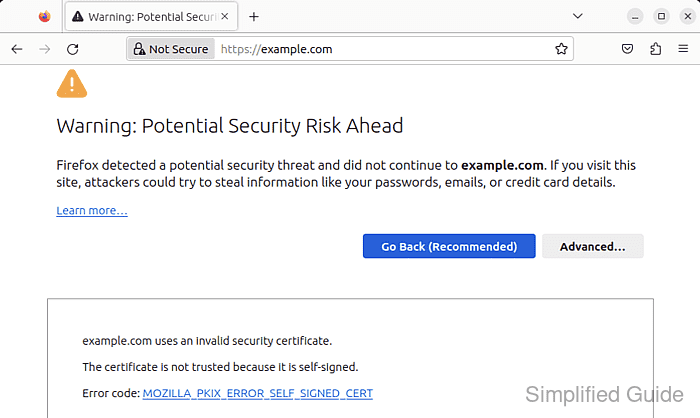
Some applications, including Firefox, use a separate trust store and still need an explicit import.
- Verify certificate trust without -k after installing the certificate into the client trust store.
$ curl -I https://host.example.net
HTTP/1.1 200 OK
Date: Sat, 06 Jun 2026 11:31:53 GMT
Server: Apache/2.4.66 (Ubuntu)
Content-Type: text/html
##### snipped #####
If curl still reports a certificate error, confirm that the requested hostname matches one of the certificate subjectAltName values and that the client trusted the same certificate file you installed on the server.

Mohd Shakir Zakaria is a cloud architect with deep roots in software development and open-source advocacy. Certified in AWS, Red Hat, VMware, ITIL, and Linux, he specializes in designing and managing robust cloud and on-premises infrastructures.


