How to create a spectrogram with SciPy
Time-frequency analysis reveals tones that appear, disappear, or move during a recording, unlike a single Fourier transform that summarizes the entire signal. A spectrogram maps power across frequency and time so changing content can be located within audio, vibration, or sensor samples.
Current SciPy releases provide ShortTimeFFT.from_window() to package the window, sampling rate, segment length, overlap, and power scaling into one reusable analyzer. SciPy classifies scipy.signal.spectrogram() as legacy and recommends ShortTimeFFT for new code.
The input must contain evenly spaced samples with a known sampling rate. A 128-sample window at 800 Hz separates frequencies into 6.25 Hz bins, while 96 samples of overlap move each time slice by 0.04 seconds; longer windows sharpen frequency separation but blur faster changes.
Steps to create a spectrogram with SciPy:
- Create spectrogram_create.py with the imports and a two-tone sampled signal.
- spectrogram_create.py
import numpy as np
import matplotlib.pyplot as plt
from scipy.signal import ShortTimeFFT

sample_rate = 800.0
duration = 2.0
sample_count = int(sample_rate * duration)
time = np.arange(sample_count) / sample_rate
samples = np.where(
    time < 1.0,
    np.sin(2 * np.pi * 50 * time),
    np.sin(2 * np.pi * 150 * time),
)
The frequency changes after one second, providing two known regions that expose whether the spectrogram follows the signal over time.
- Append the spectrogram analysis block below the signal definition.
analyzer = ShortTimeFFT.from_window(
    "hann",
    fs=sample_rate,
    nperseg=128,
    noverlap=96,
    scale_to="psd",
)
power = analyzer.spectrogram(samples)
scale_to=“psd” scales each short-time Fourier transform column as a power spectral density before spectrogram() returns its absolute square.
- Add the frequency-profile checks below the spectrogram calculation.
slice_times = analyzer.t(samples.size)
frequencies = analyzer.f
early = (slice_times >= 0.1) & (slice_times < 0.8)
late = (slice_times > 1.2) & (slice_times <= 1.9)
early_frequency = frequencies[np.argmax(power[:, early].mean(axis=1))]
late_frequency = frequencies[np.argmax(power[:, late].mean(axis=1))]

assert np.isclose(early_frequency, 50.0, atol=analyzer.delta_f)
assert np.isclose(late_frequency, 150.0, atol=analyzer.delta_f)

print(f"spectrogram shape: {power.shape}")
print(f"dominant frequency, first half: {early_frequency:.1f} Hz")
print(f"dominant frequency, second half: {late_frequency:.1f} Hz")
The assertions are specific to the synthetic 50 Hz and 150 Hz signal and are not universal acceptance limits for measured data.
- Complete the script with decibel scaling and plot export after the checks.
power_db = 10 * np.log10(np.maximum(power, 1e-12))
figure, axes = plt.subplots(figsize=(7, 4))
image = axes.pcolormesh(
    slice_times,
    frequencies,
    power_db,
    shading="auto",
)
axes.set(
    title="SciPy ShortTimeFFT spectrogram",
    xlabel="Time (s)",
    ylabel="Frequency (Hz)",
    ylim=(0, 220),
)
figure.colorbar(image, ax=axes, label="PSD (dB)")
figure.tight_layout()
figure.savefig("spectrogram.png", dpi=150)
plt.close(figure)
print("saved plot: spectrogram.png")
np.maximum() limits the lowest plotted value so zero-power bins do not produce negative infinity during the decibel conversion.
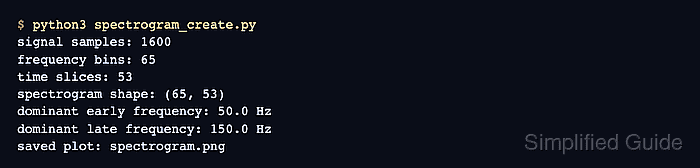
- Run spectrogram_create.py to generate spectrogram.png.
$ python3 spectrogram_create.py
spectrogram shape: (65, 53)
dominant frequency, first half: 50.0 Hz
dominant frequency, second half: 150.0 Hz
saved plot: spectrogram.png
The dominant frequency moves from 50.0 Hz to 150.0 Hz without triggering either assertion.
- Verify that spectrogram.png decodes as the expected RGBA image.
$ python3 -c 'from matplotlib import image; pixels = image.imread("spectrogram.png"); print(f"image shape: {pixels.shape}")'
image shape: (600, 1050, 4)